In this article, you'll learn how to navigate and utilize the admin portal and reservation dialog from the Timeline tab.
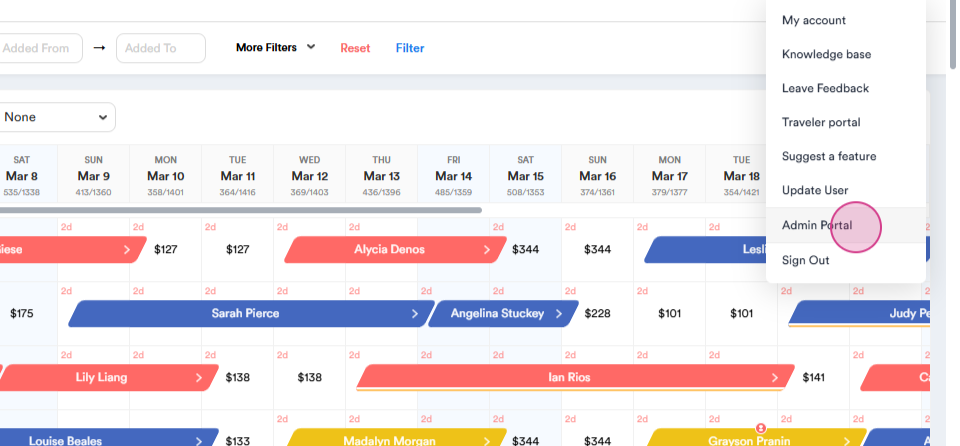
Step 1: Click on the icon on the right side with your name to access the admin portal.

Step 2: From the dropdown menu, select the Admin Portal.
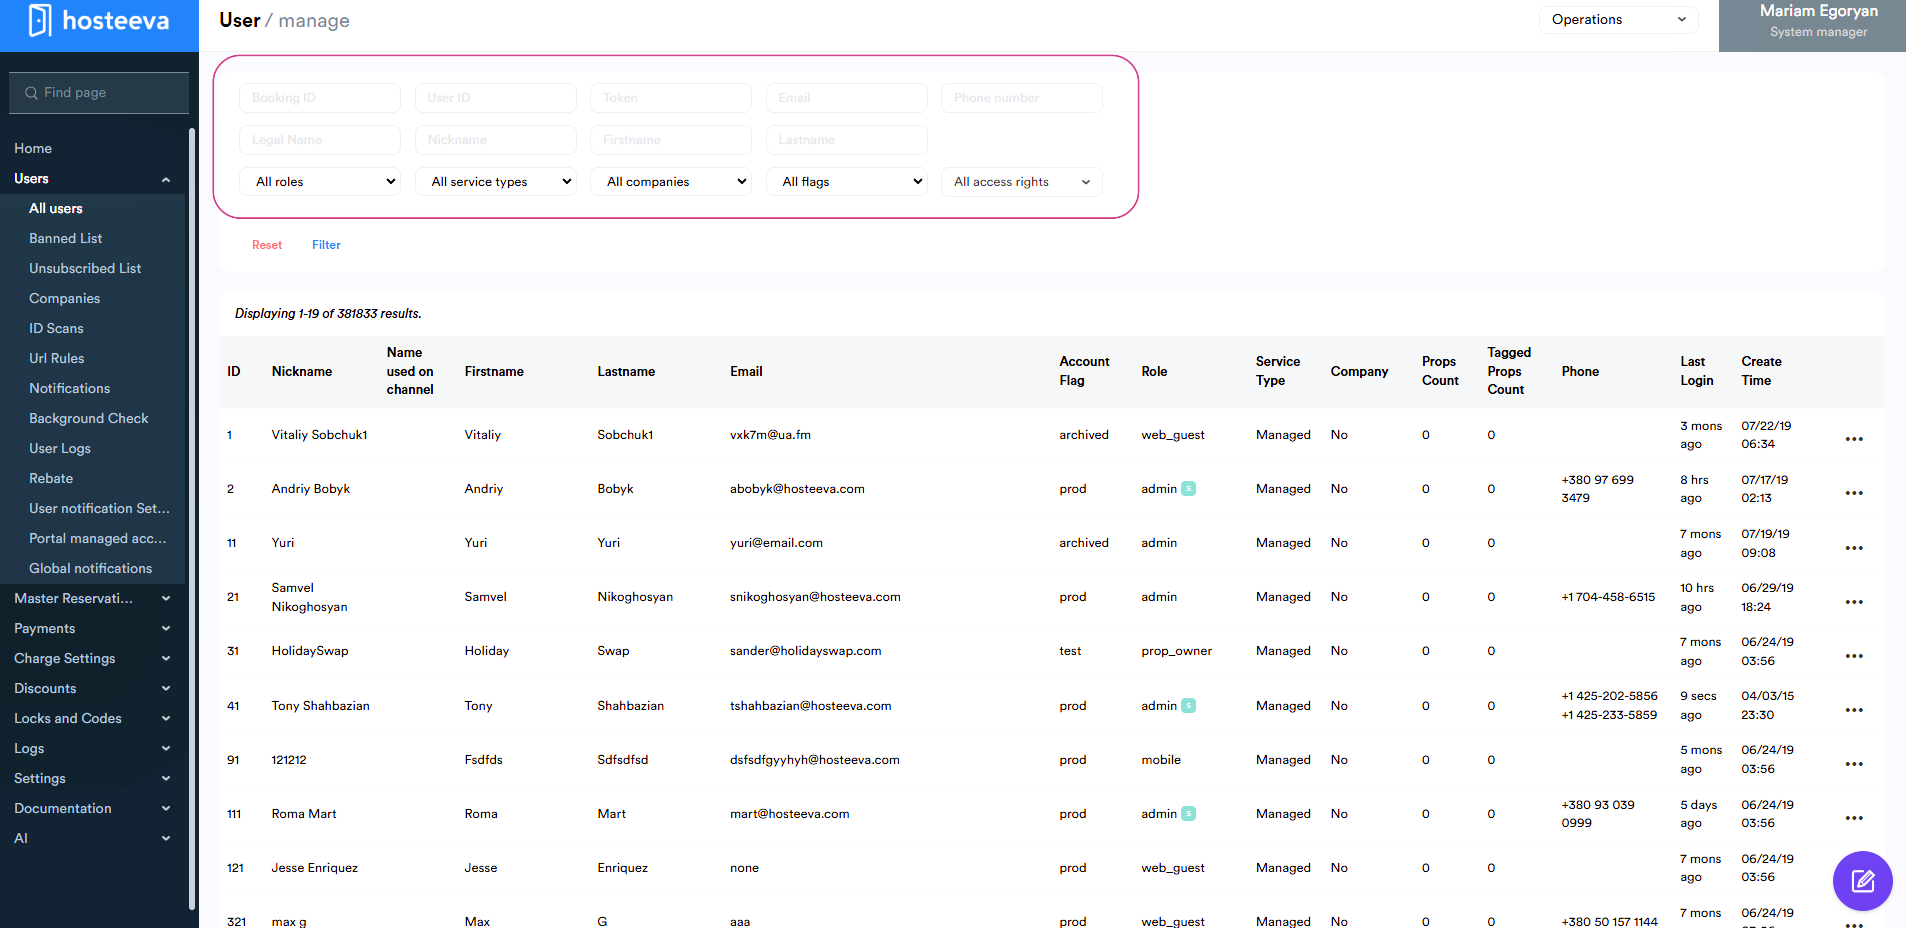
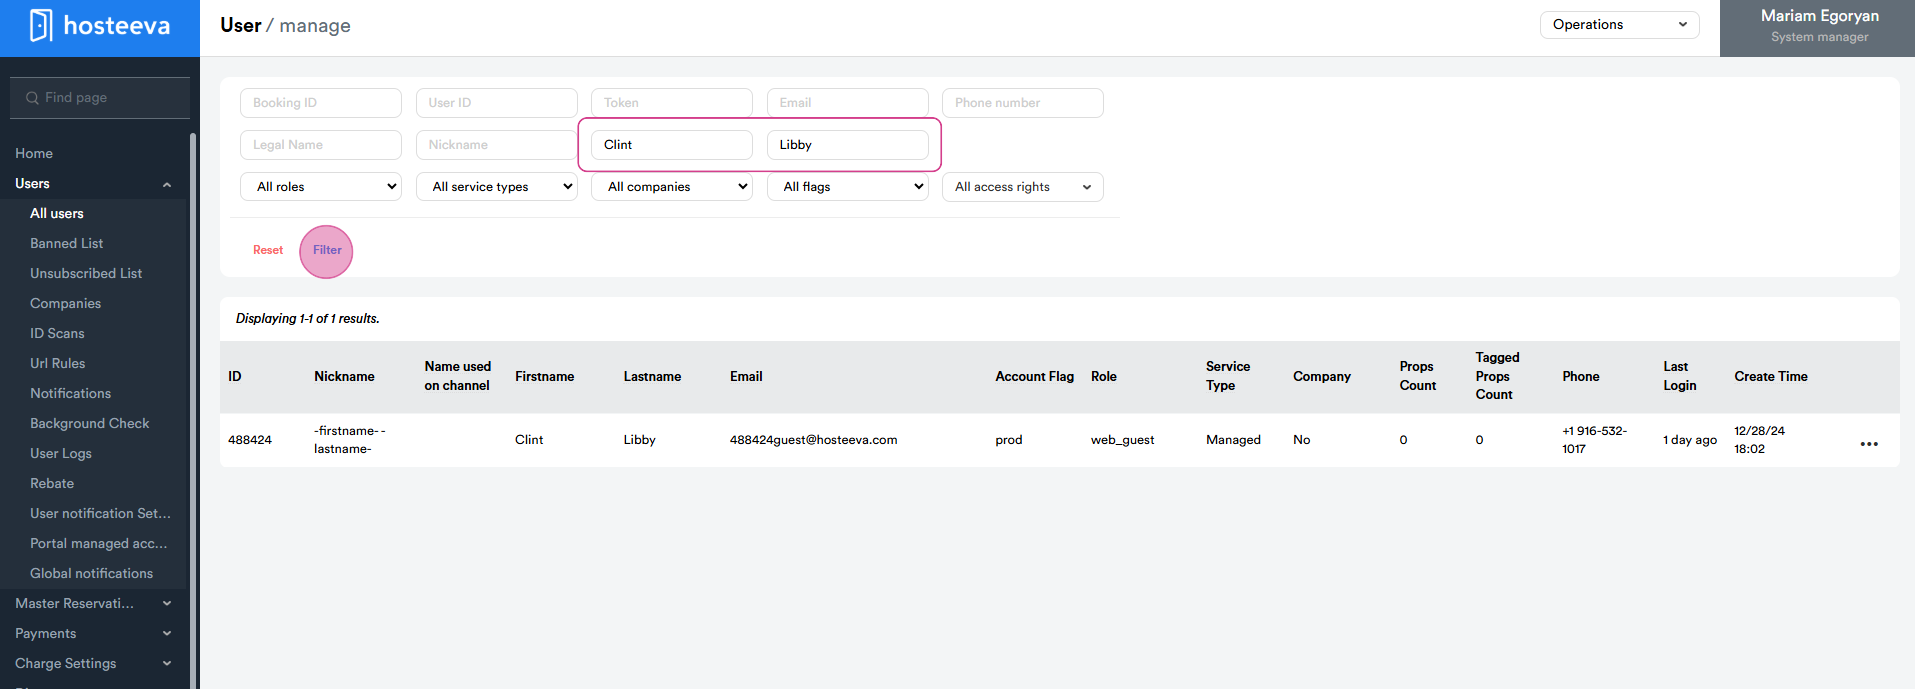
Step 3: You're now in the admin portal. Here's what the admin portal looks like. Use the search bar to find reservations by booking id, user ID token, email, phone number, legal name, nickname, first name, and last name.
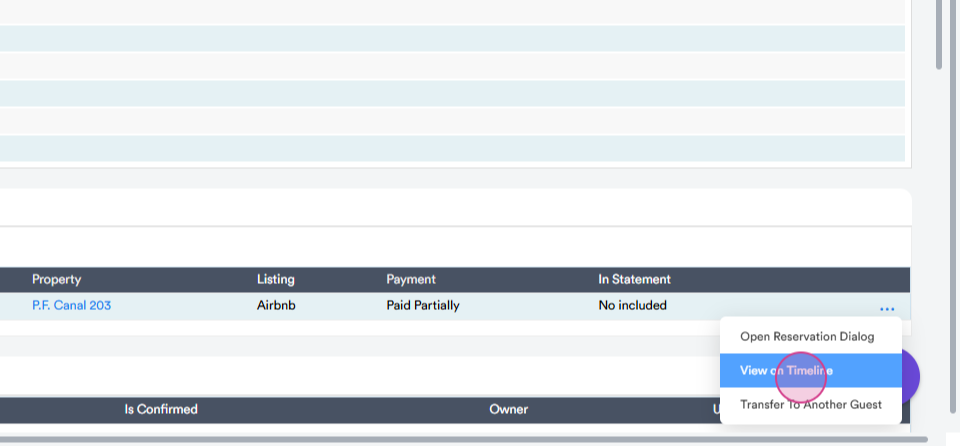
Step 4: To view a reservation on the timeline, click on the three dots and select View on timeline.
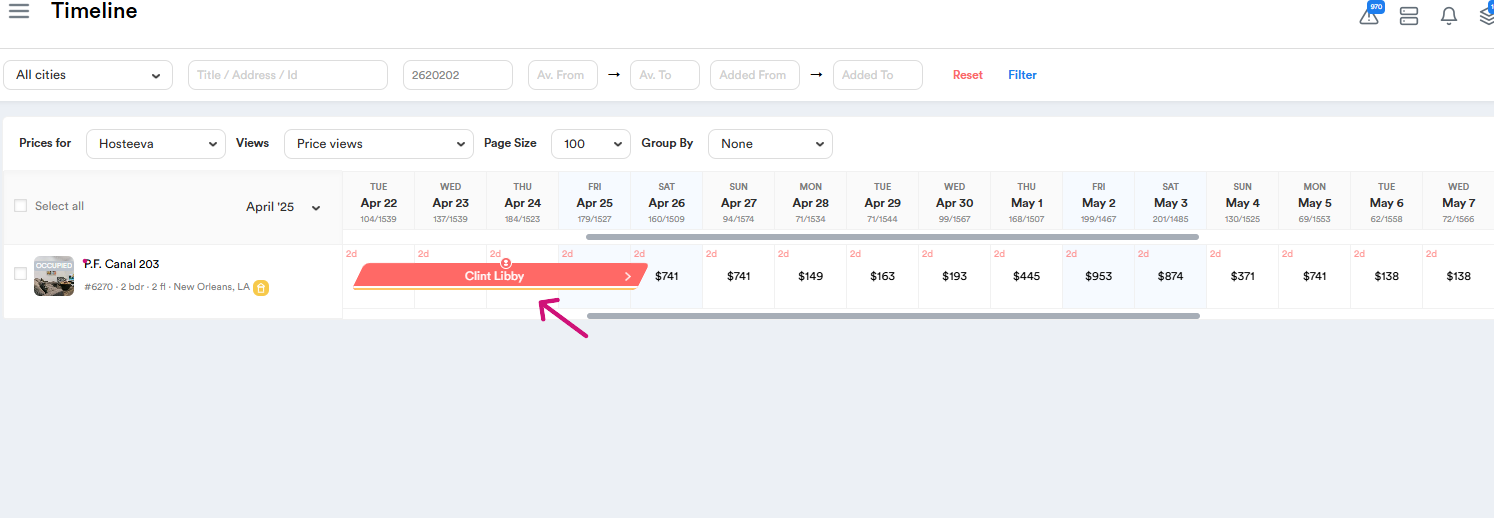
Step 5: The system will display the reservation on the timeline. By clicking on the reservation, the reservation dialog will open.
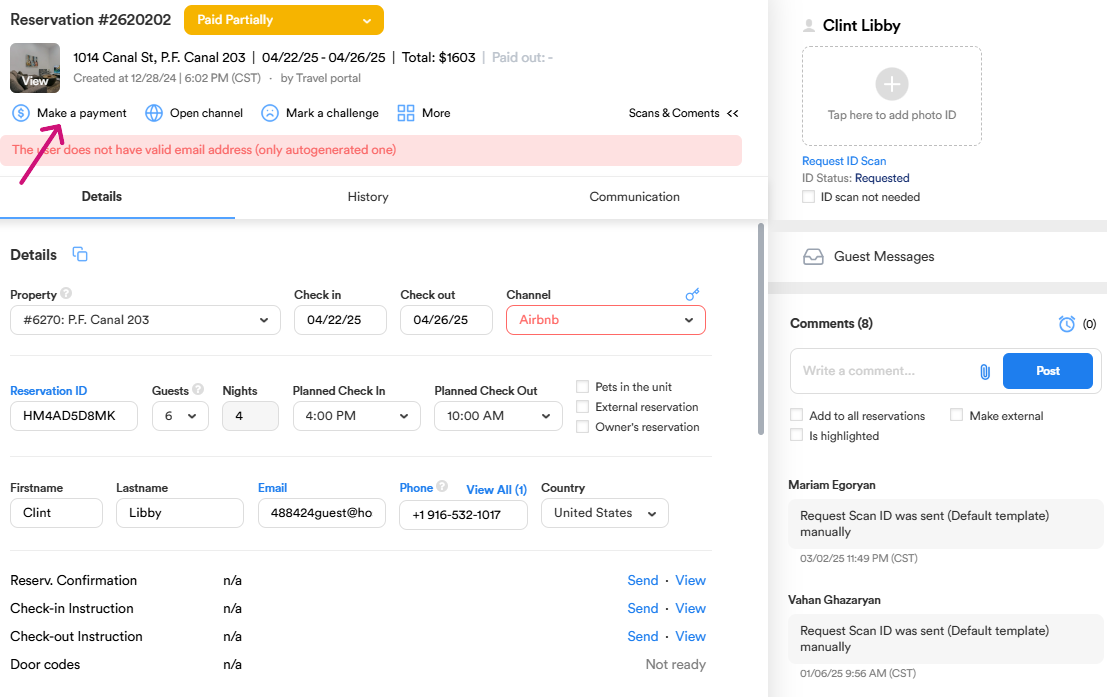
Step 6: Here is the reservation dialog. The reservation dialog displays all the relevant information about the reservation.
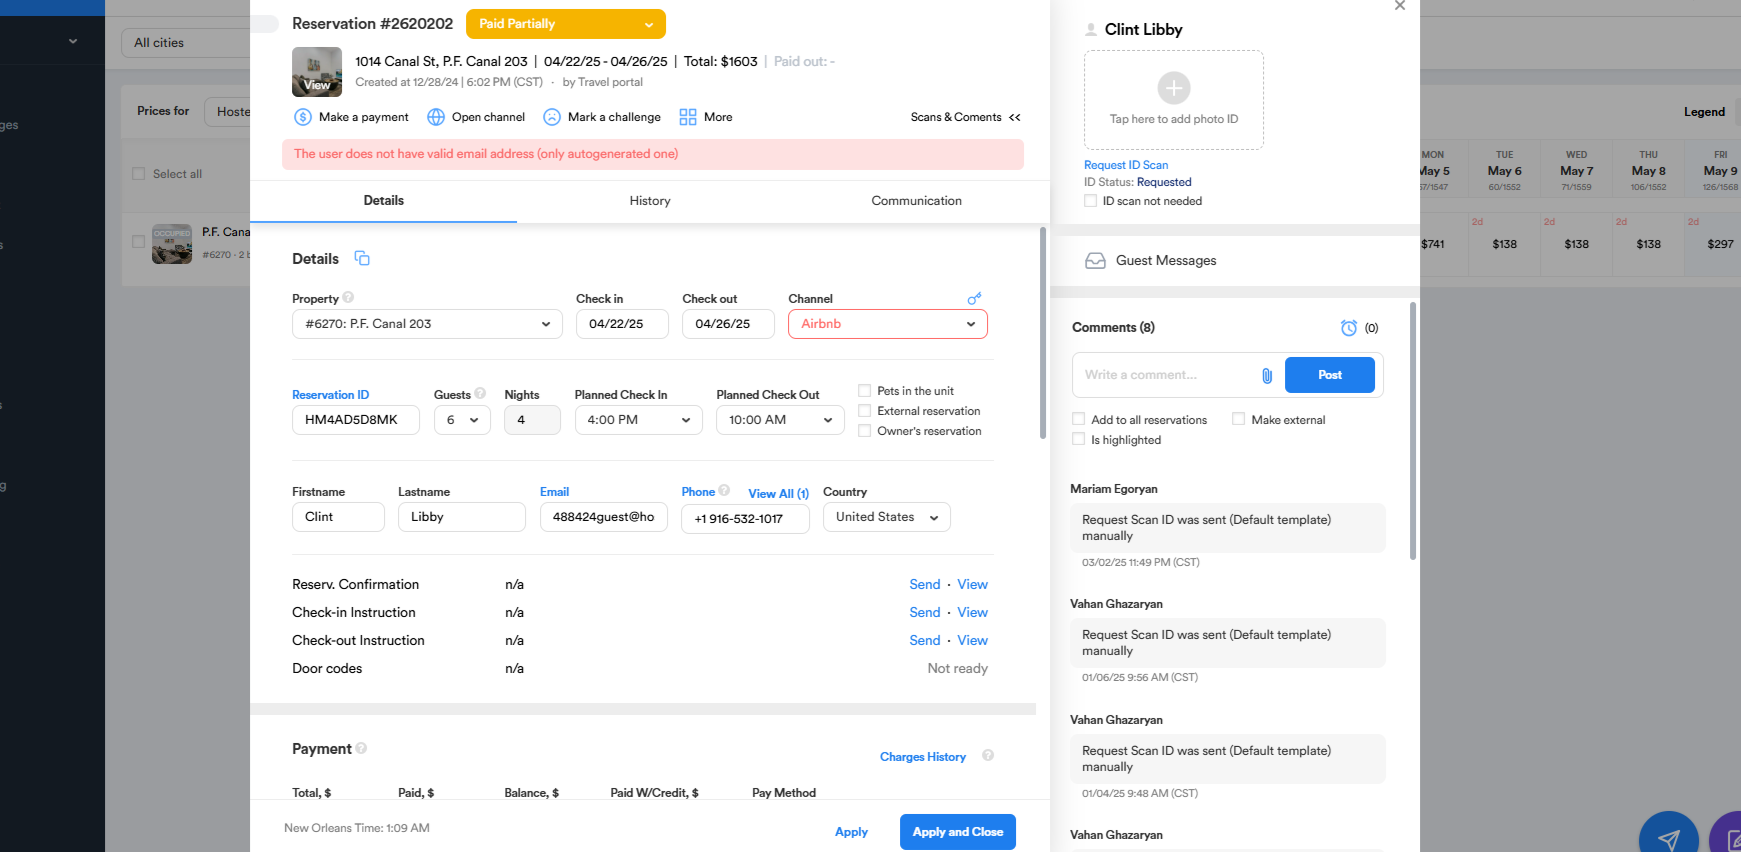
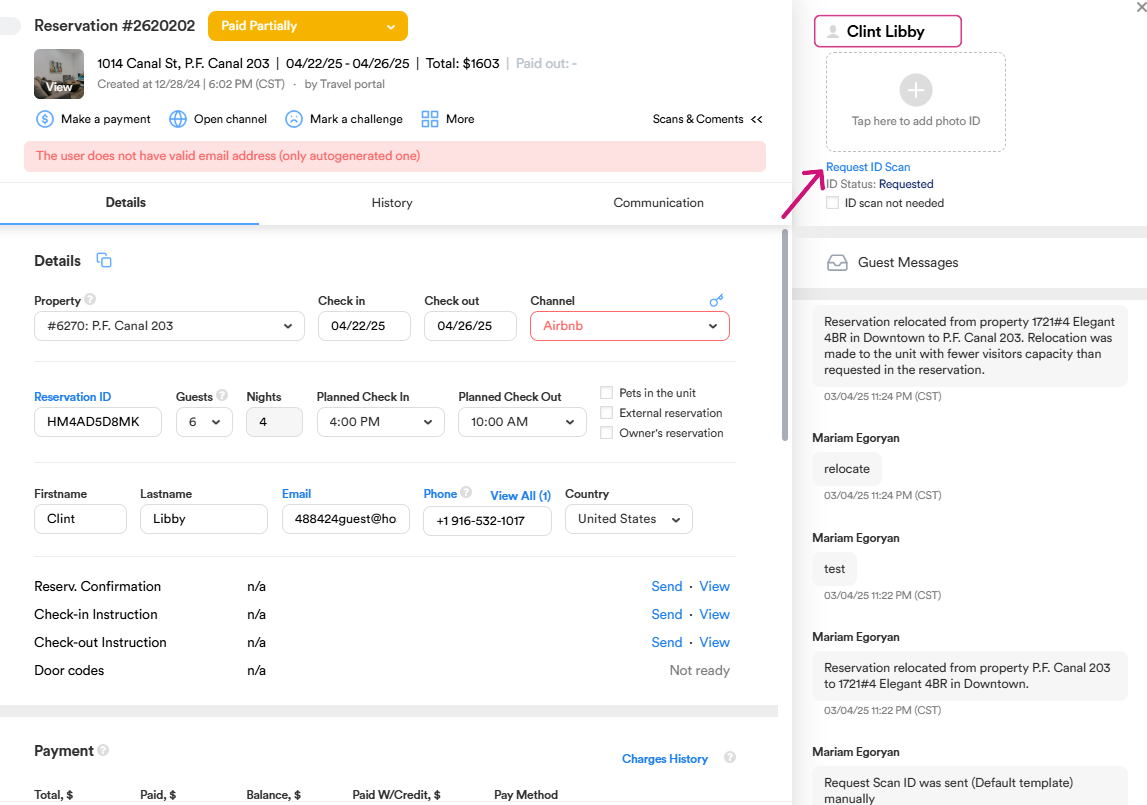
Step 7: This reservation dialog provides the main information about the booking. It displays the property's internal id, check-in and checkout dates, and the website where the reservation was received. It also shows the reservation's external id, number of guests, number of nights, planned check-in and checkout times, and the guest's first and last name. Typically, we also receive the guest's email address and phone number here.
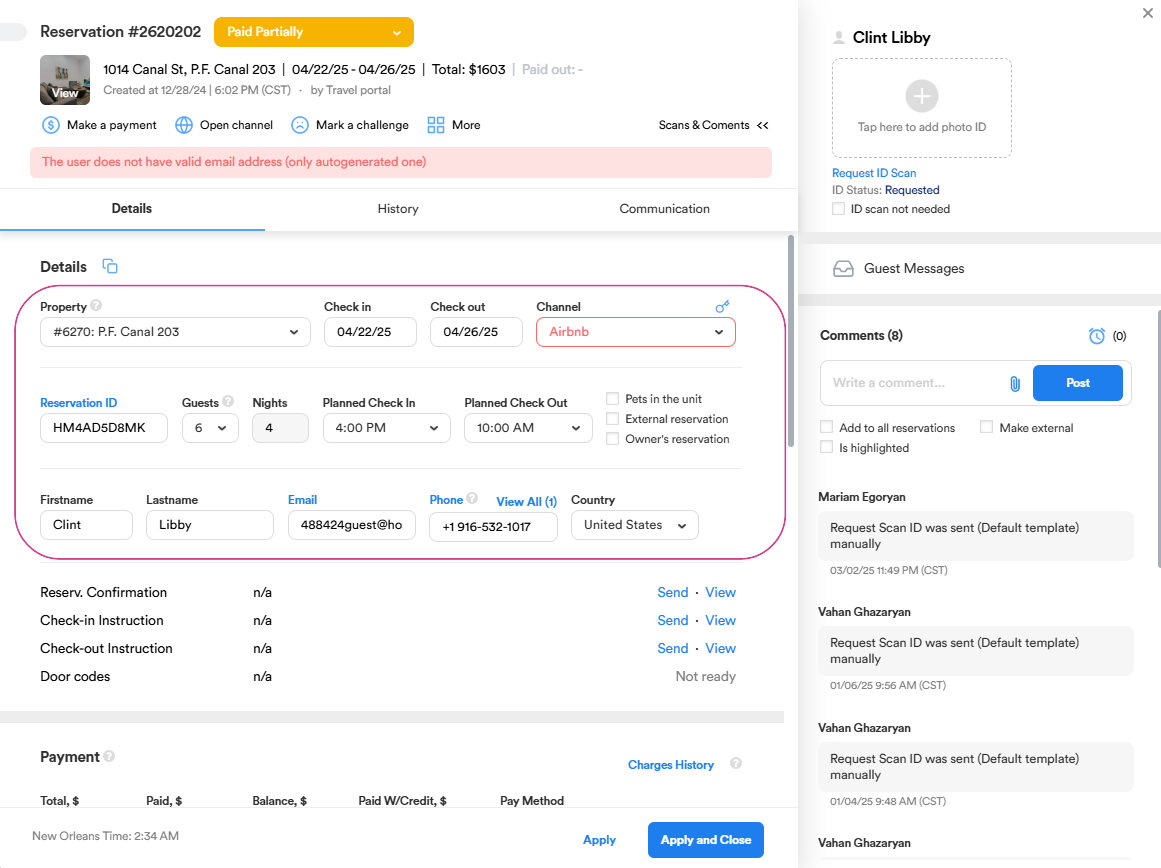
Step 8: Other details include whether the guest received the reservation confirmation, and whether check-in instructions were sent or not if all the previous necessary actions were completed. You'll also see the total amount paid by the guest and the payment method used.
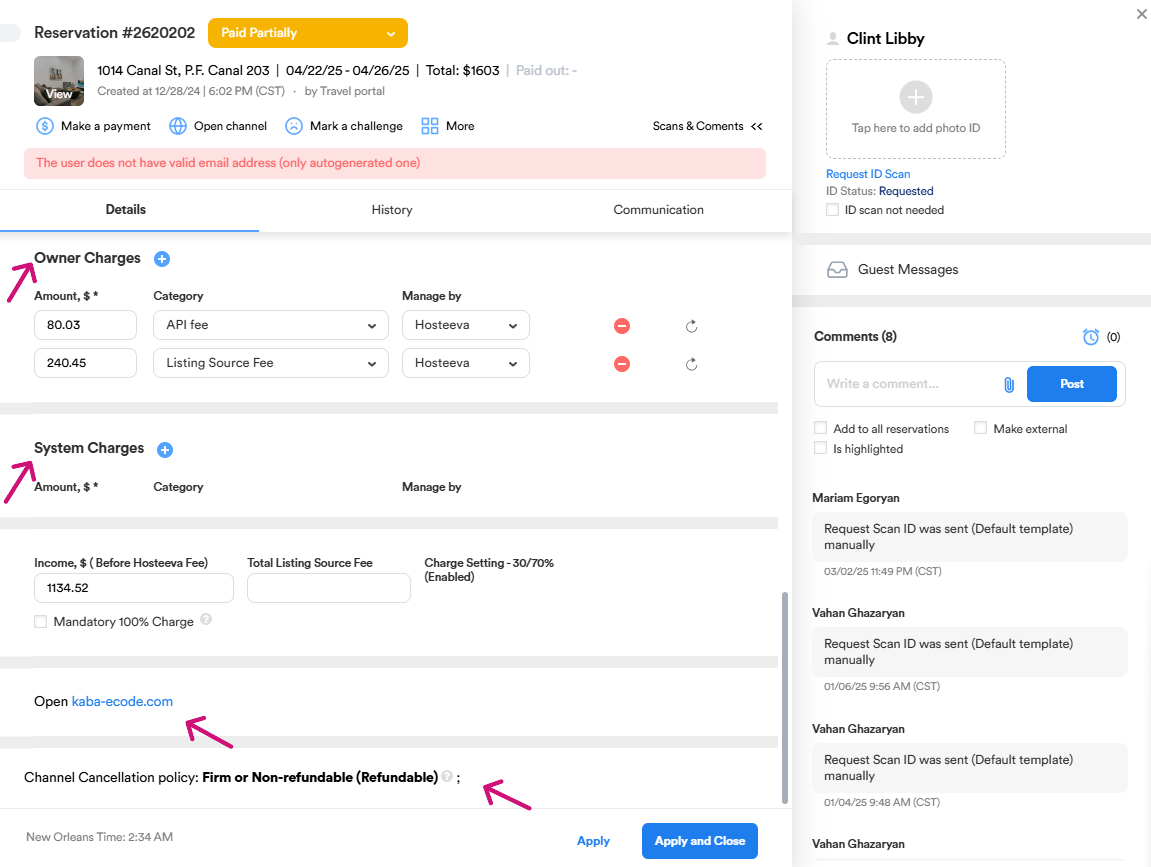
Step 9: Other information such as Guest Charges, Owner Charges, System Charges information, door code information, and cancellation policy are also displayed.
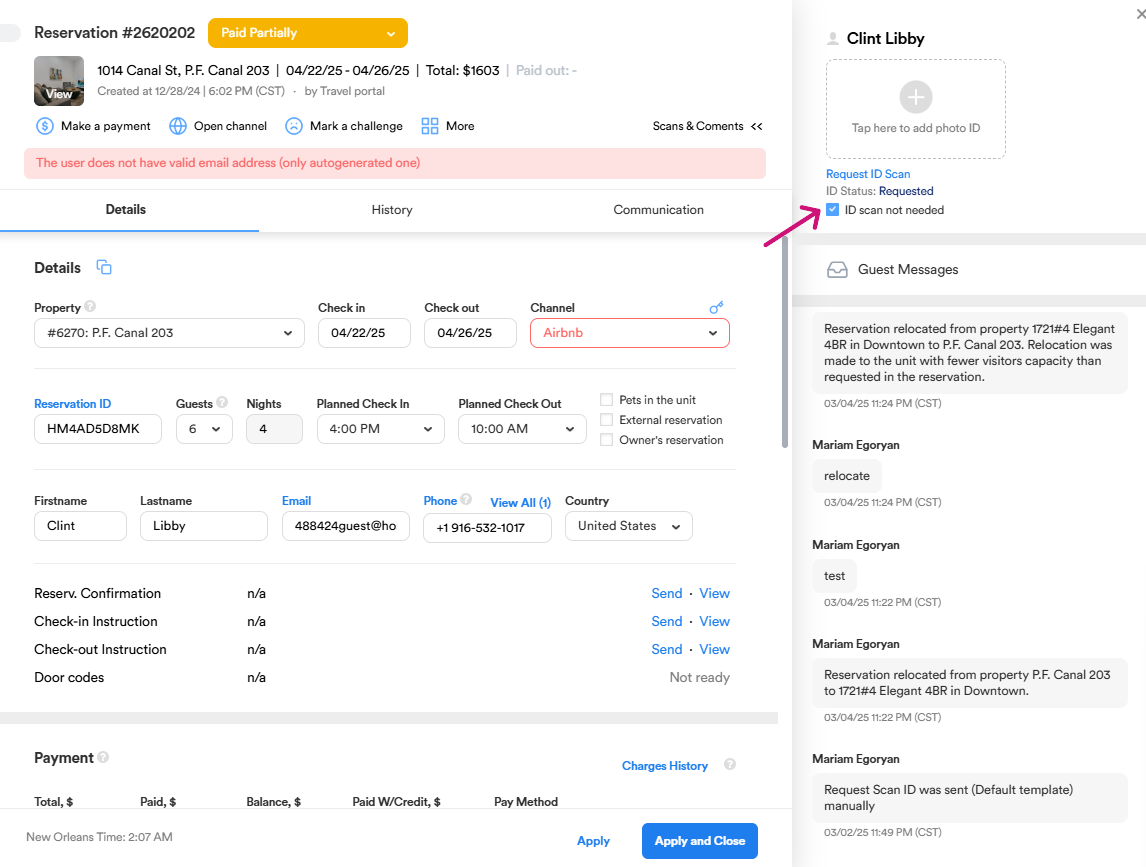
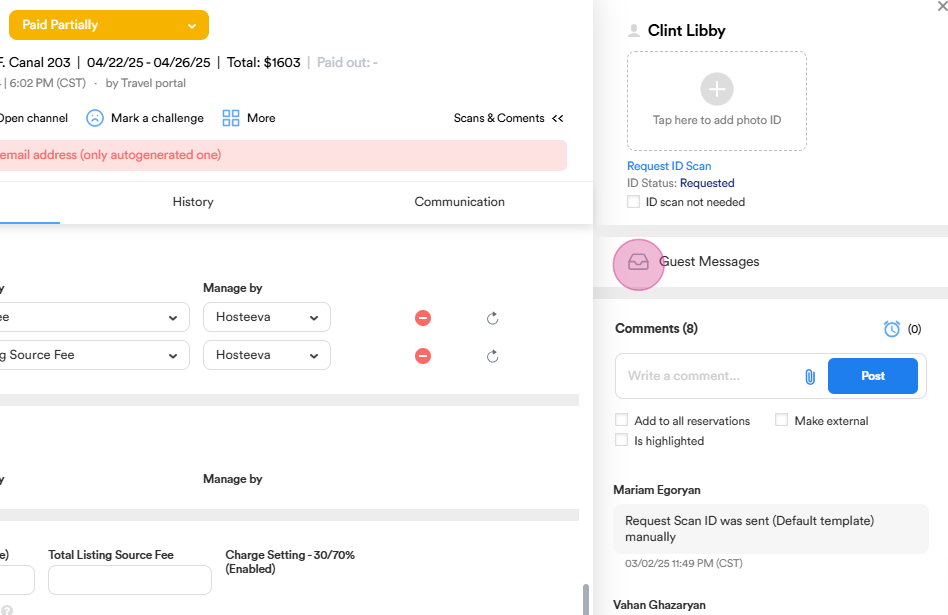
Step 10: On the right side, you'll see the guest's name and a place to request ID verification. Once the guest provides the required documents, the pictures will be uploaded to the ID photo section.
If an ID scan is not required for the reservation, the checkbox will automatically be ticked to indicate that no ID scan is needed.
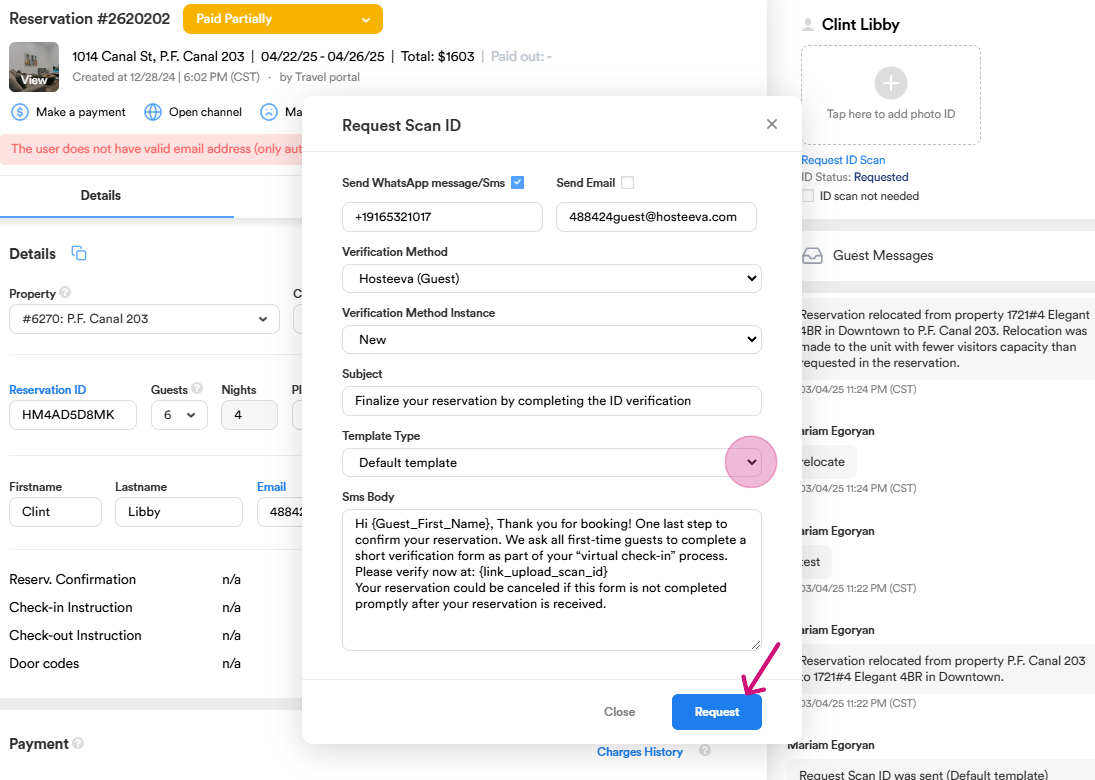
Step 11: Click on Request ID scan. Choose Send WhatsApp message/ SMS or Send Email and a template and send a text message to request the ID.
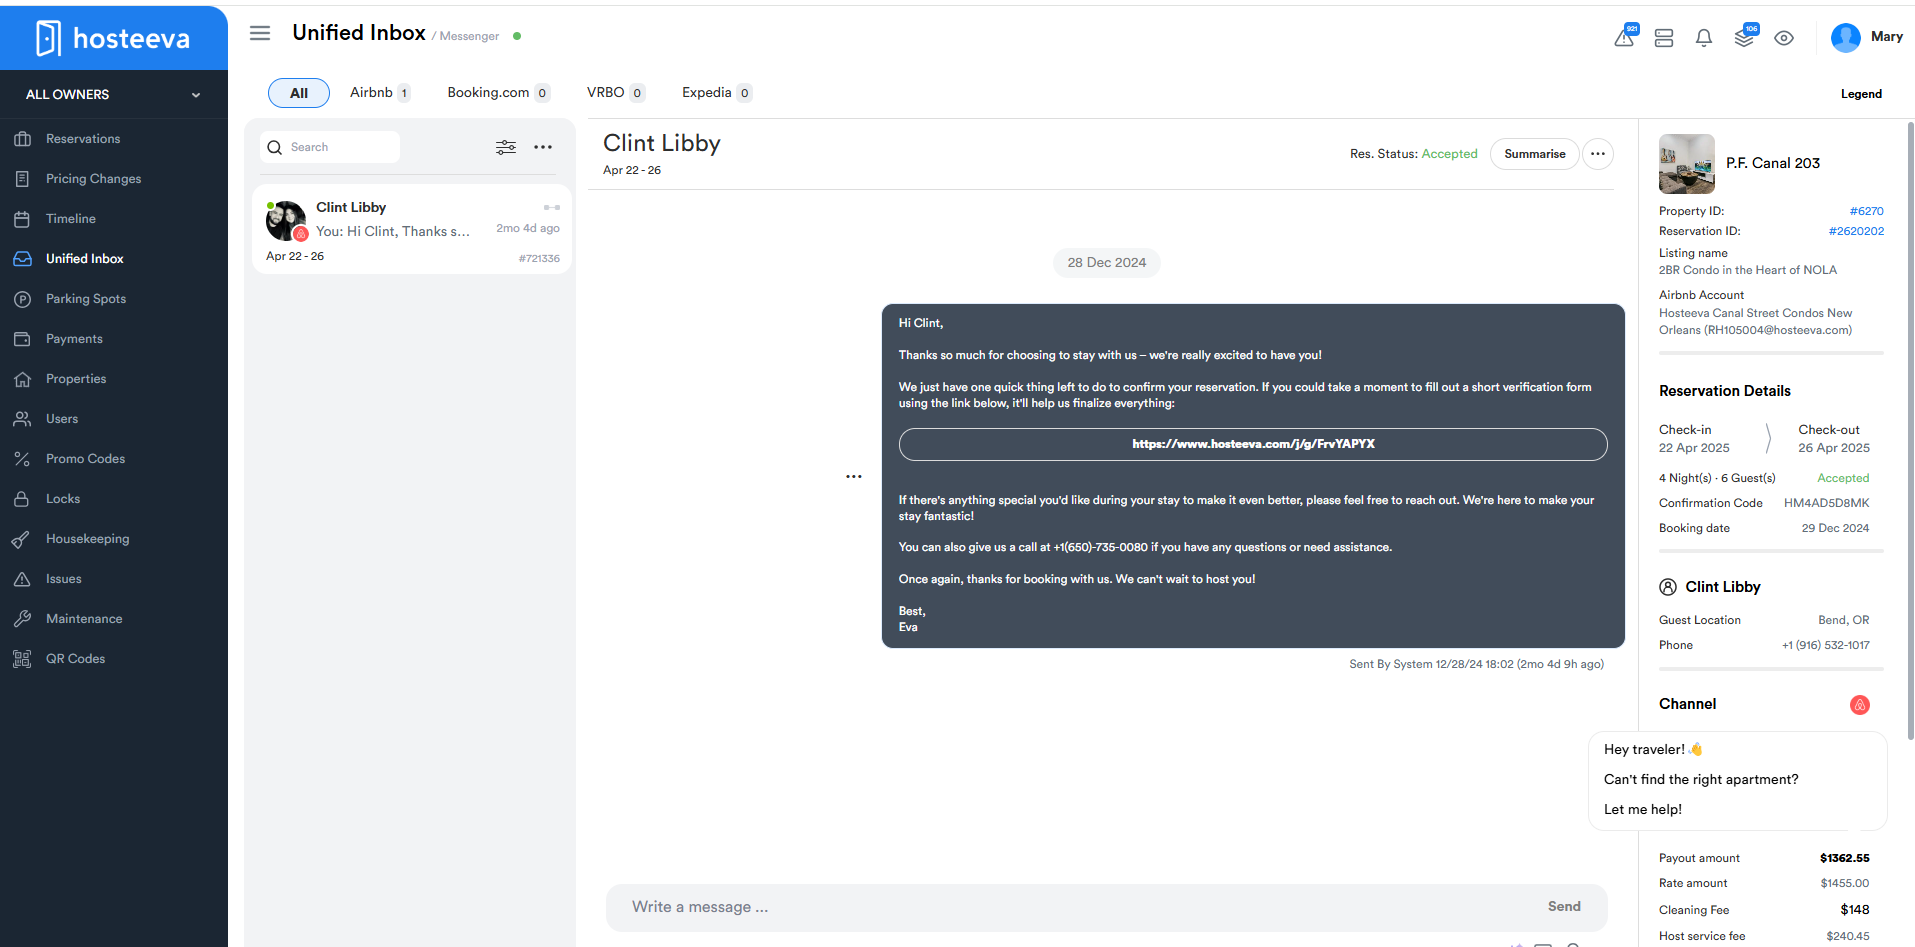
Step 12: When you click on Guest Messages, the system will direct you to the Unified Inbox section. In the Unified Inbox, you can see all the communication with the guest. From there, you can continue the conversation and address any concerns or provide further assistance.
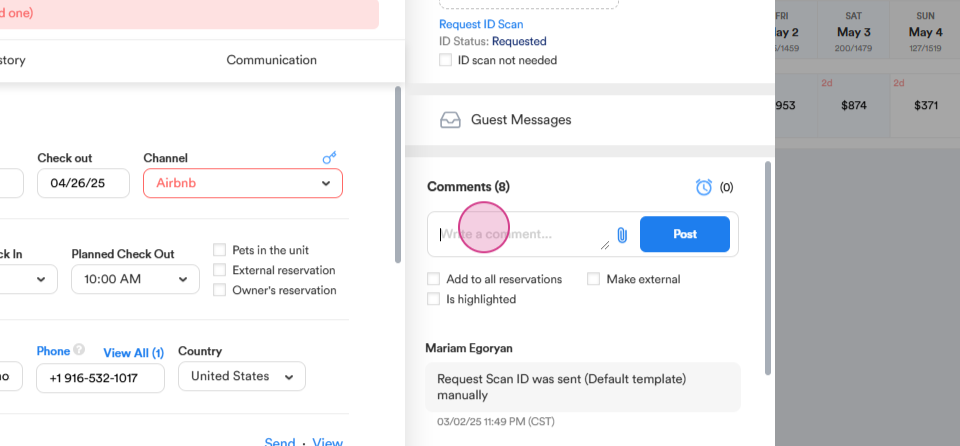
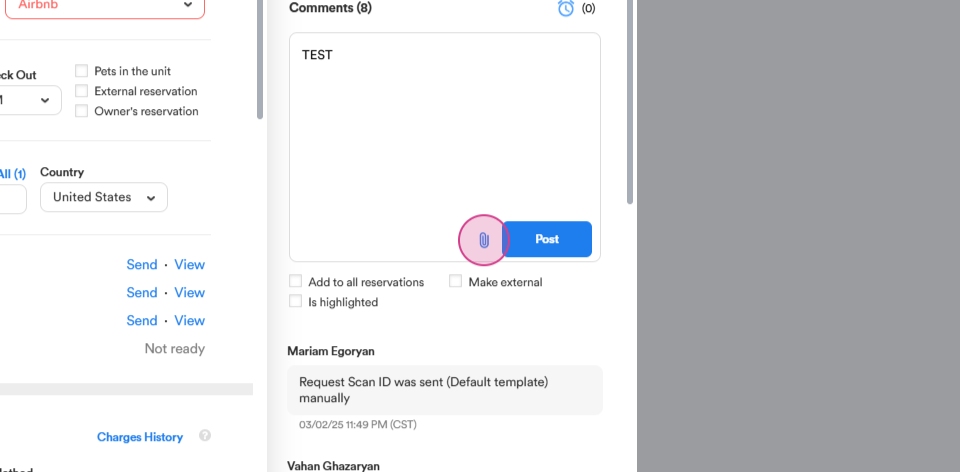
Step 13: All comments regarding the reservation will be displayed here. To add a comment, type your message and attach any necessary files by clicking on the clip icon.
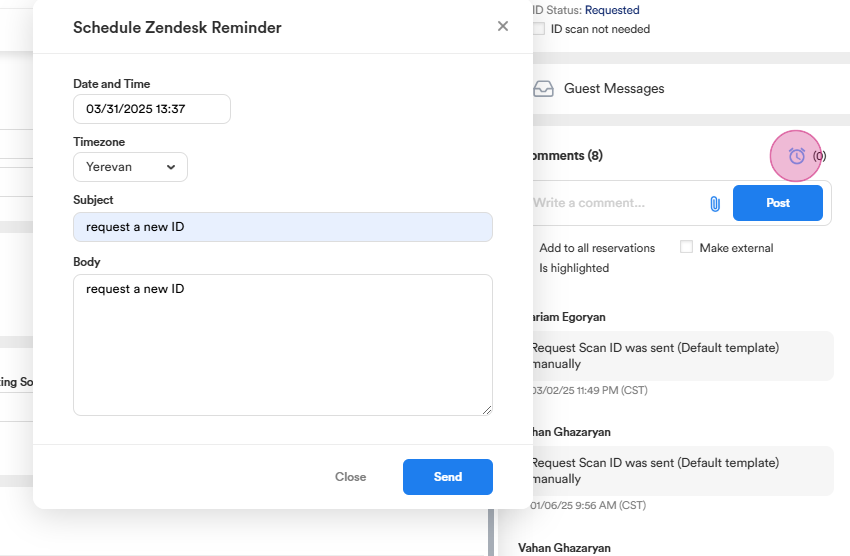
Step 14: The system allows you to set a reminder for specific cases related to the reservation. For example, if the provided documents are expired, or you need to request additional fees (e.g., pet fee, damage deposit) you can schedule a reminder to follow up with the guest.
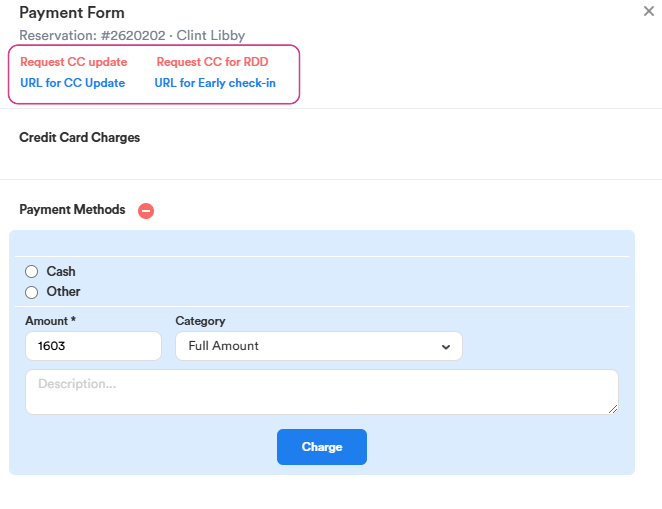
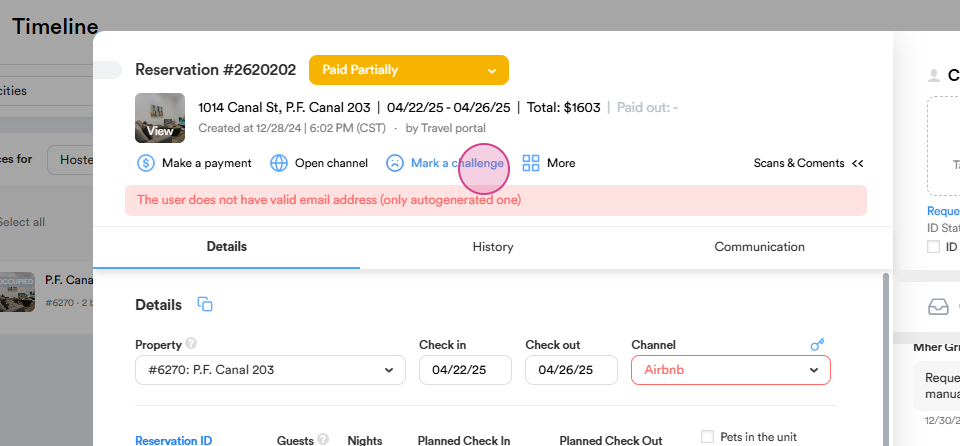
Step 15: If you need to request additional charges, such as early check-in or late check-out, or parking reservation payment click on Make a payment and send a direct charge payment link to a guest.
Step 16: To review the guest account information or request additional charges (e.g., pet fee, extra cleaning fee), click on Open Channel for the specific reservation. Once the channel is open, follow the necessary steps to request the additional charges from the guest.
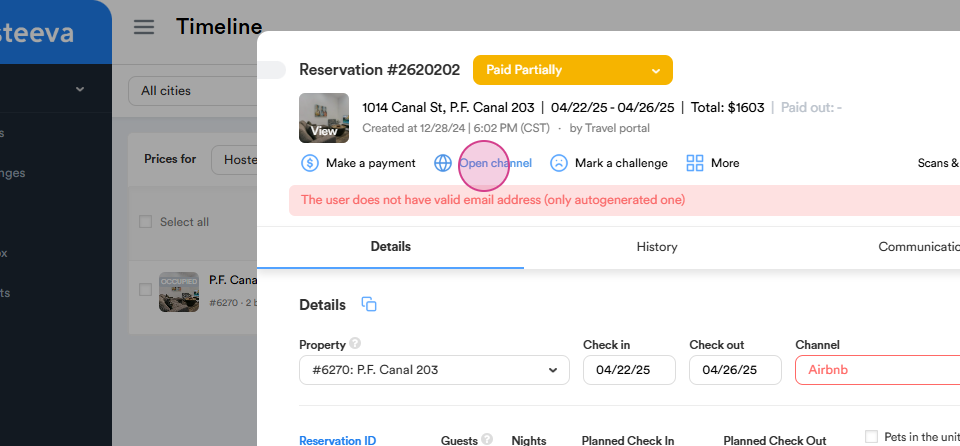
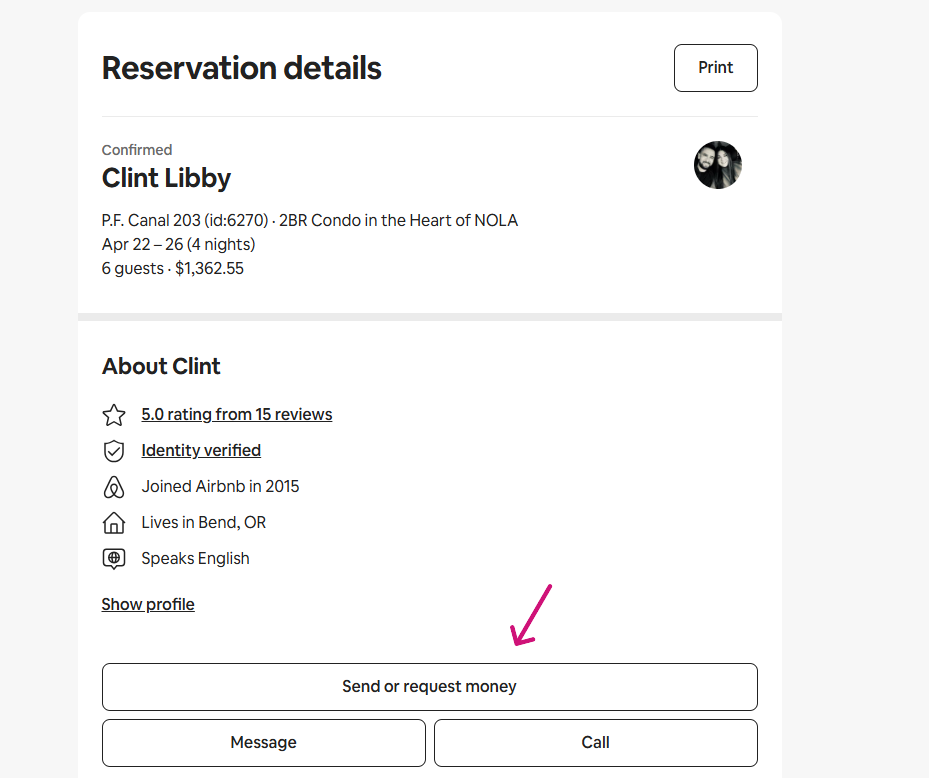
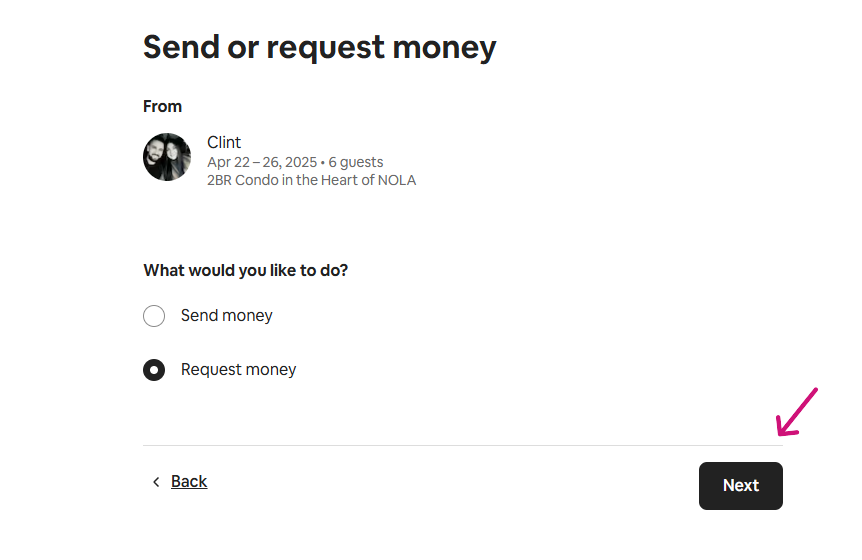
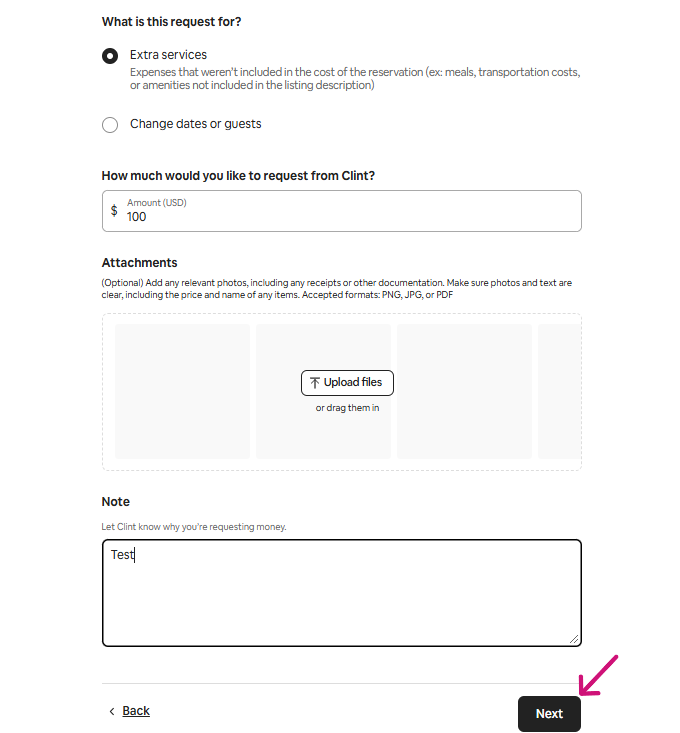
Here is an example of how to request money for Airbnb reservation.
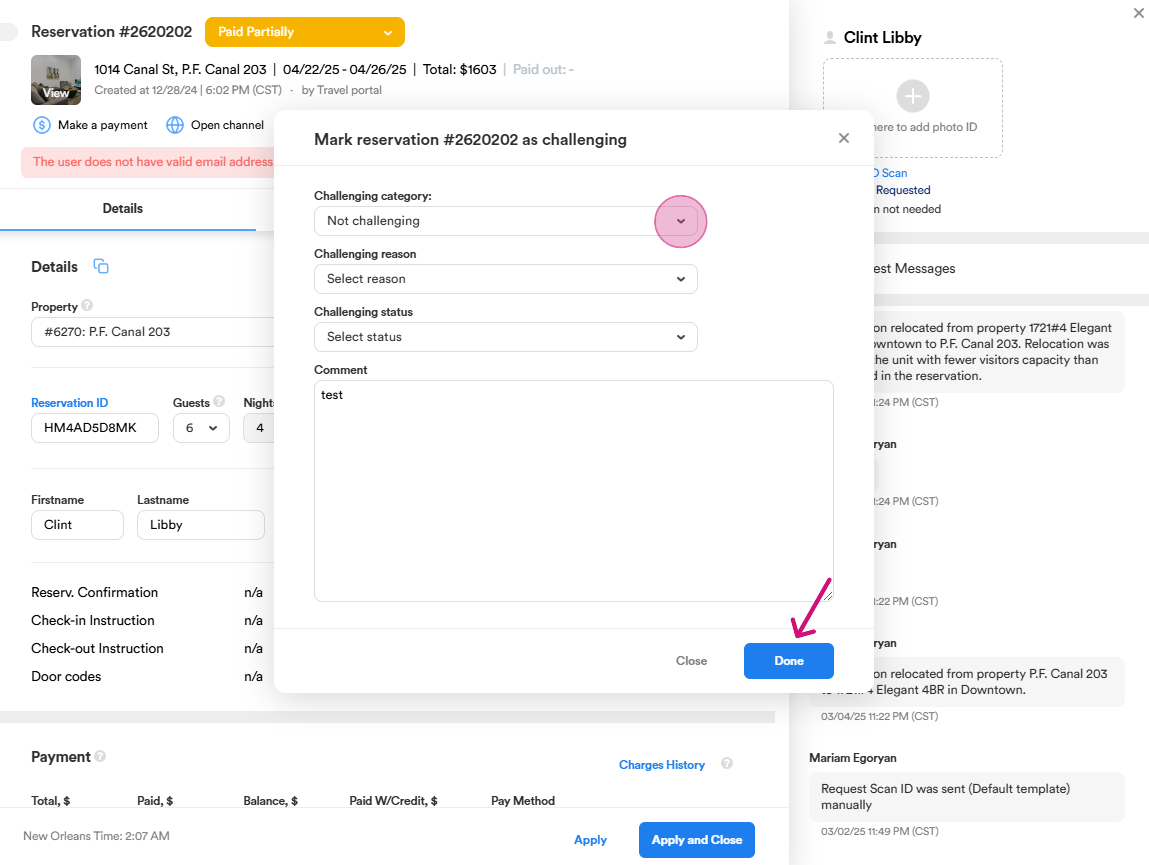
Step 17: If a guest encounters any difficulties from the check-in time and throughout their stay you can use the Mark a Challenge option to document and address the issue. From the dropdown menu, select the appropriate category (e.g., attention needed, challenging, etc.) and the reason (e.g., maintenance, housekeeping etc.). Choose the corresponding status (e.g., unresolved, resolved, in progress) to track the issue's progress. Add any additional comments to provide context or details about the situation or your actions taken.
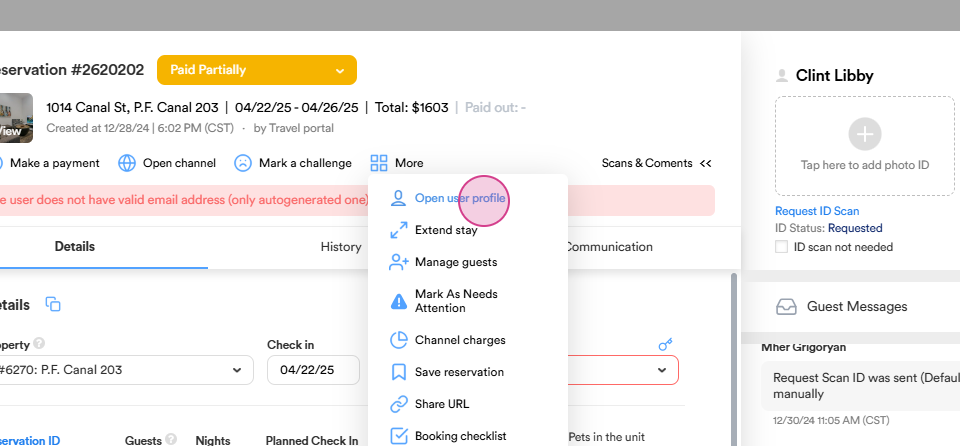
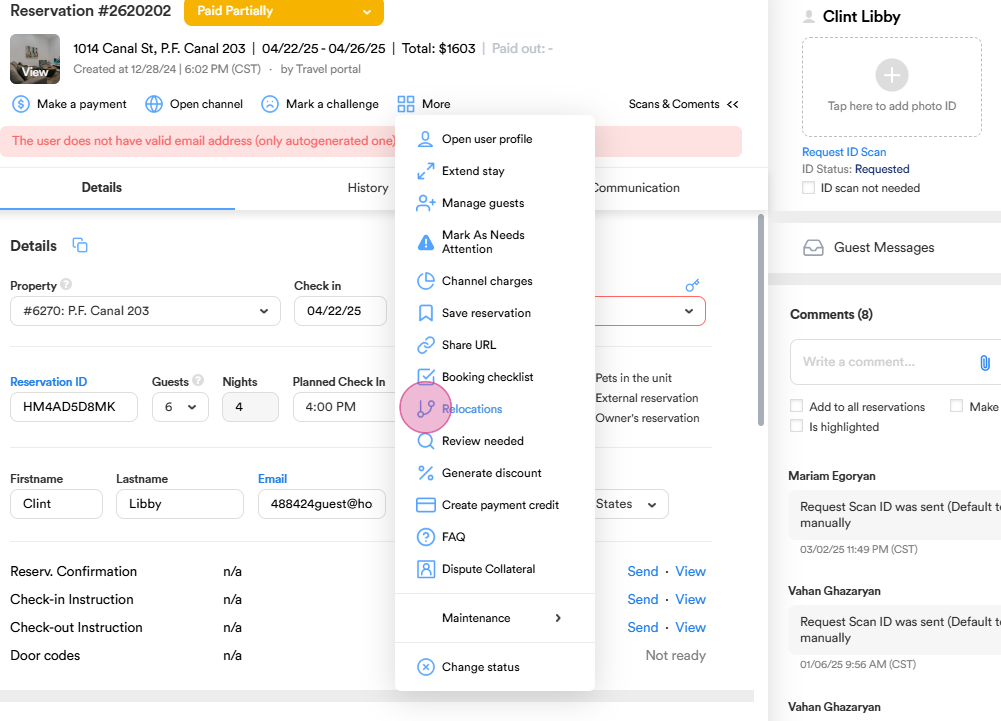
Step 18: Click on the More button to access additional options such as opening the user profile, extending the guest's stay, and relocating the guest from original property to a new one.
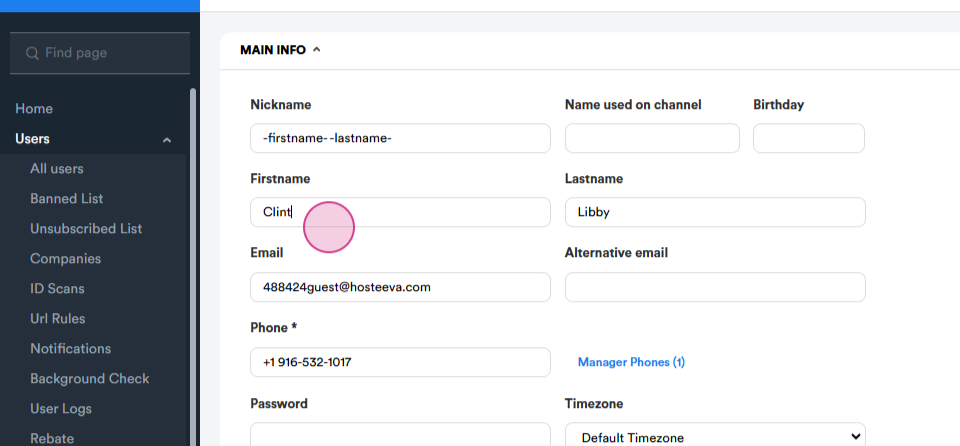
On the profile page, you can manually add or edit any information as needed. This includes personal details, contact information, preferences, etc.
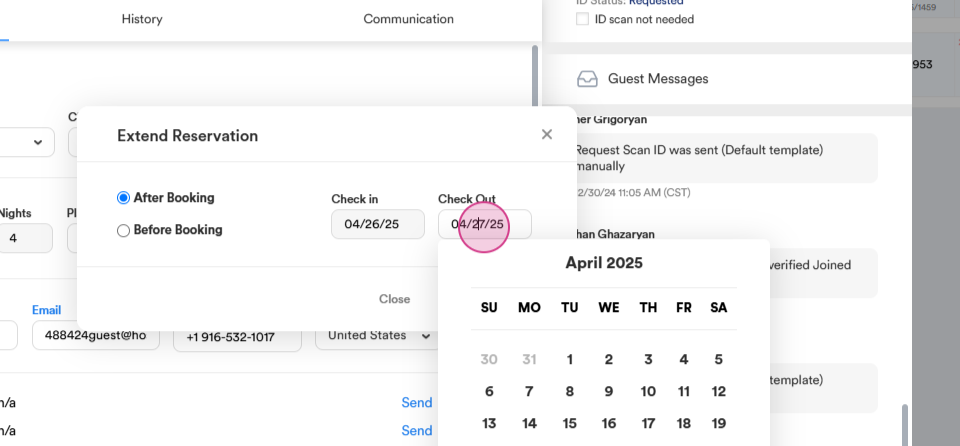
The Extend Stay option allows you to extend a guest's stay either before or after their initial booking, provided there is availability.
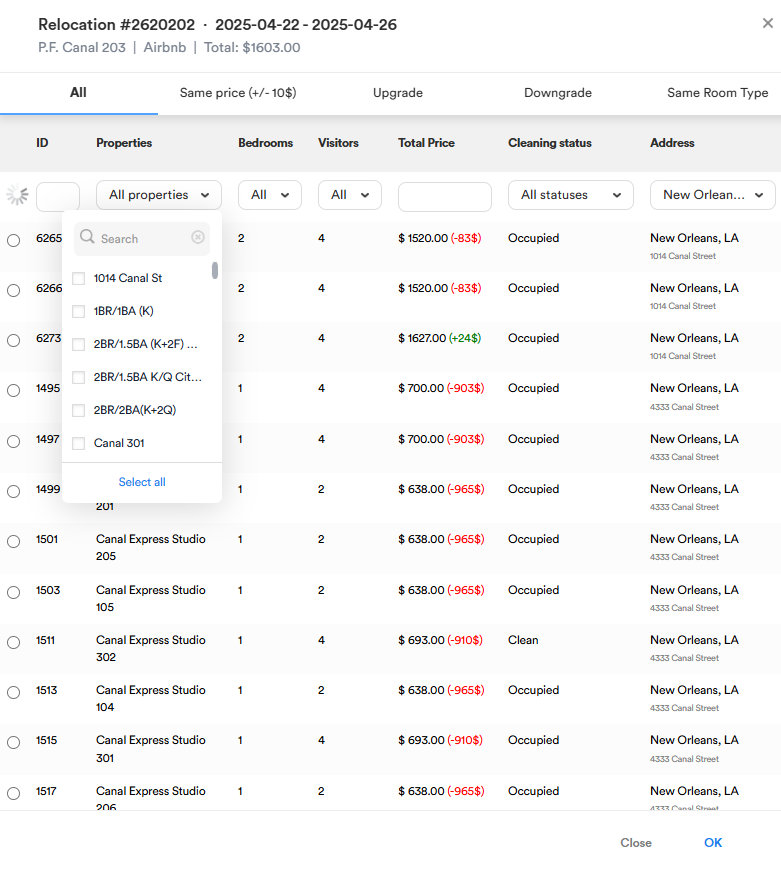
The Relocations option allows to move the guest to a different property.
This option allows you to select from a variety of filters to customize the view and narrow down the information based on specific criteria. You can upgrade or downgrade the property, and to find the desired options, simply select filters such as property name, number of bedrooms and visitors, total price, cleaning status, or address.
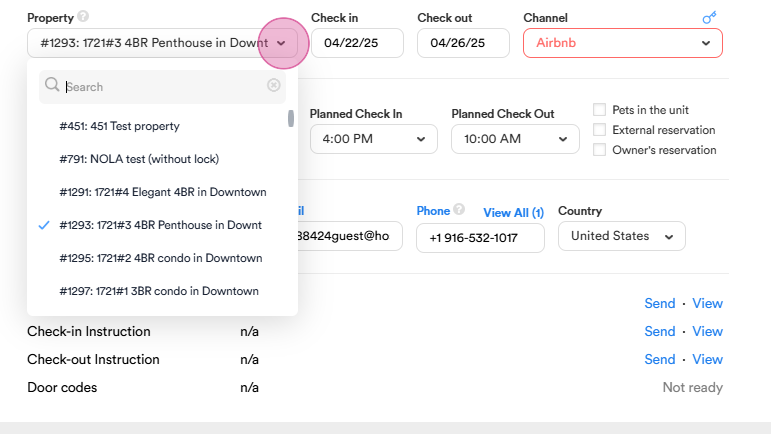
Relocation can also be done easily from Reservation dialog by simply choosing a property name from the list of available options.
Step 19: From the More button you can also use the Maintenance option which allows us to follow up on actions related to property maintenance and any issues the guests may have faced during their stay. Here we can create issues, process payments to the owner, or establish work orders. If a guest reports any issue during their stay, such as problems with housekeeping, maintenance, missing amenity we create a work order for the local team to resolve the problem as quickly as possible.
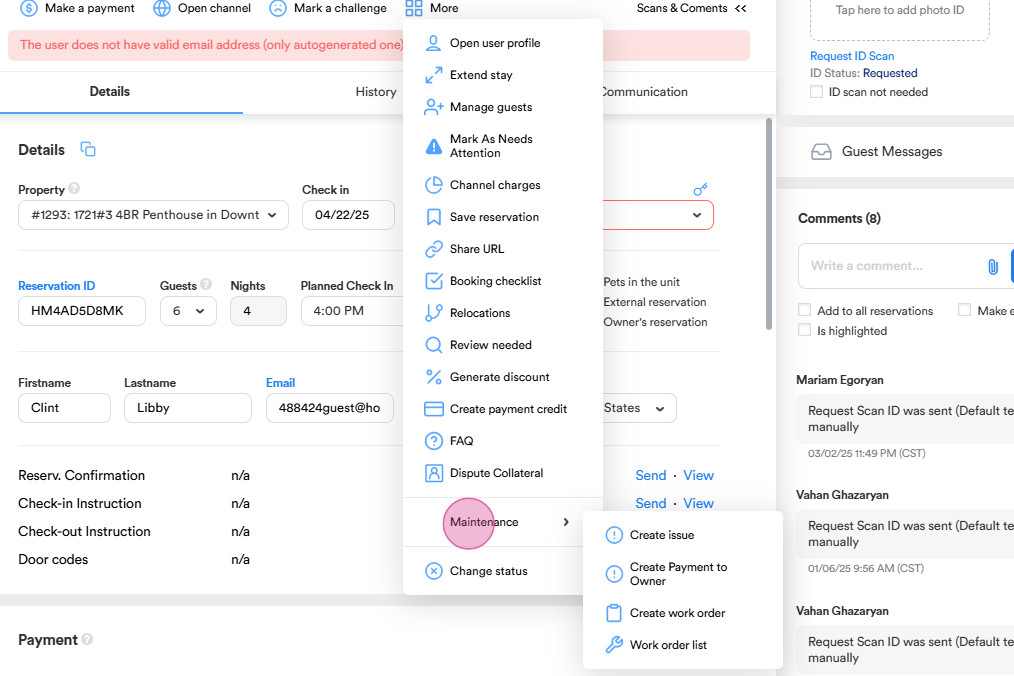
Let's create a work order for maintenance. The issue could vary, such as an AC problem, which falls under category of maintenance, and choose an AC as the subcategory. Alternatively, it could be a cleanliness issue, such as an unclean unit, which would fall under category of housekeeping. We also assign a priority level to the issue: low, medium, high, or urgent, depending on the severity of the situation.
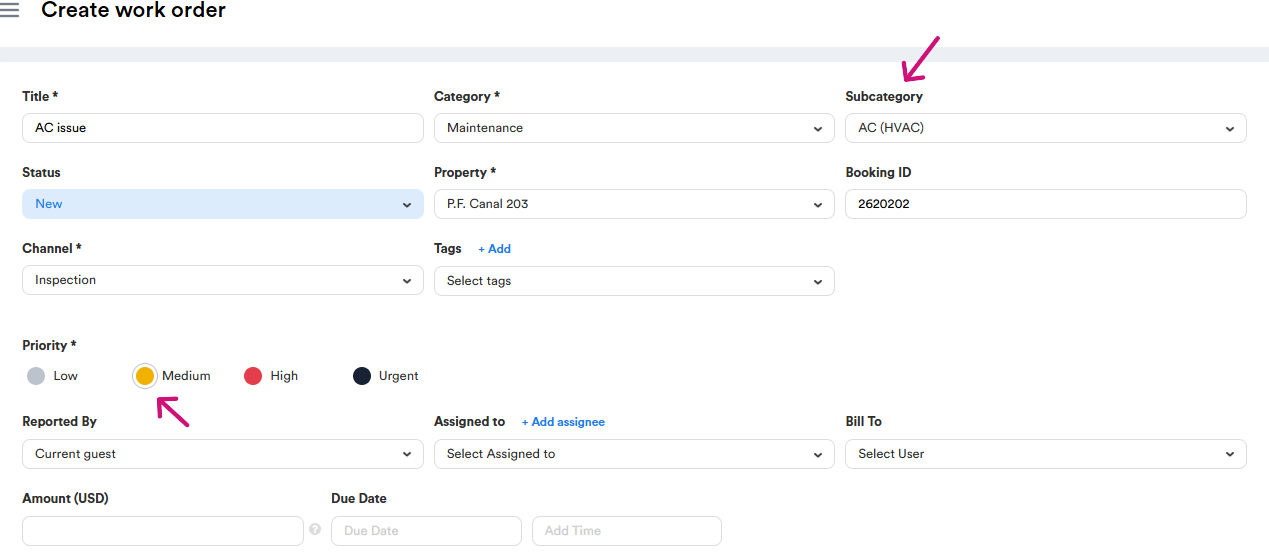
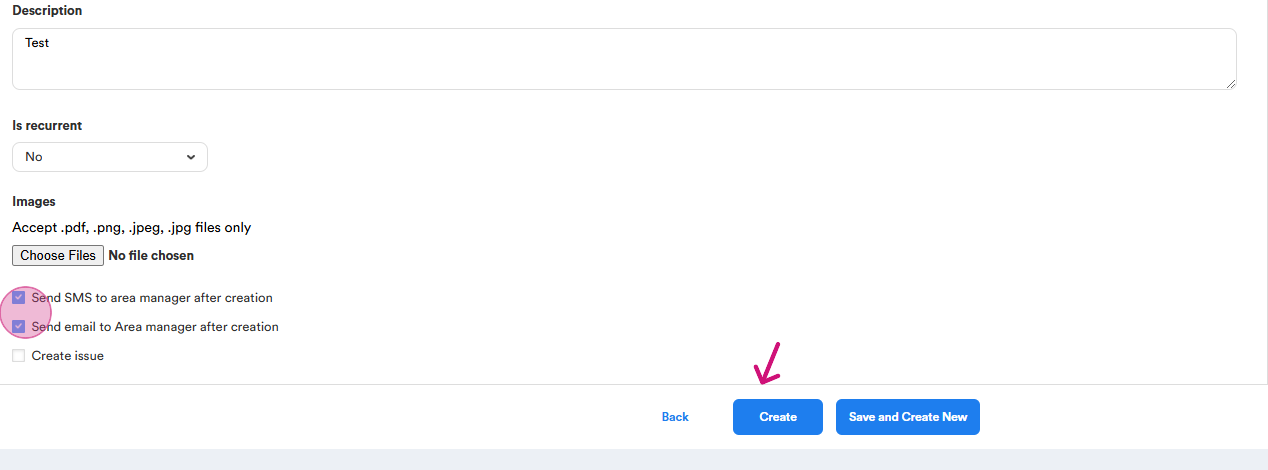
In the Description section, we include any extra details provided by the guest regarding the issue. If there are any relevant photos, we attach the appropriate files to provide further context. After selecting the files and confirming the information (by ticking both checkboxes), we can then proceed to create the work order.
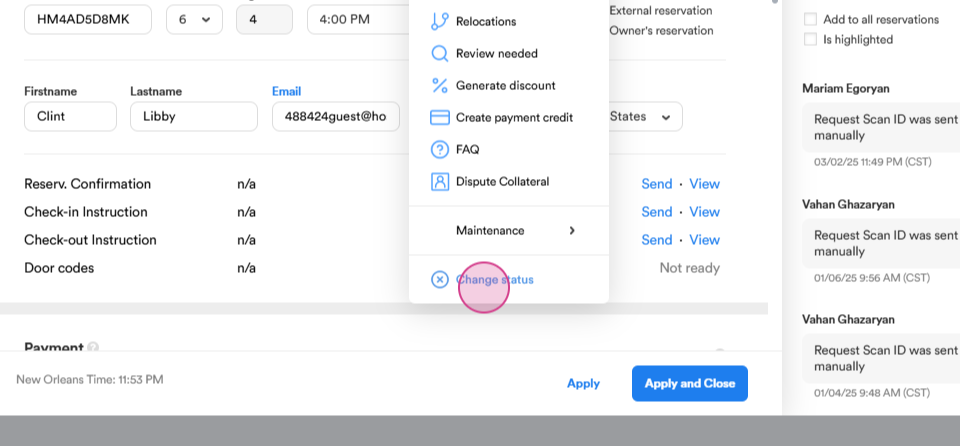
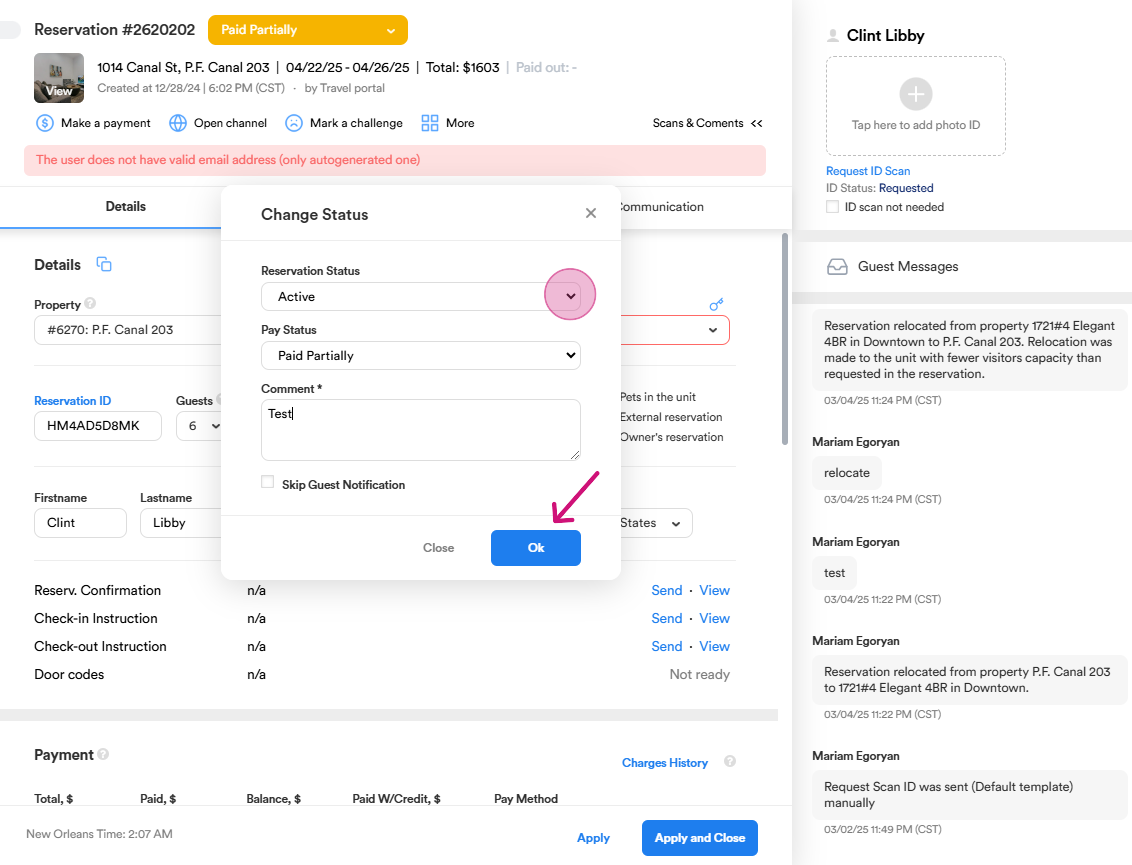
Step 20: The Change Status option allows you to update both the reservation status and the payment status as needed.
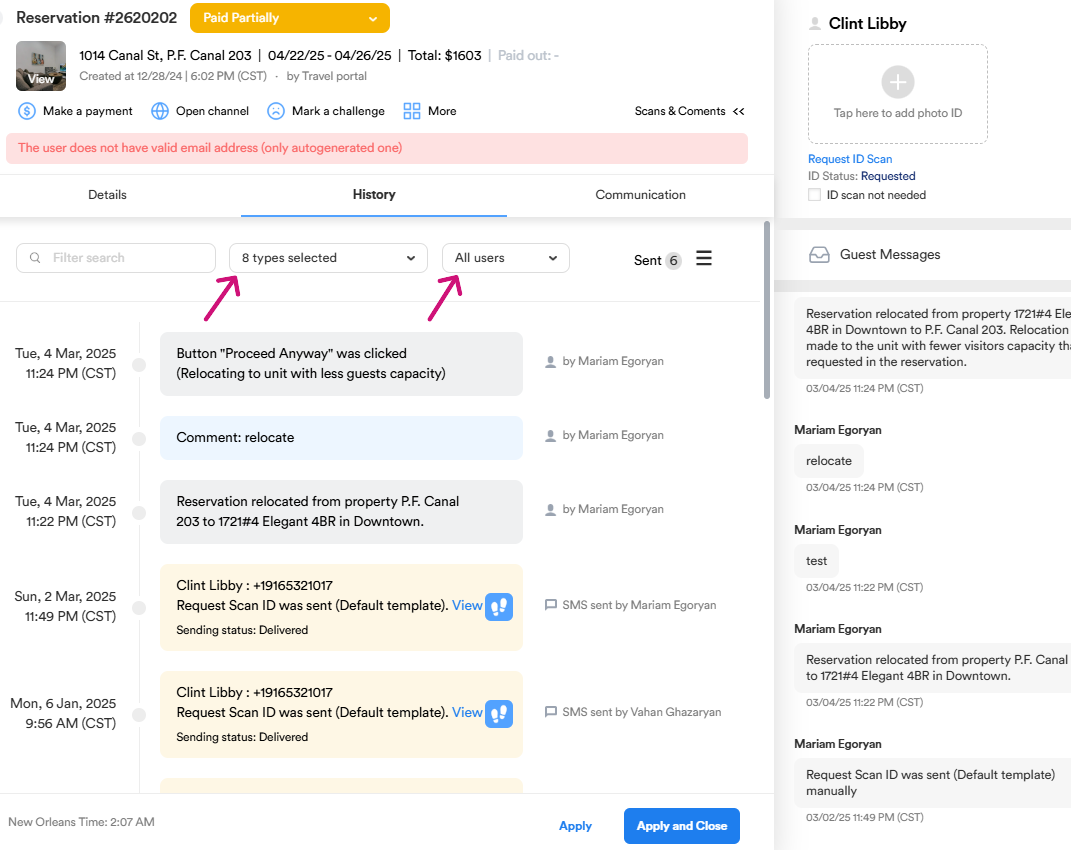
Step 21: The History section displays a complete log of all interactions related to the reservation. This includes reservation changes, comments, payment information, and any other relevant updates. The section also shows which users made each change or comment, providing a clear record of all actions taken.
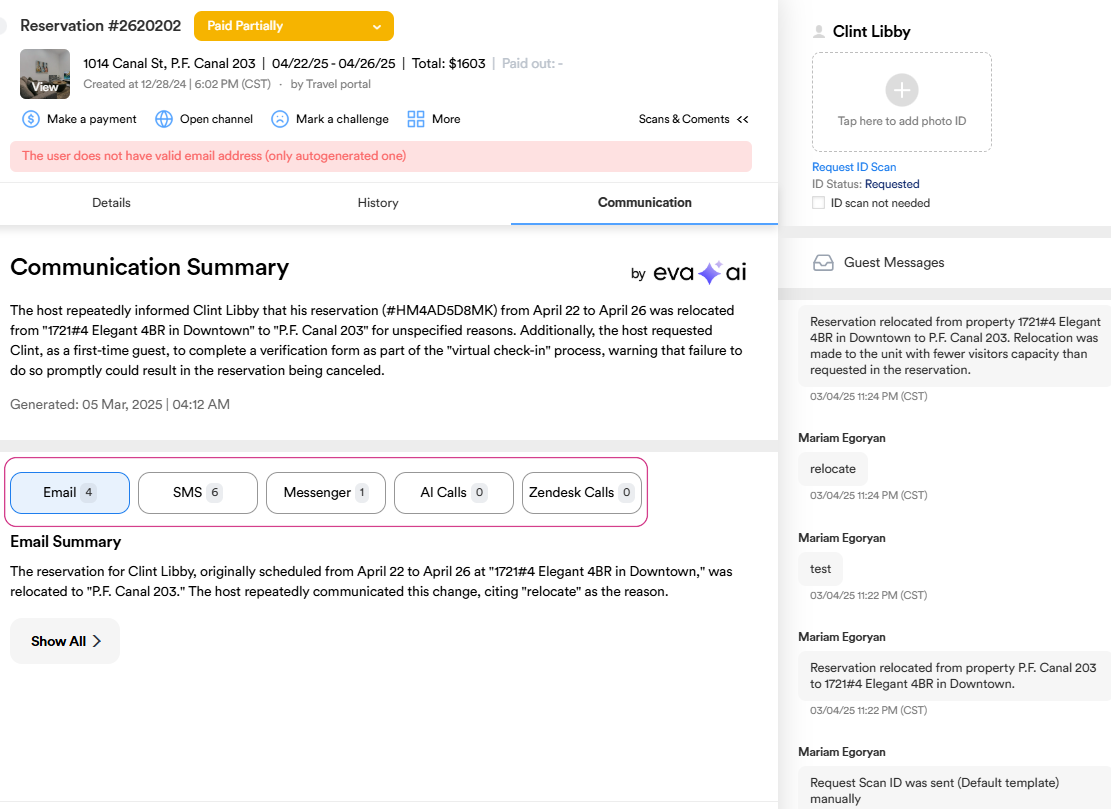
Step 22: The Communication section displays the entire conversation history with the guest across all active platforms.
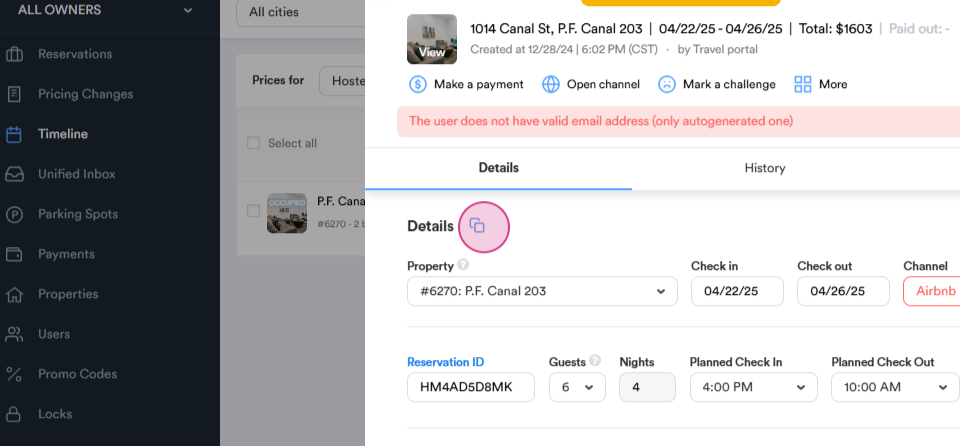
Step 23: The Details option allows you to easily share the reservation link with others.
Thank you!