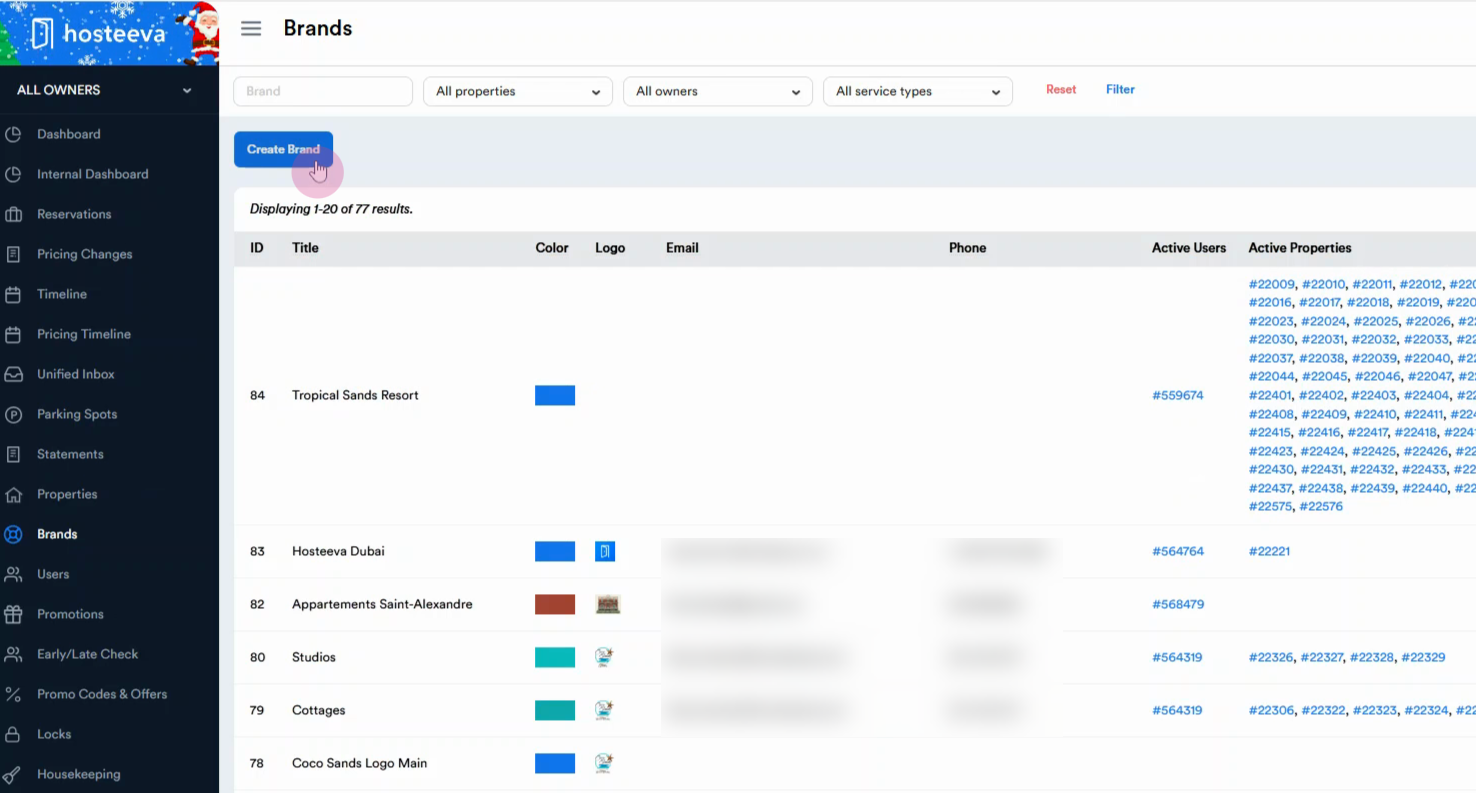
Step 1: Click the Create button on the Brands tab to add a new brand.
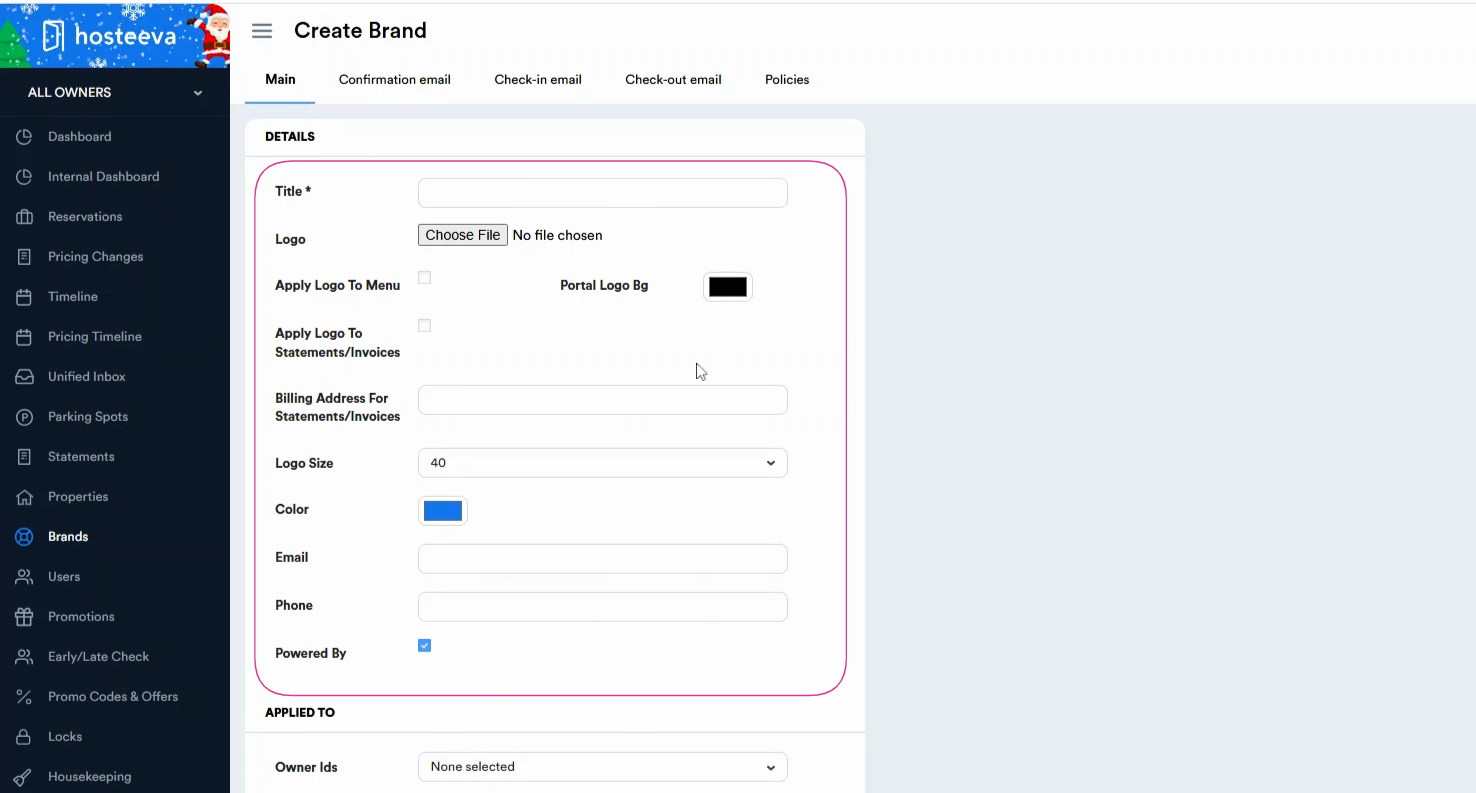
Step 2: Fill in the main requested information about the brand, like name, contact information, and logo.
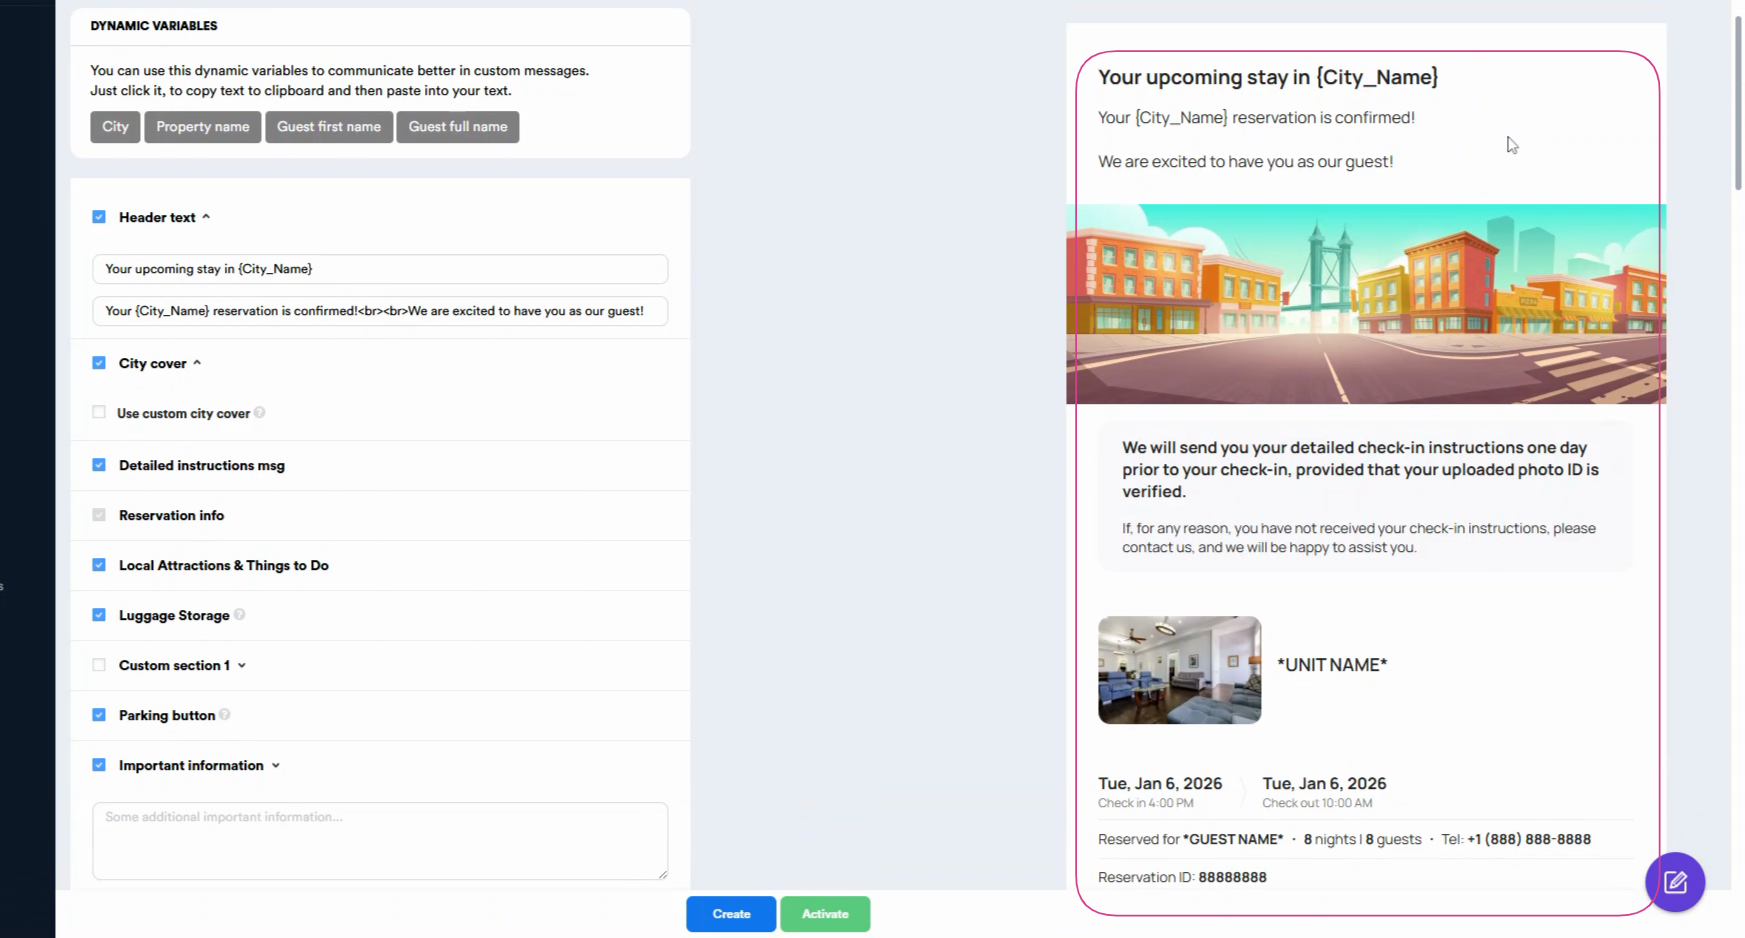
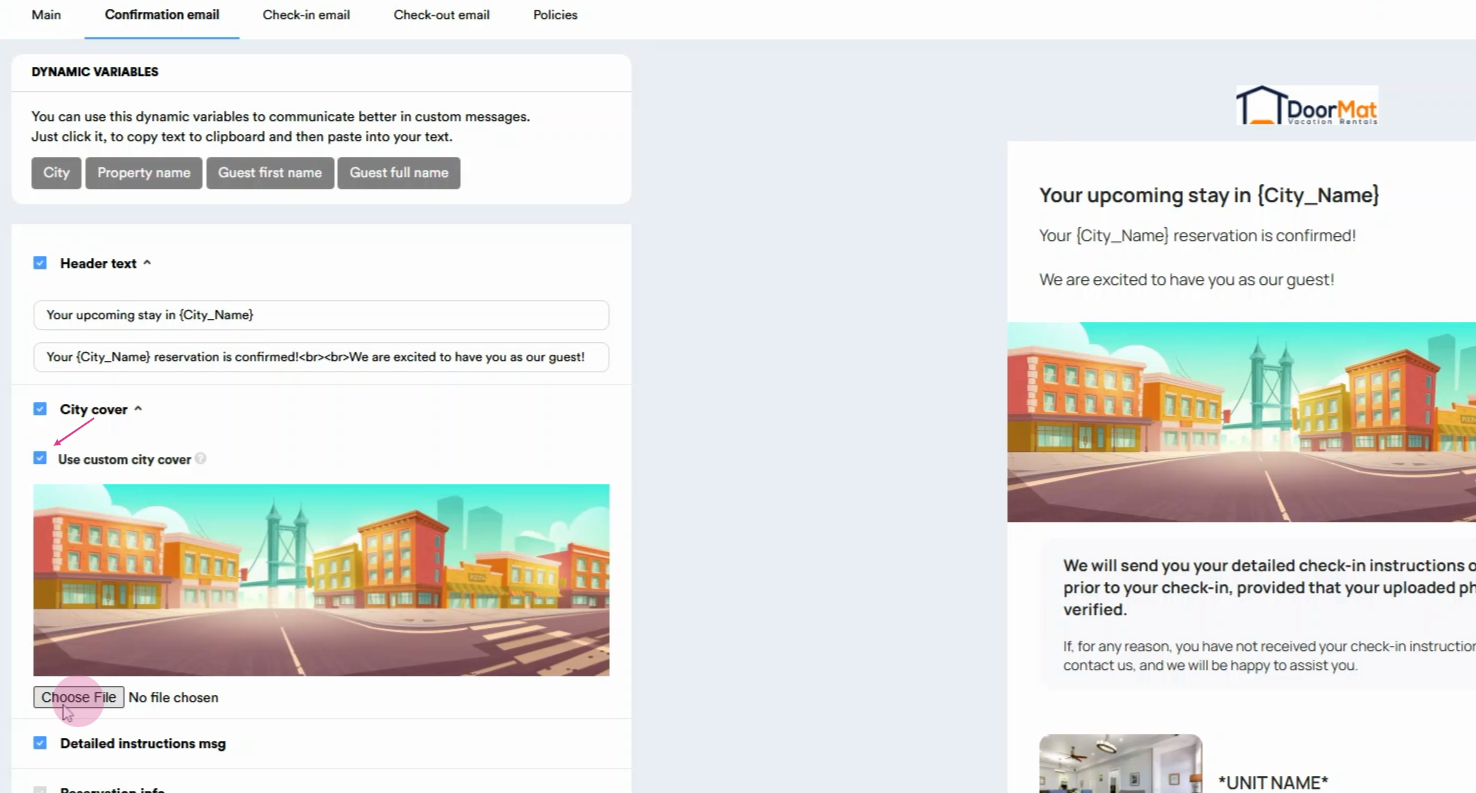
Step 3: Set up your email templates. On the right, complete fields for the confirmation email, adding the guest's name, the reservation dates, and any custom messaging.
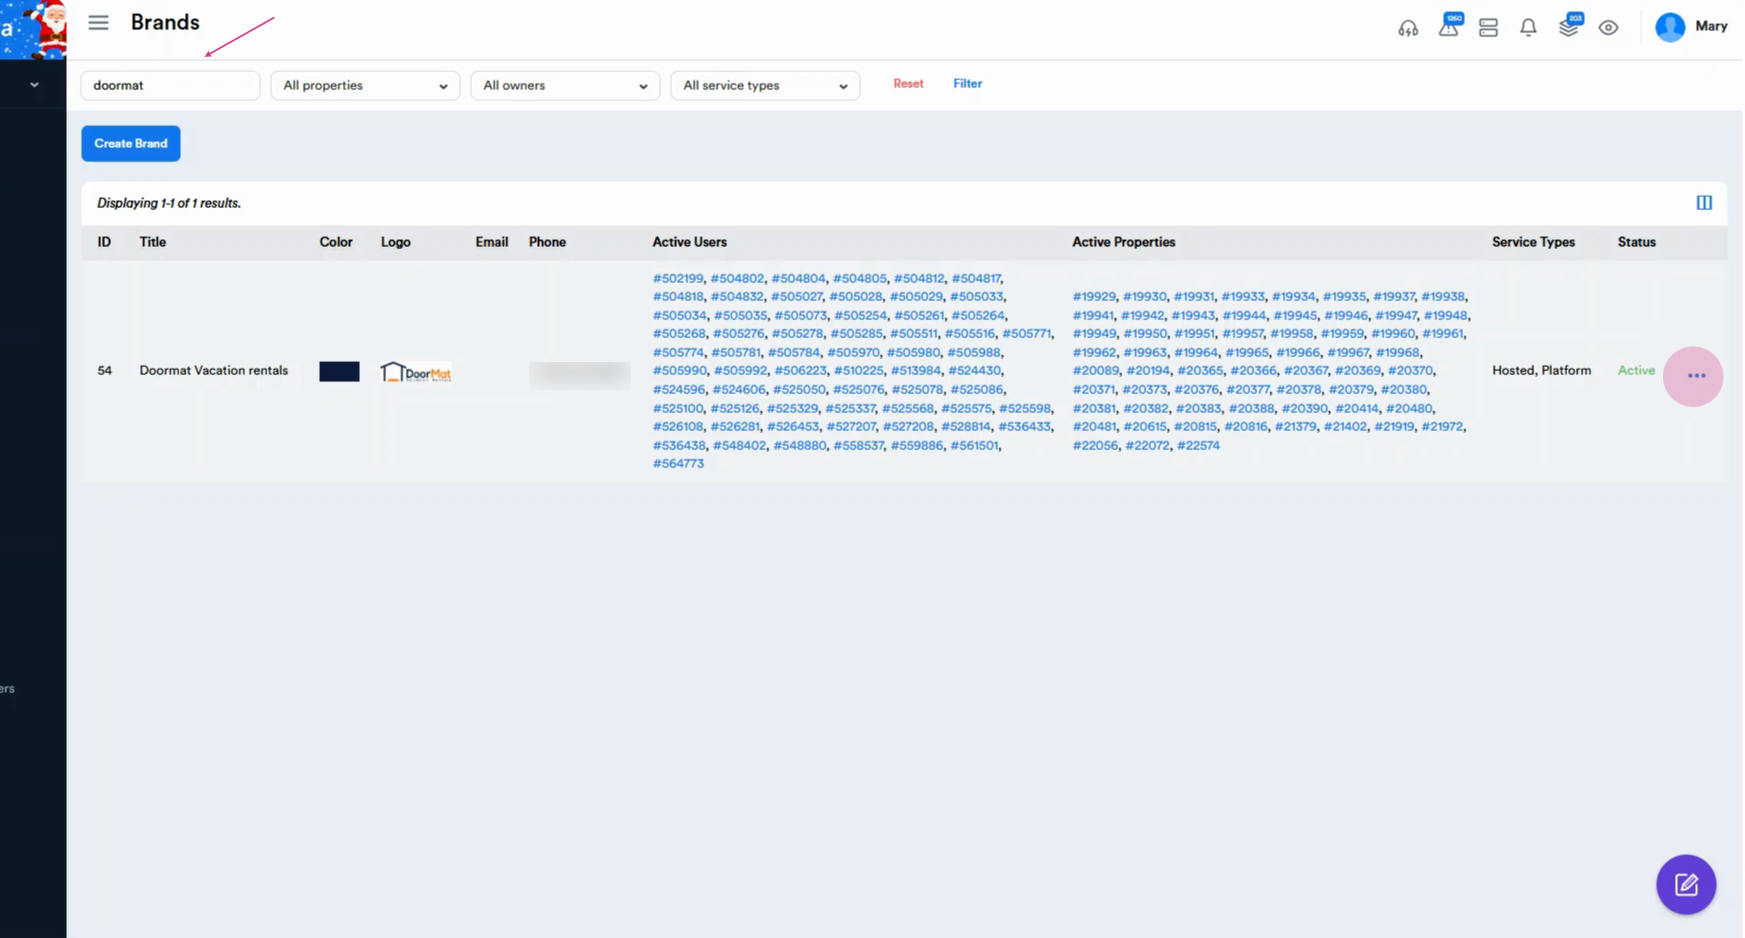
Step 4: Edit or update existing brands: search for the brand name and click the three dots.
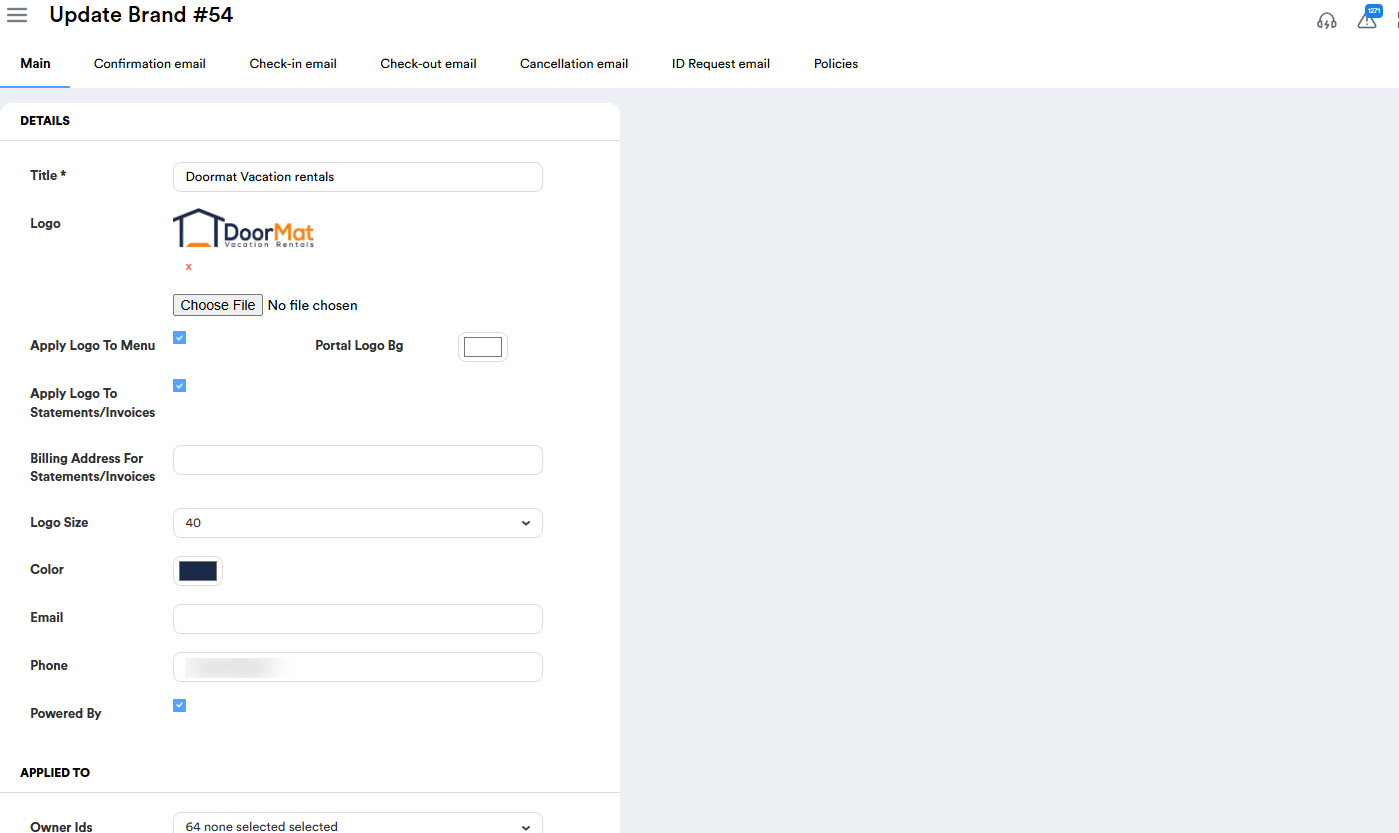
Step 5: Review and update the brand details and logo as needed.
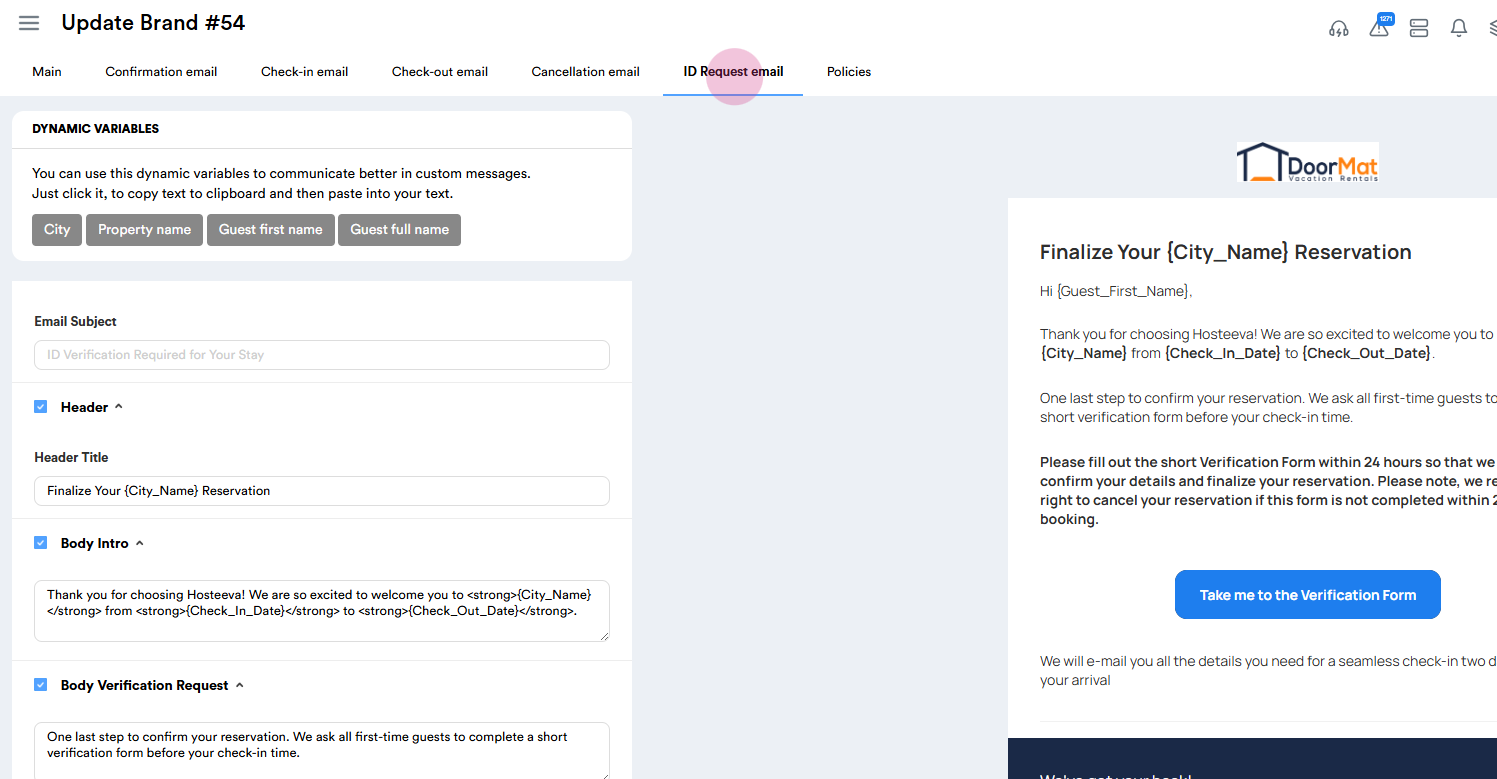
Step 6: To customize the ID request email, click on ID Request email.
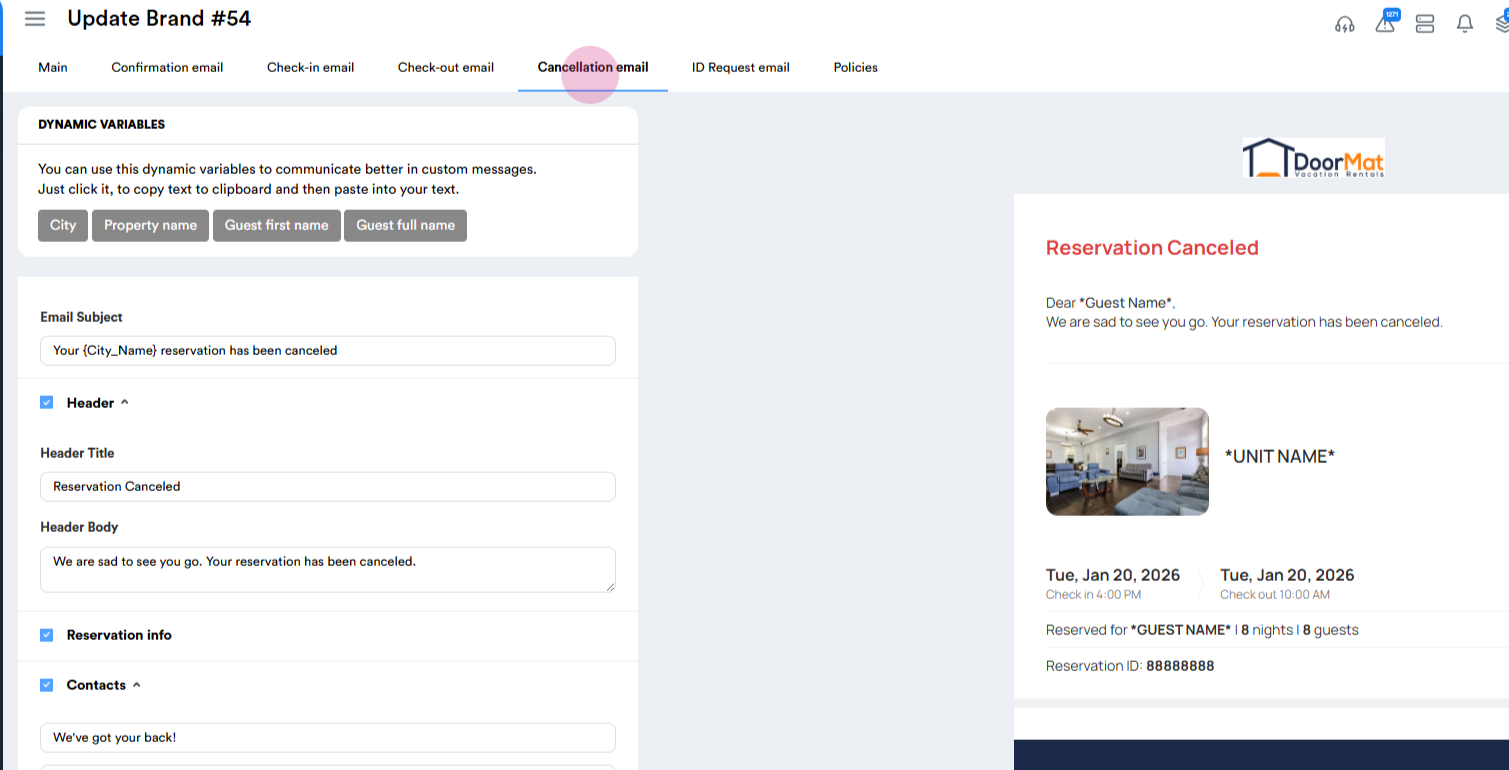
Step 7: To customize the ID request email, click on Cancellation email, click on Cancellation email.
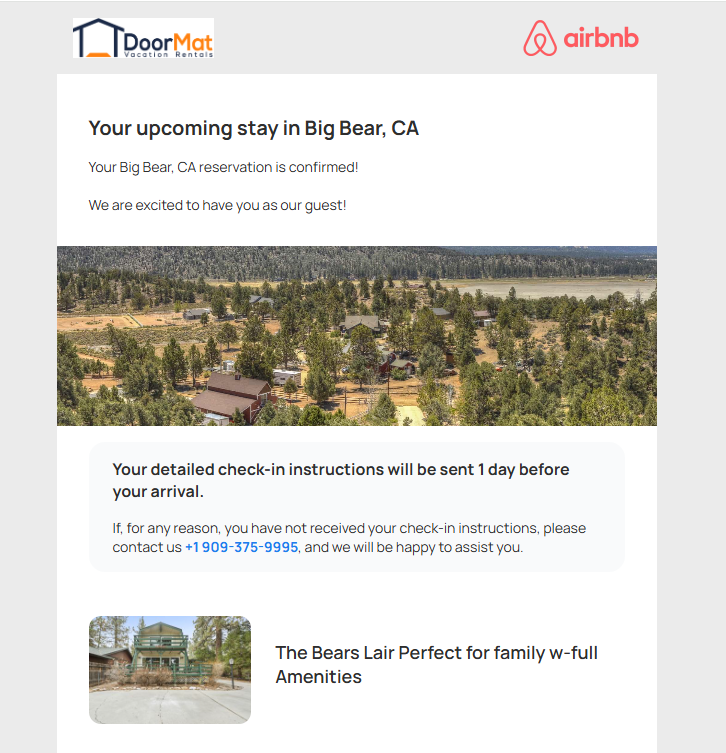
Step 8: Move to the confirmation email section to enable a custom city cover image. Under City Cover, check Use custom city cover. Click Choose file to upload your own image, replacing the default one.
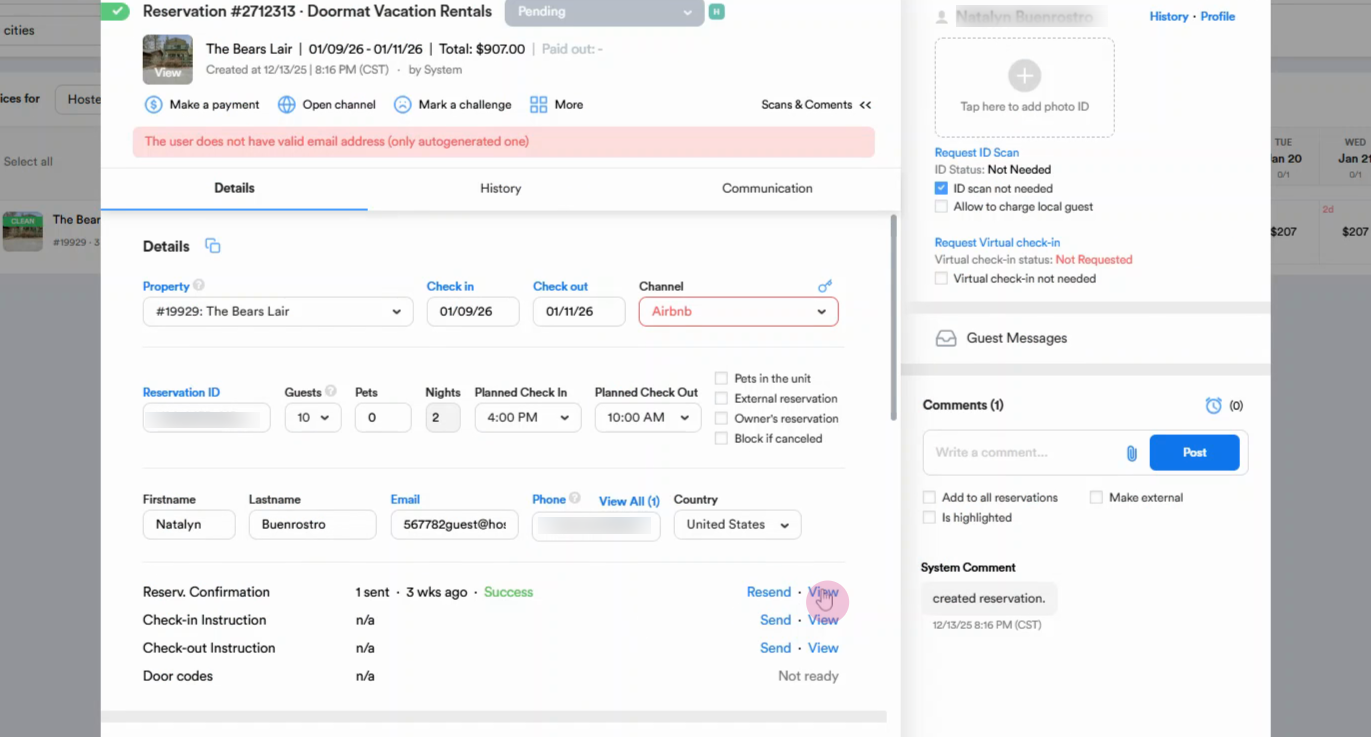
Step 9: To preview the personalized confirmation email, navigate to the Timeline, open a reservation, go to view Reservation Confirmation Email.