This article will guide you through the process of connecting your existing Airbnb listing with Hosteeva. By the end of this tutorial, you'll have your Airbnb listing synced with your Hosteeva account.
Step 1: Start by logging into your Hosteeva Dashboard. Navigate to the Properties tab.

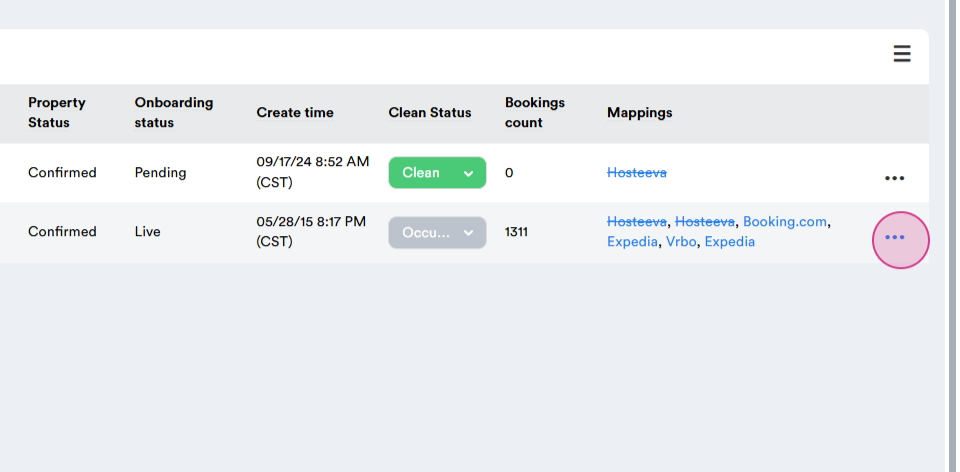
Step 2: Identify the property you wish to connect. Make sure the Onboarding Status is Live, Click on the three dots next to it.
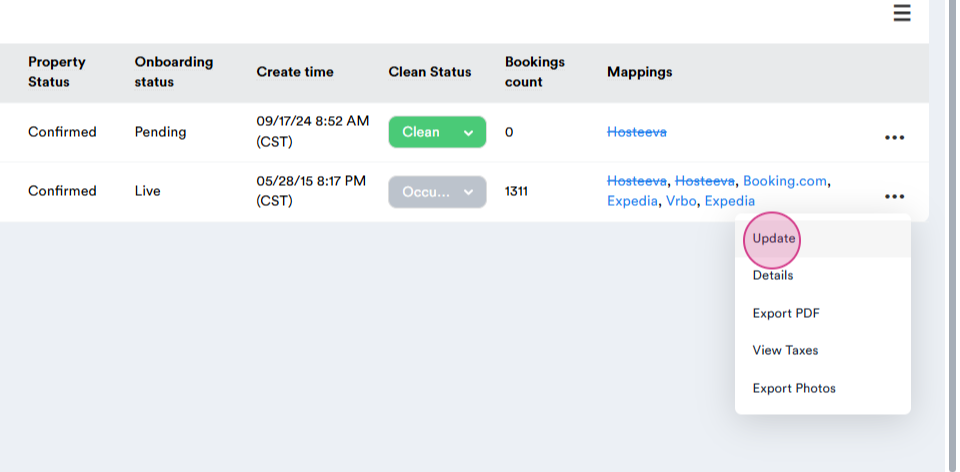
Step 3: Click on the Update button.
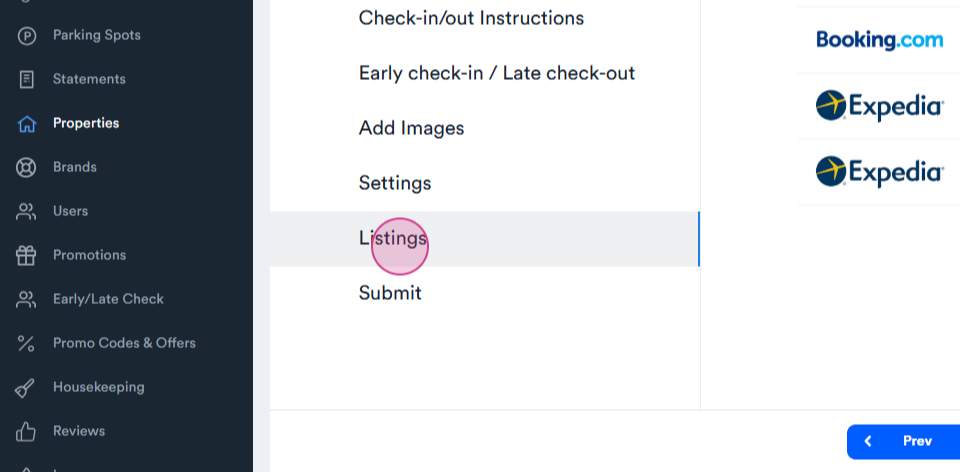
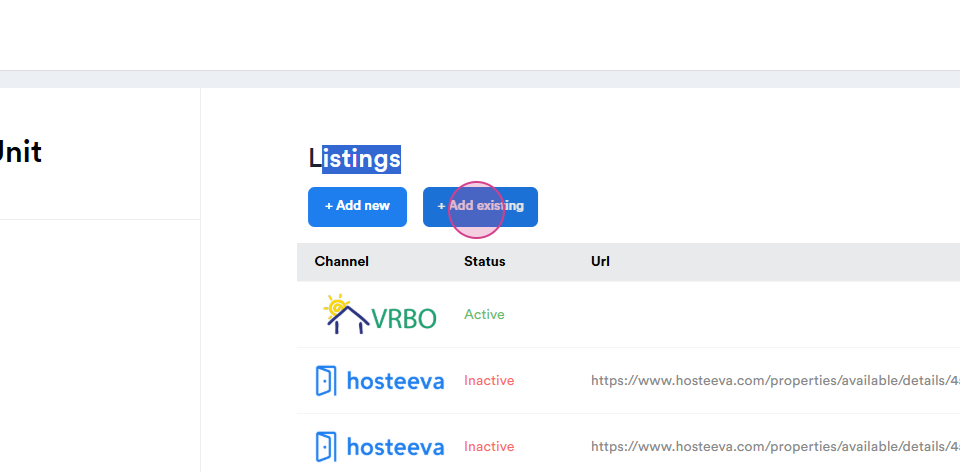
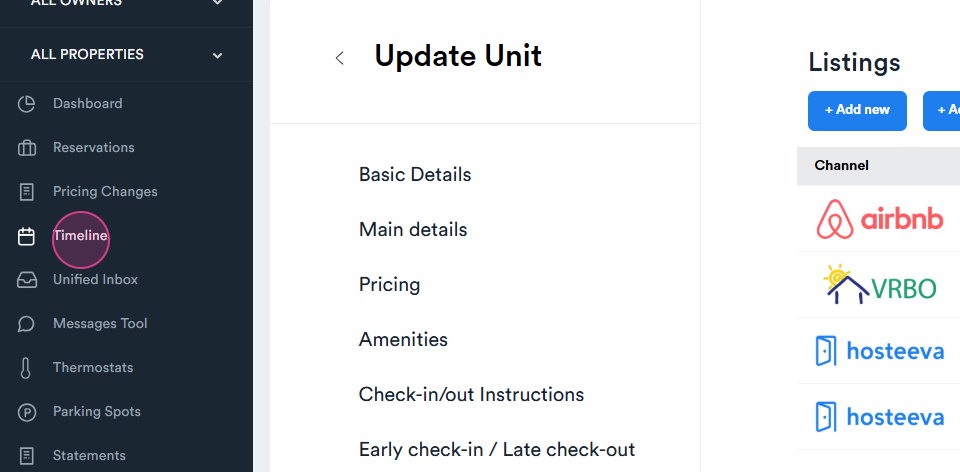
Step 4: Navigate to the Listings tab.
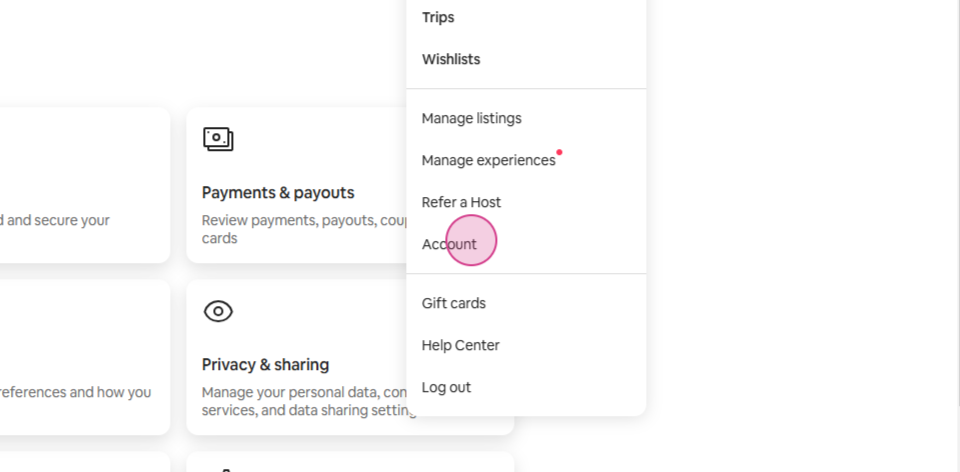
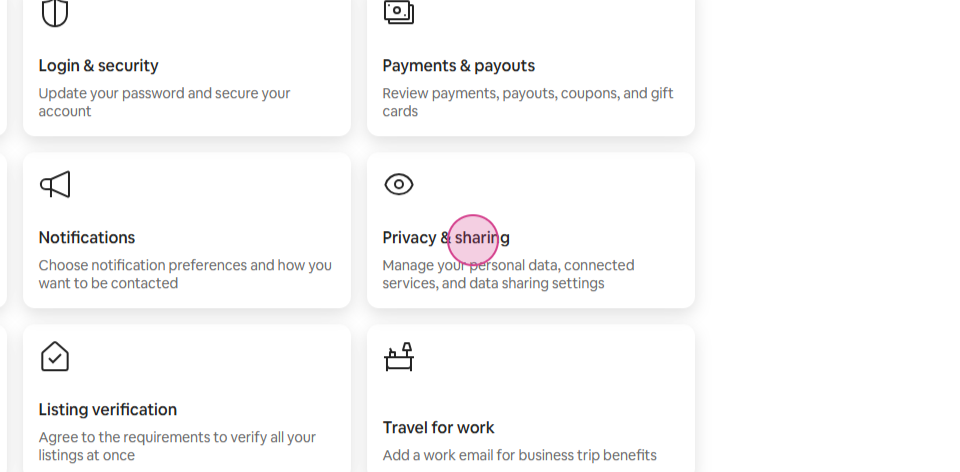
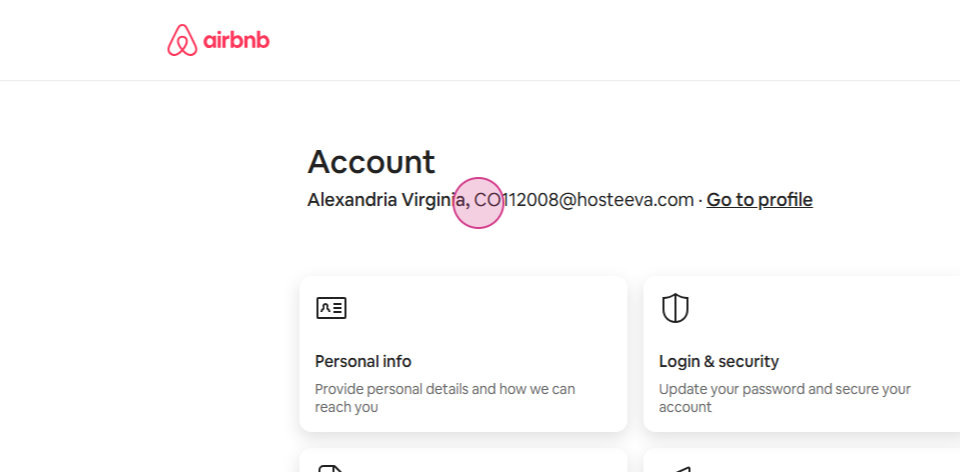
Step 5: Log into your Airbnb account. Navigate to Account.
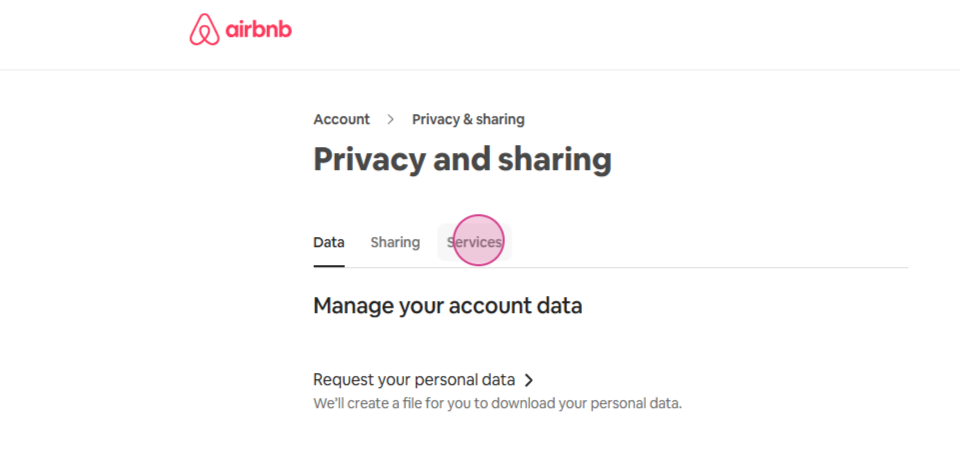
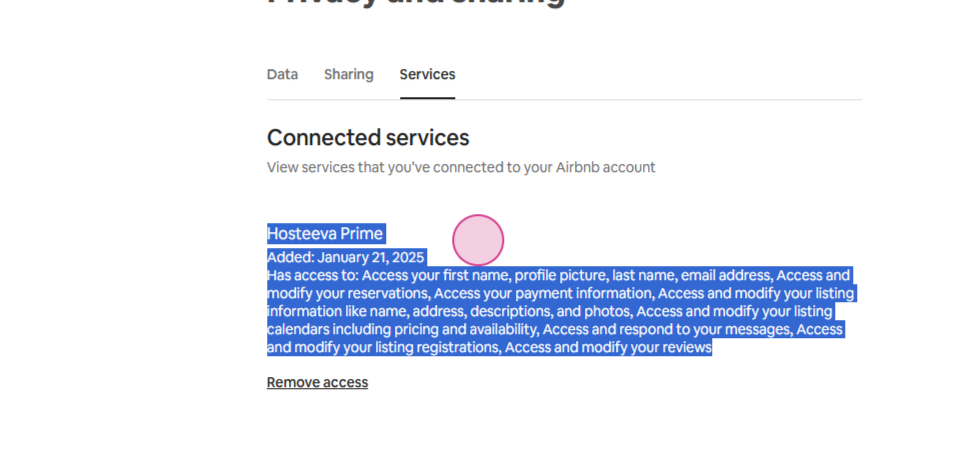
Step 6: Proceed to Privacy and Sharing.
Step 7: Go to the Services tab.
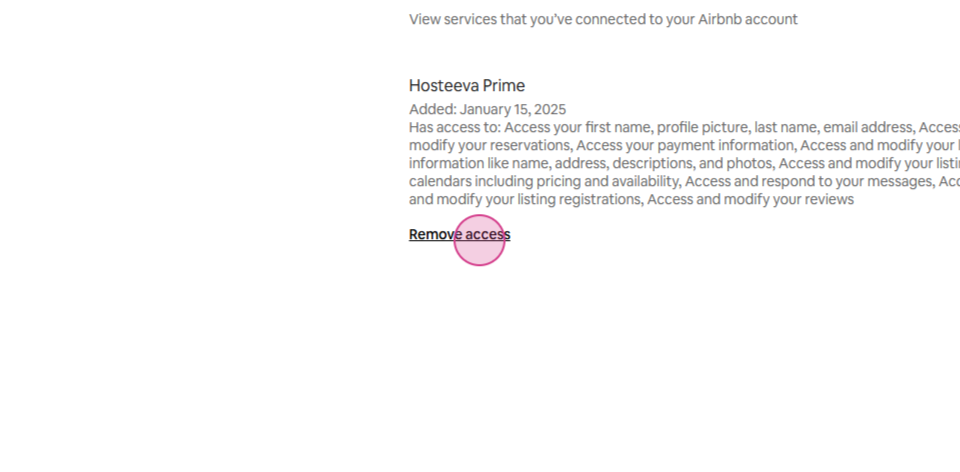
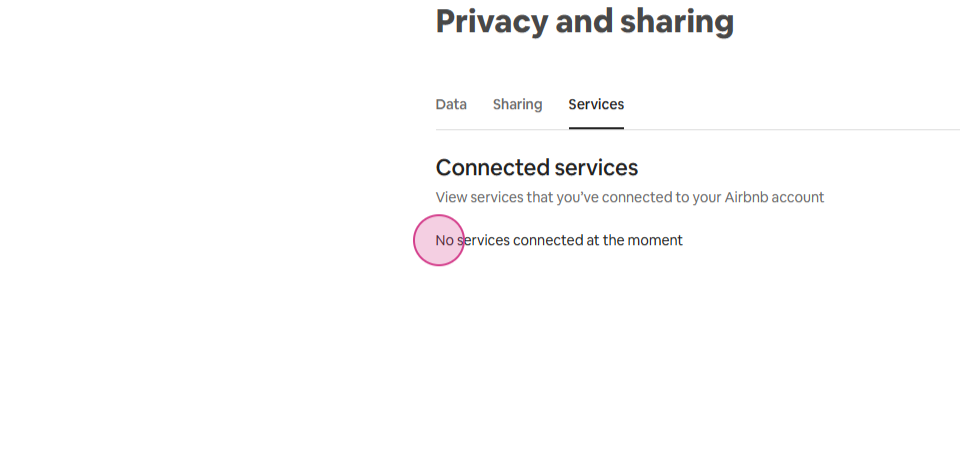
Step 8: Ensure no services are connected. If any are, remove their access by clicking on Remove Access.
Step 9: Return to the Hosteeva Dashboard. Under the Listings tab, click on Add Existing Listing.
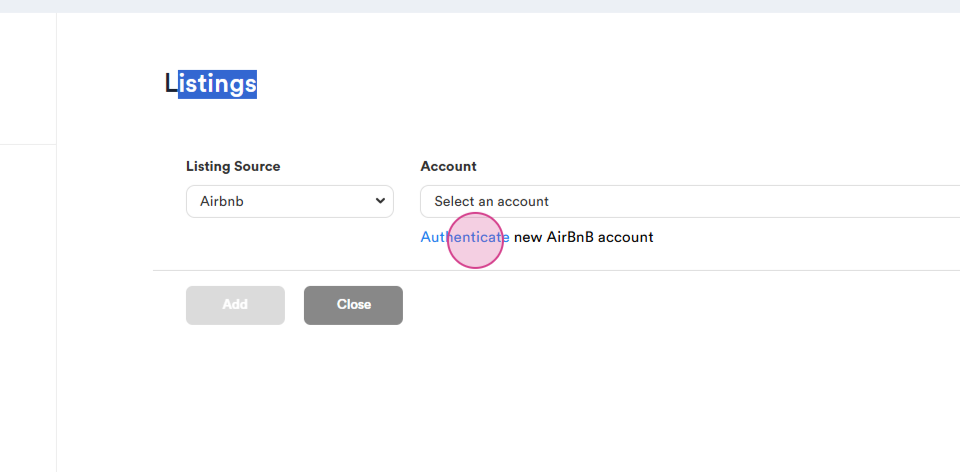
Step 10: Set the source as Airbnb. Choose the account to connect and authenticate your Airbnb account by clicking on the Authenticate button.
Step 11: Scroll down and click on the Allow button.

Step 12: Verify your connection with Airbnb by refreshing the page and checking the Services tab.

Step 13: Return to Hosteeva and select your Airbnb account.
Step 14: Go back to Airbnb and click on Account to view the email address associated with it.
Step 15: Choose the same email address on Hosteeva.
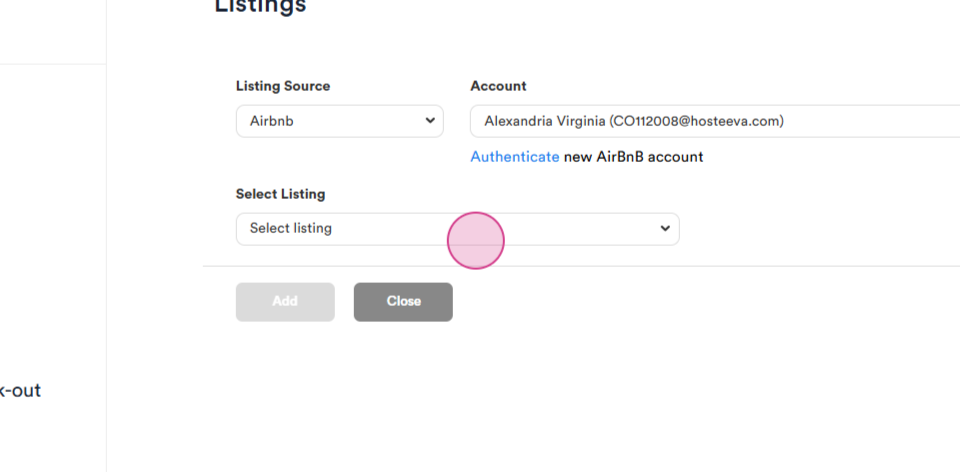
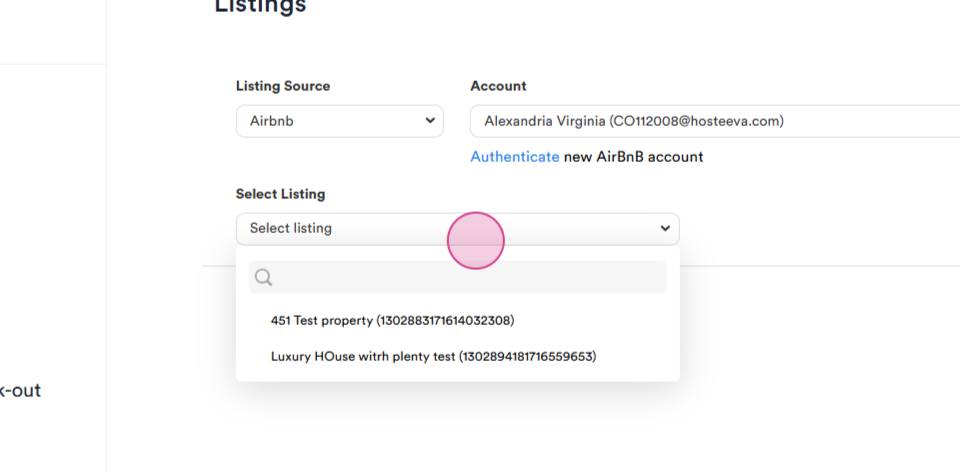
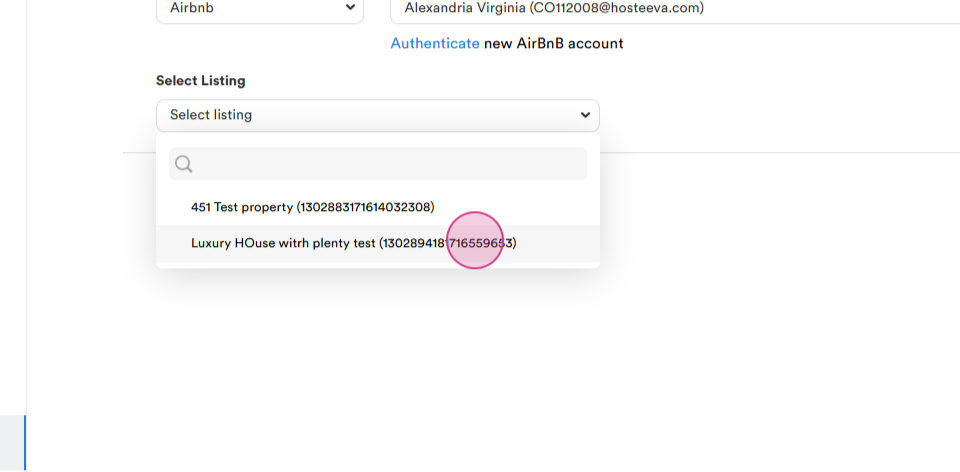
Step 16: Select the listing to connect. Note that you might have different listing IDs on Airbnb.
Step 17: Go back to Airbnb to Manage Listings on Airbnb.

Step 18: Click on the listing and note down the listing ID. You can find it in the listing link.
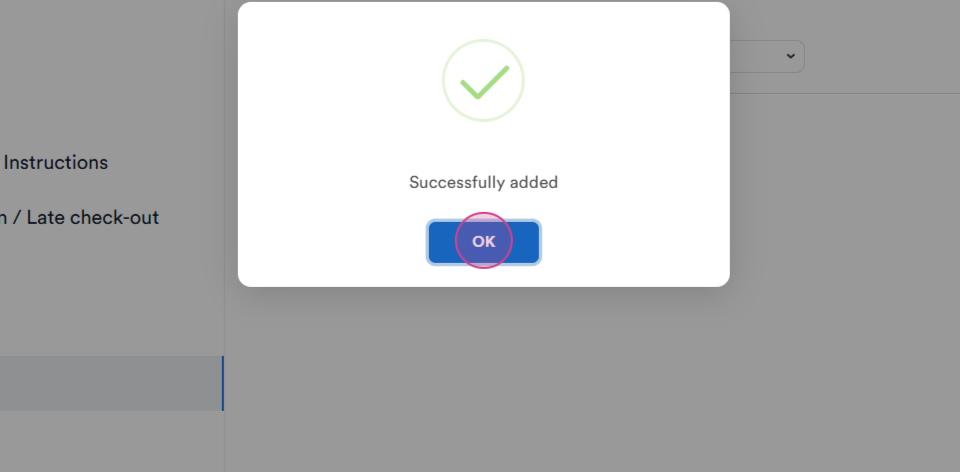
Step 19: After selecting all the necessary information, click on the Add button.

Step 20: The listing status will show as inactive, click on the Edit button.

Step 21: Review all the information. If your location requires a regulation number for short term rentals, or if it's a hotel license, check the appropriate box.
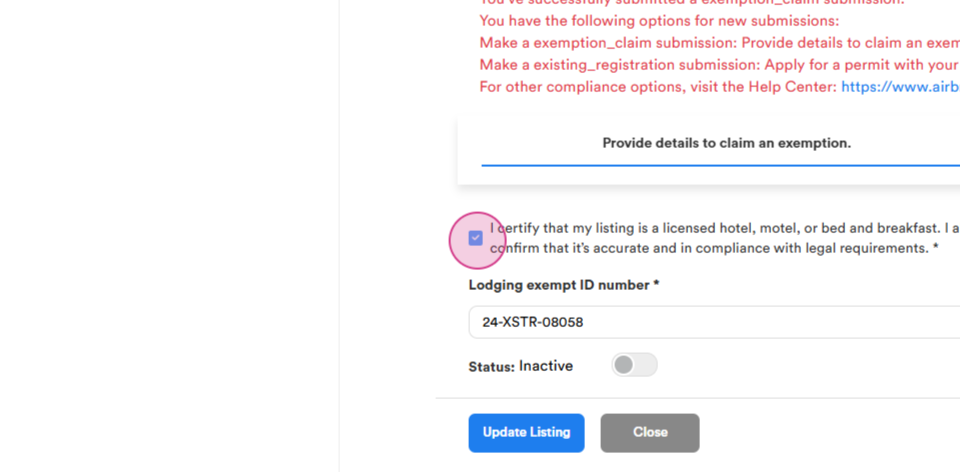
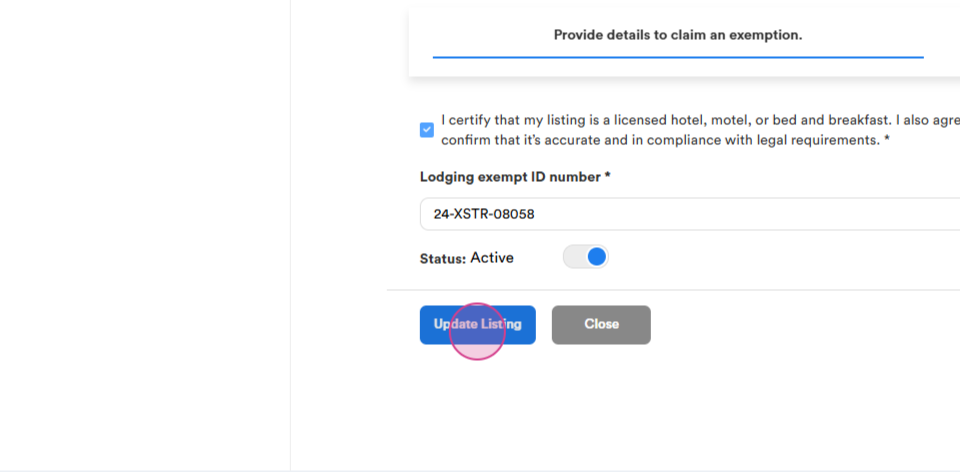
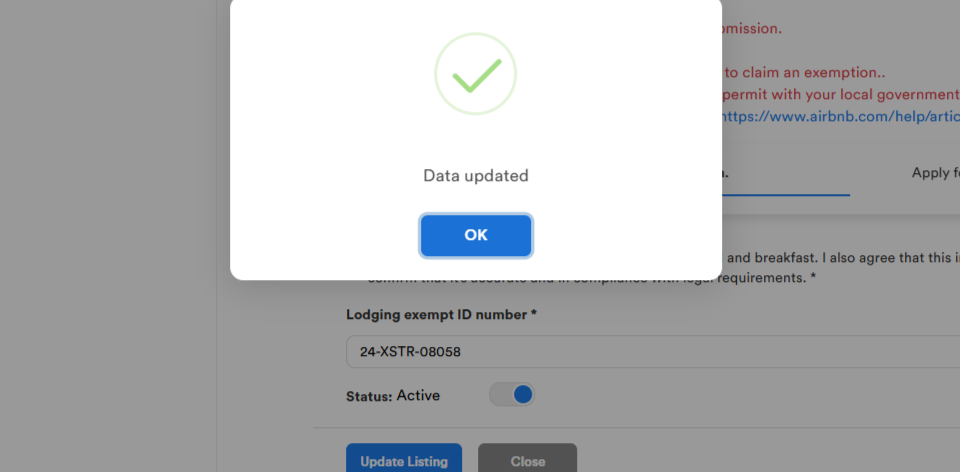
Step 22: To make the listing active, click on the inactive status and then click on Update Listing.

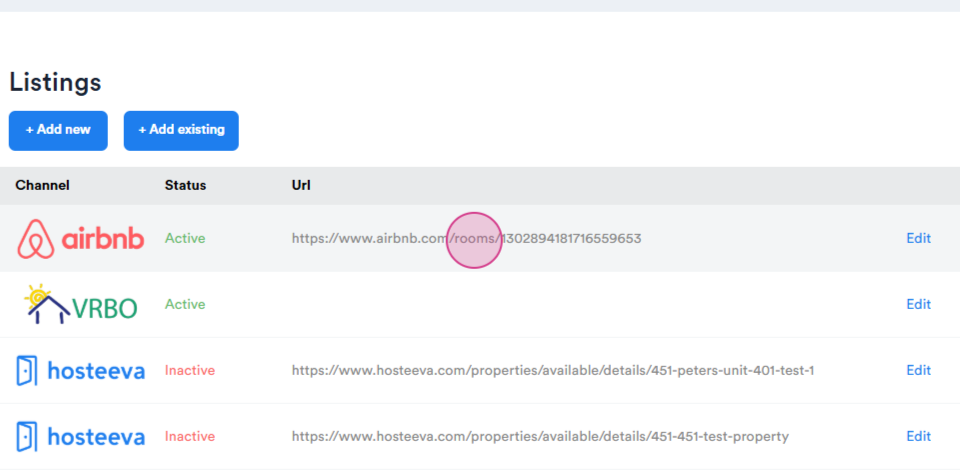
Step 23: Verify that the listing is active on Airbnb.
Step 24: Check existing reservations on Airbnb by clicking on the Timeline. Allow 30 minutes for all reservations to sync from your Airbnb calendar to your Hosteeva calendar.

That's it! You've successfully connected your Airbnb listing to Hosteeva. If you encounter any issues or have questions, don't hesitate to reach out to your local Hosteeva representative.