Learn how to create a new user in the Hosteeva platform.
Step 1: Log into the Hosteeva dashboard.
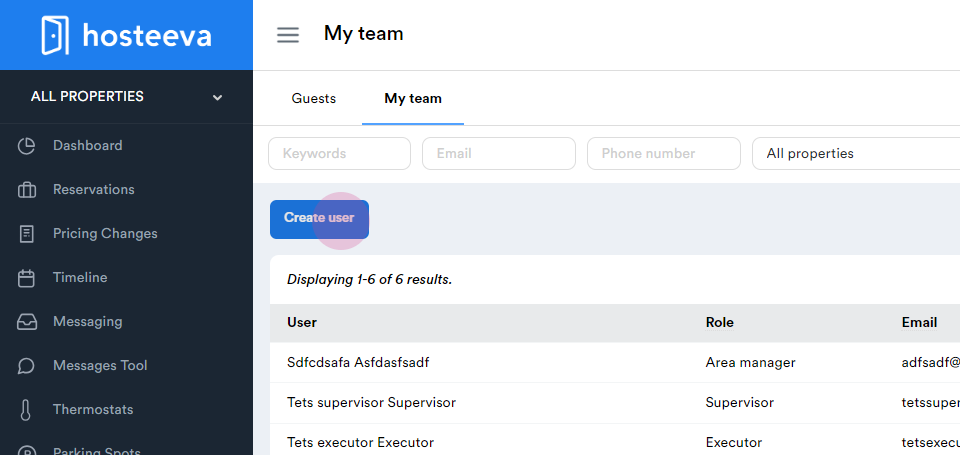
Step 2: Click on the Users tab.
Step 3: Navigate to My Team

and select Create User.
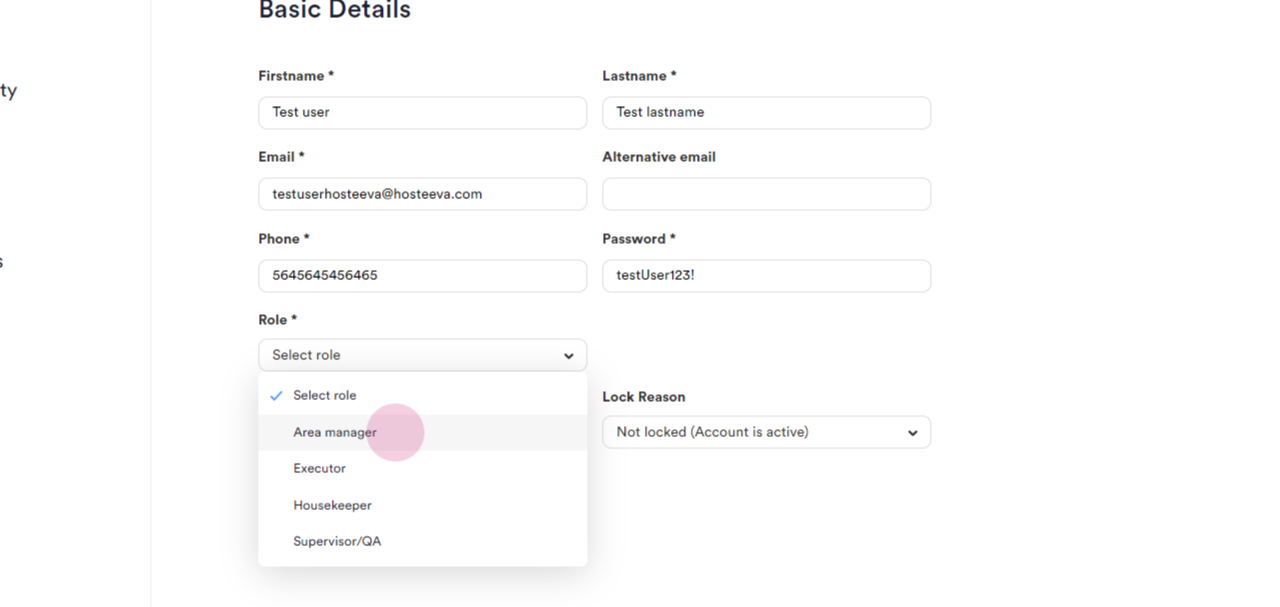
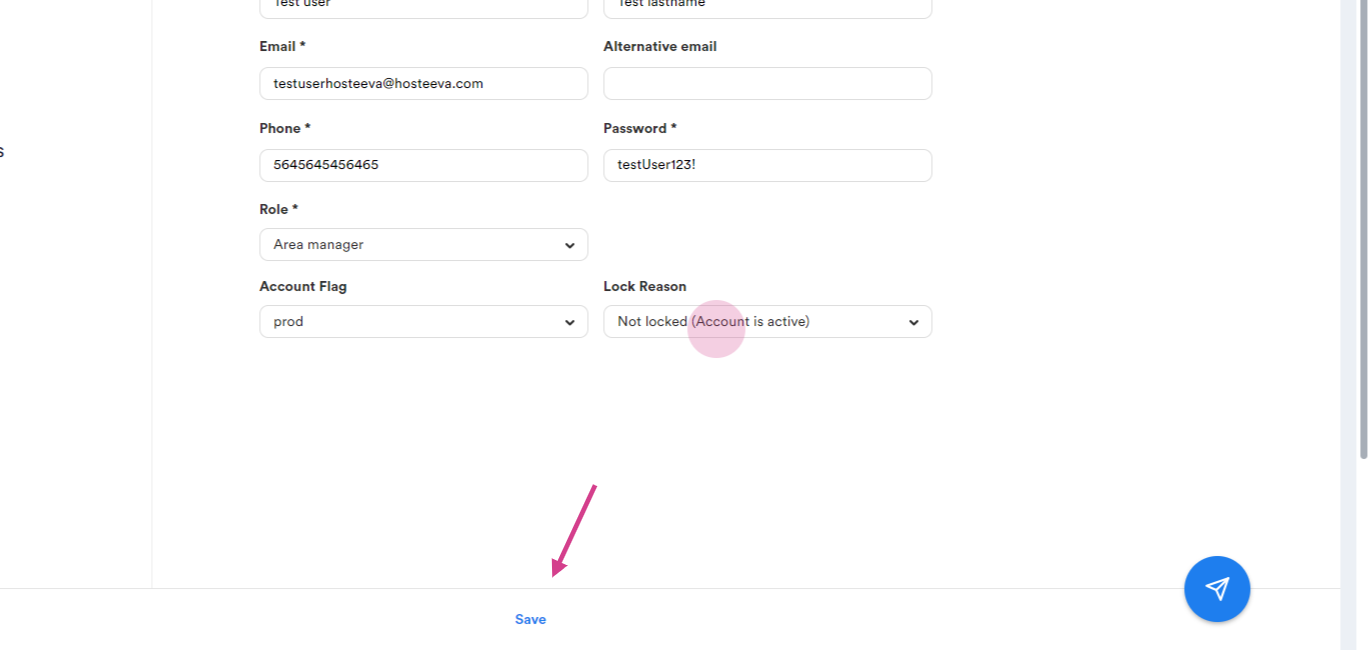
Step 4: Fill in the basic details for the user.
First Name, Last Name, Email Address, Phone Number, Password
Assign a role to the user. The options include Area Manager, Executor, Housekeeper, and Supervisor. Select Area Manager for this guide.
Step 5: Ensure the Account flag is set to Prod and Set the Lock Reason to Not Locked.
Step 6: If a user's account is locked, unlock it by selecting Not Logged Account.
Step 7: Save the user's details by clicking Save.
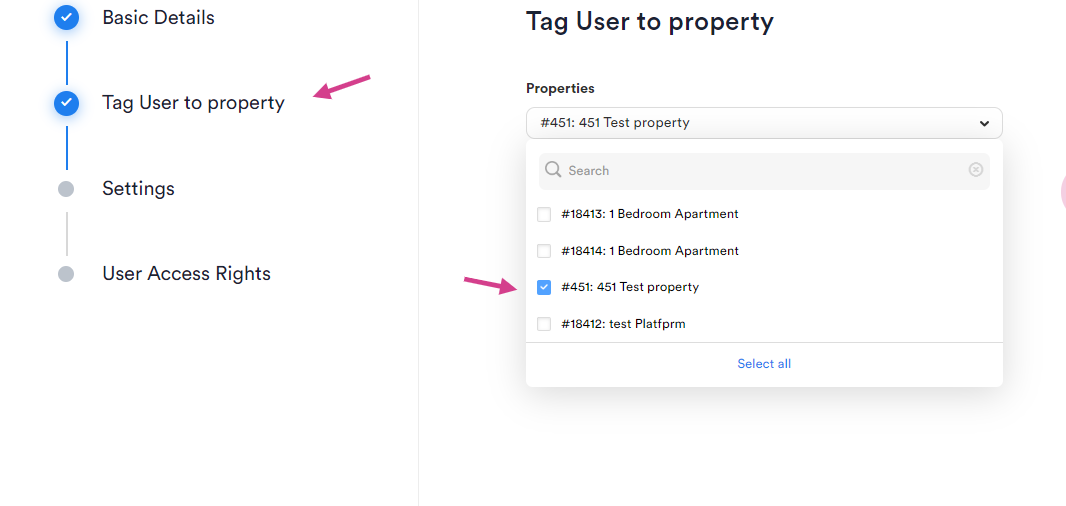
Step 8: Assign properties to the user.
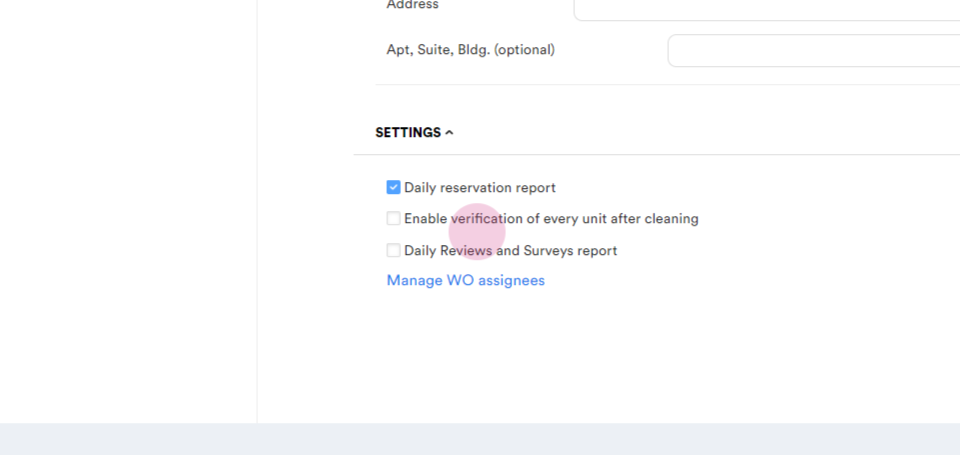
Step 9: Set the user's billing address, if necessary. Enable the daily reservation report, verification of every unit after cleaning, daily reviews, service report, and manage work order signees.
Step 10: Set the user's access rights. Extra access rights can be granted or removed as needed.
Save the user's details by clicking Save. The new user is now created.

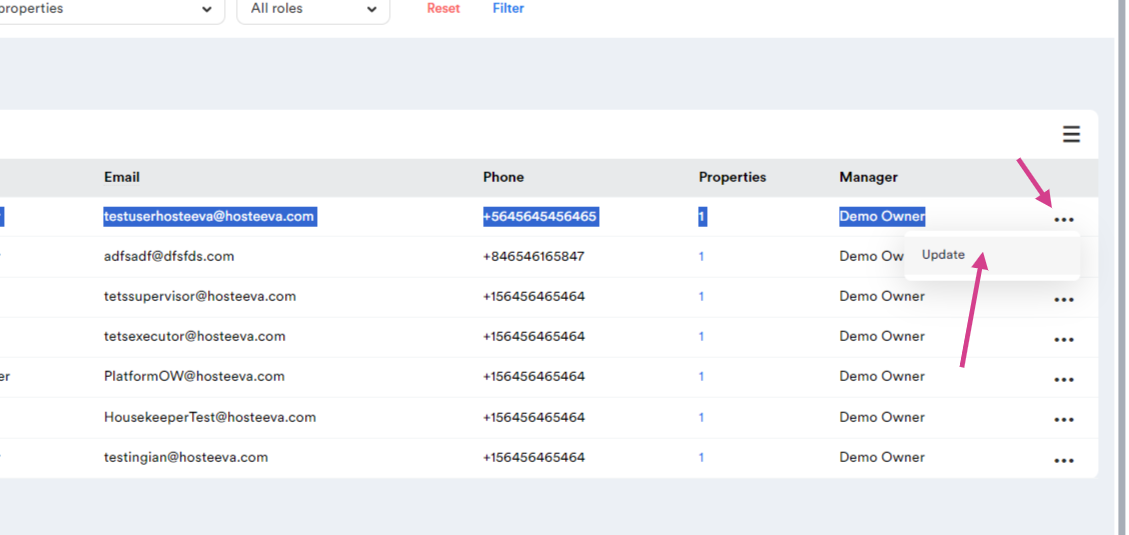
Remember, the user's details can be updated at any time. Just click on the three dots and click on Update.