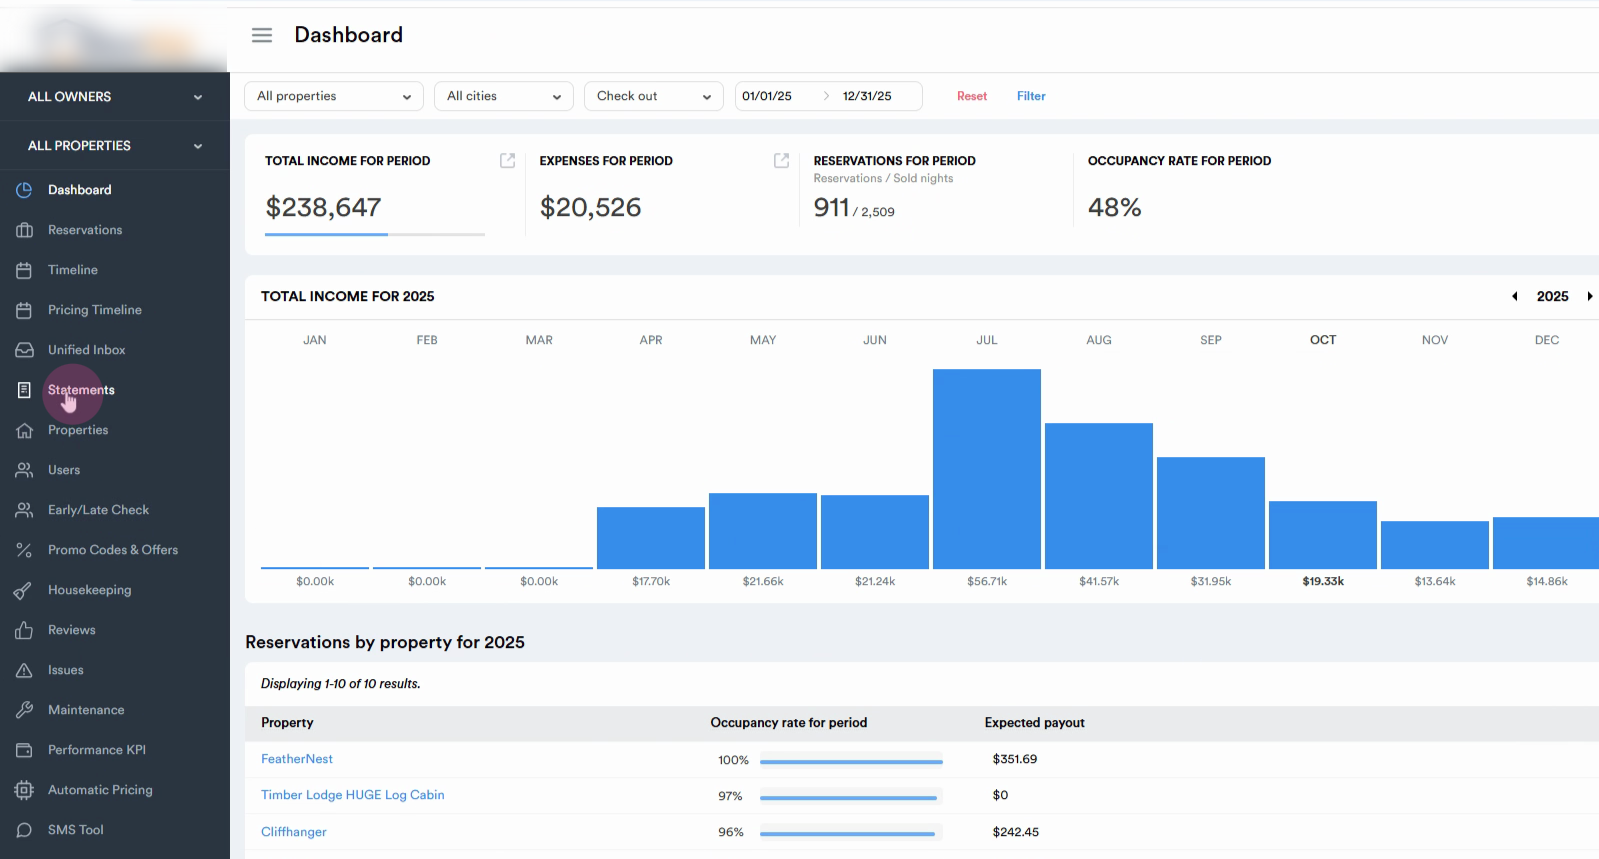
In this tutorial, you'll learn how to generate owner statements and add expenses to them.
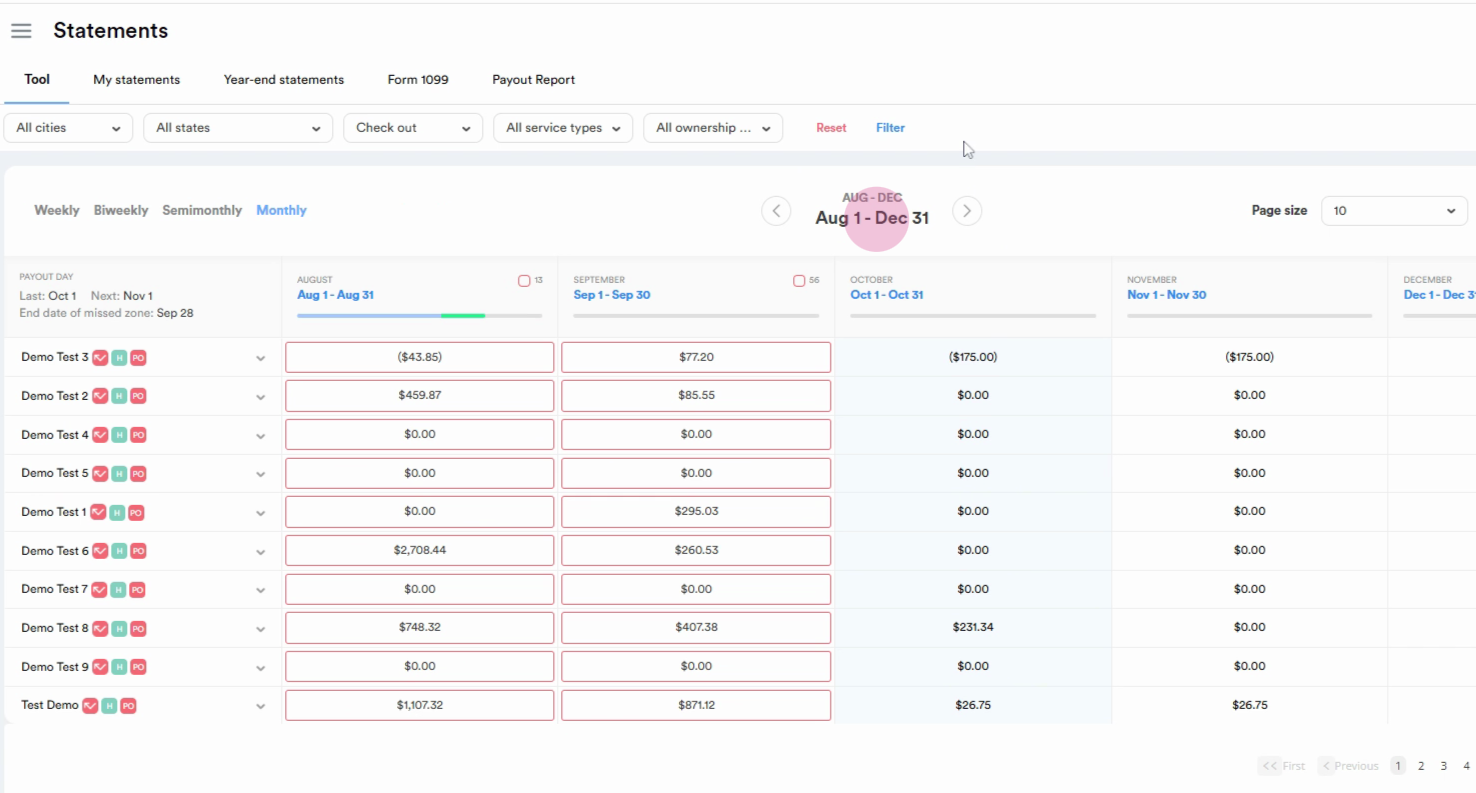
Step 1: Start by navigating to the statement section.
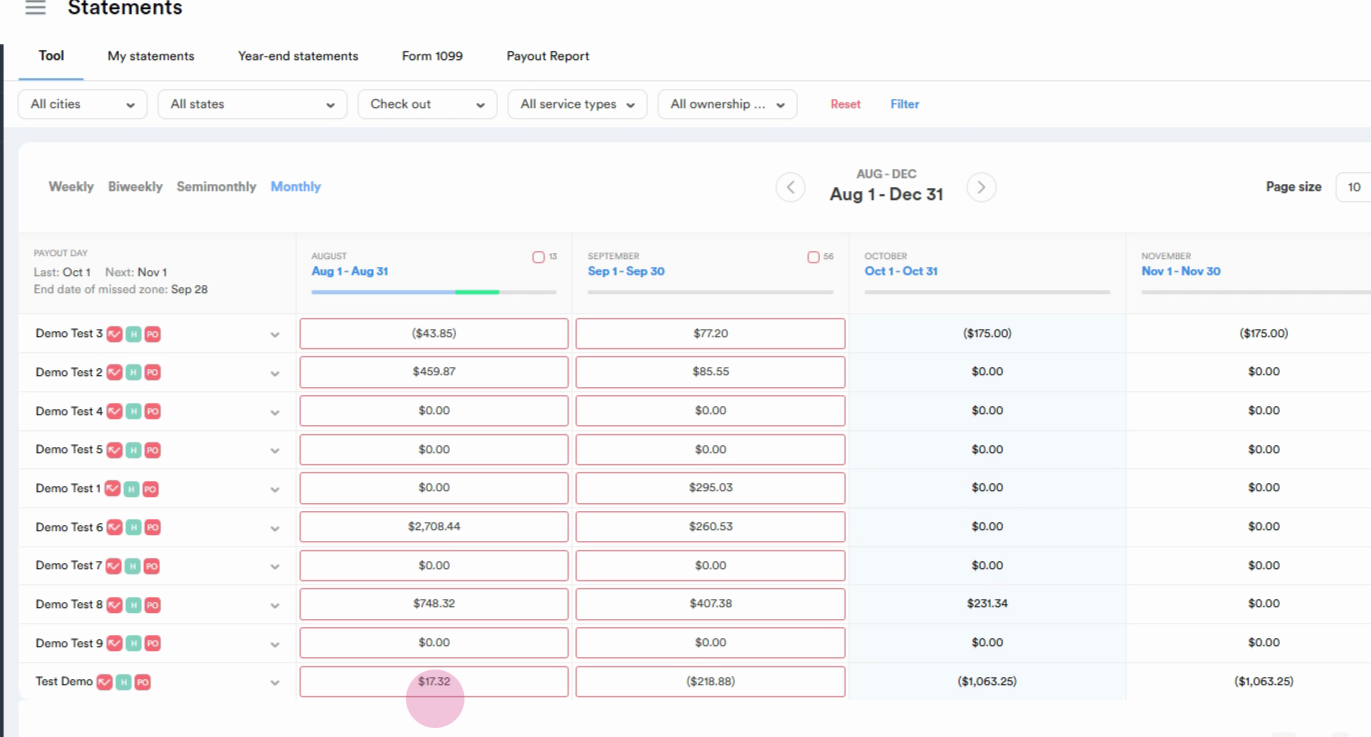
Step 2: Choose the tool from the upper part. On the left side of the page, you'll see the owners.
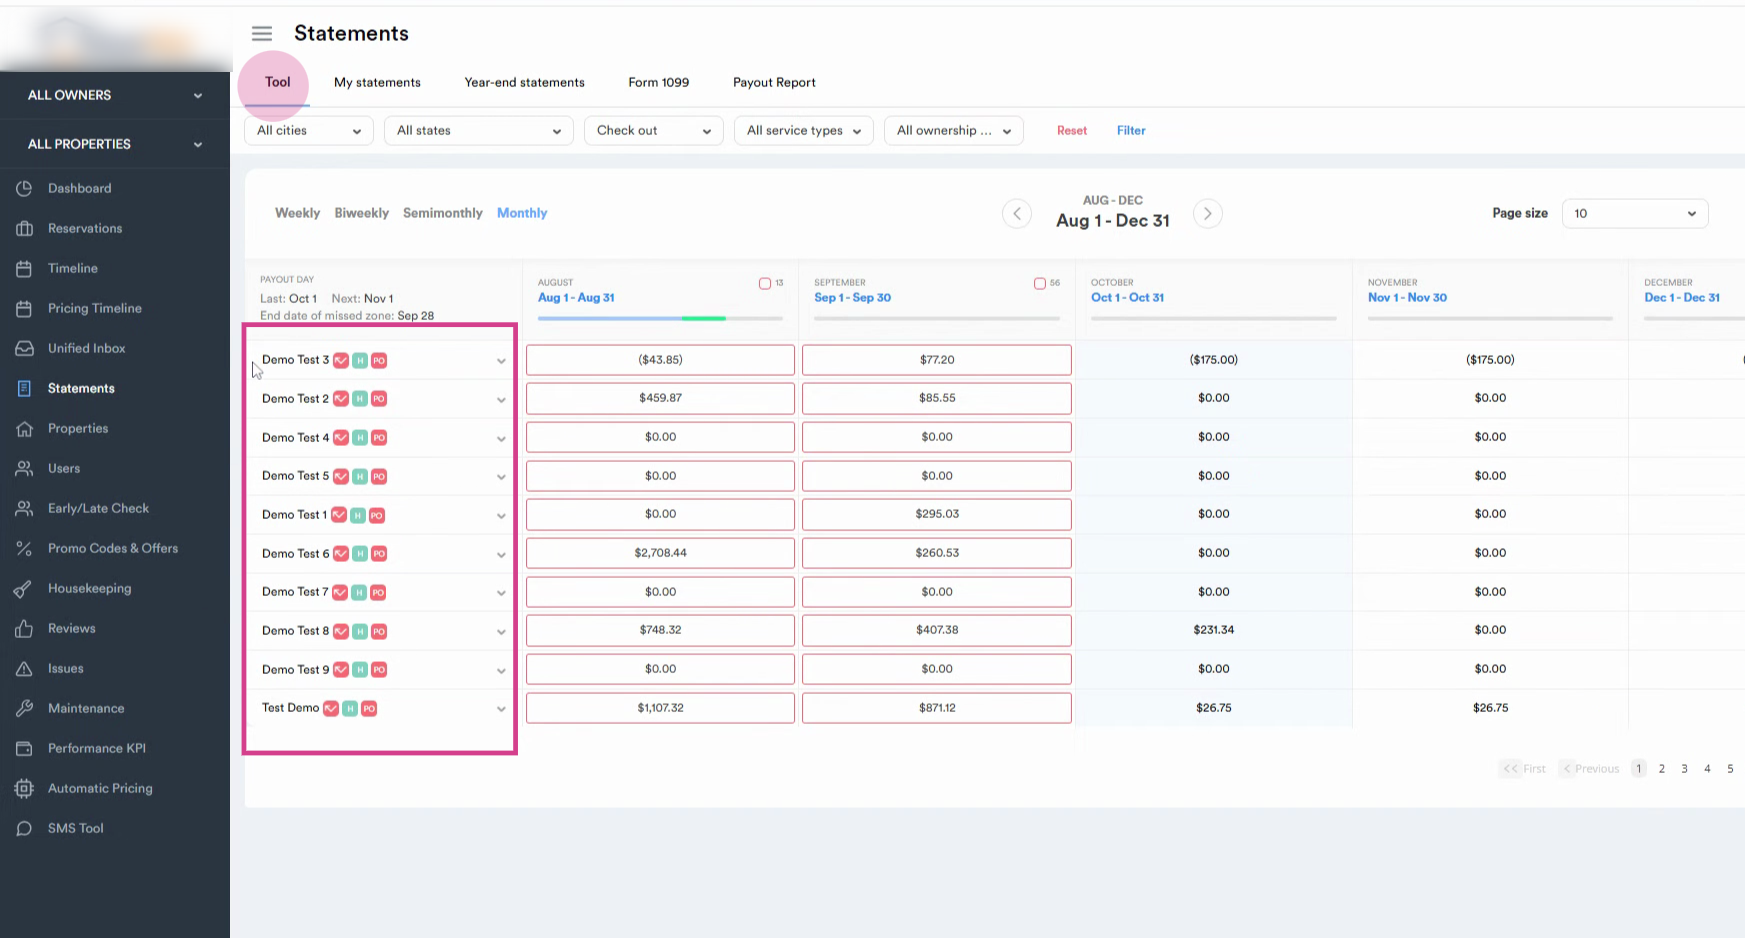
Step 3: Choose the time period for which you want to generate the statement.
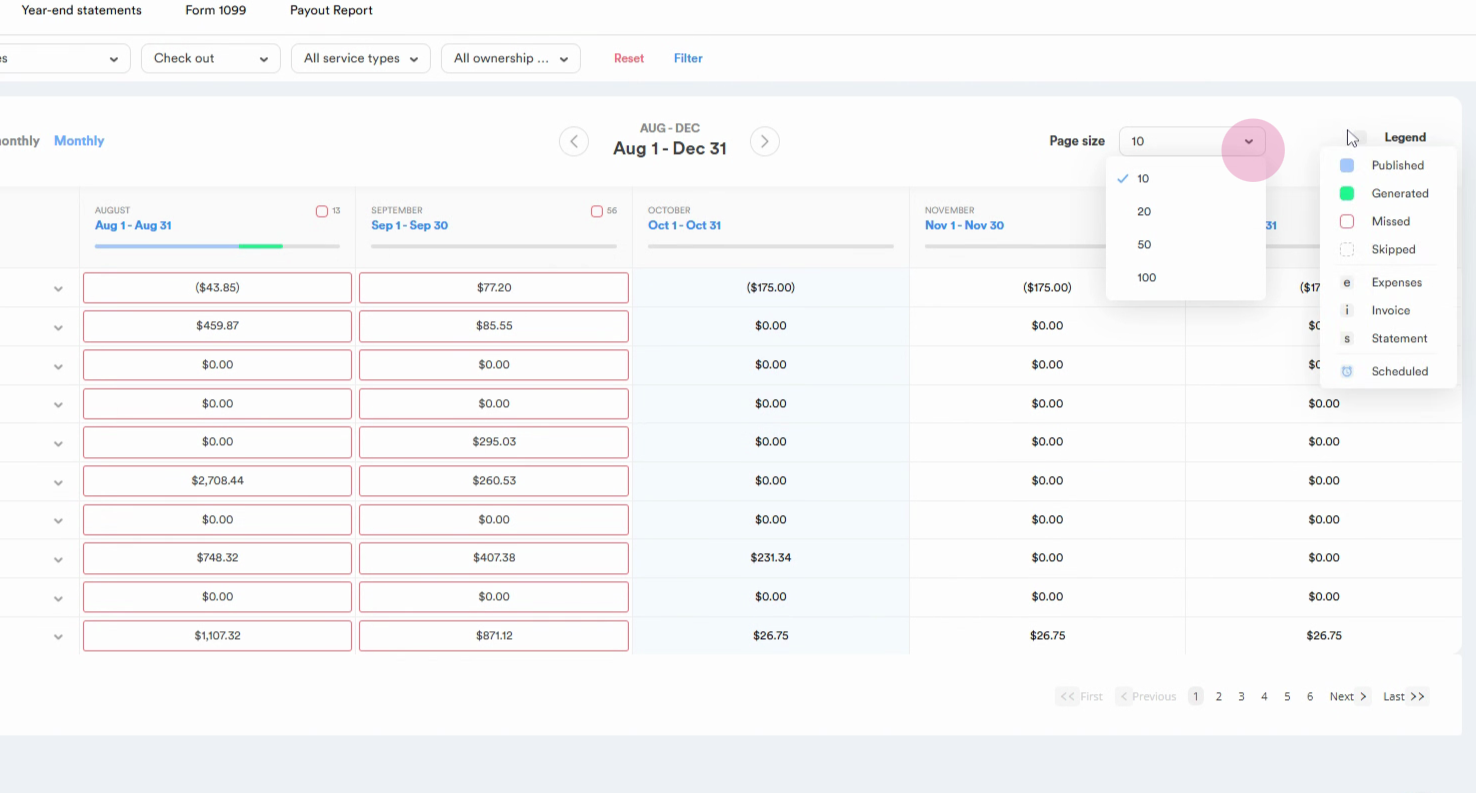
Step 4: Adjust the page size from the drop-down menu. Choose the size of the page. The legend indicates the coloring and symbols used.
Step 5: Click on the box beside the owner's name, from the dropdown, choose the "Reservation Overview"
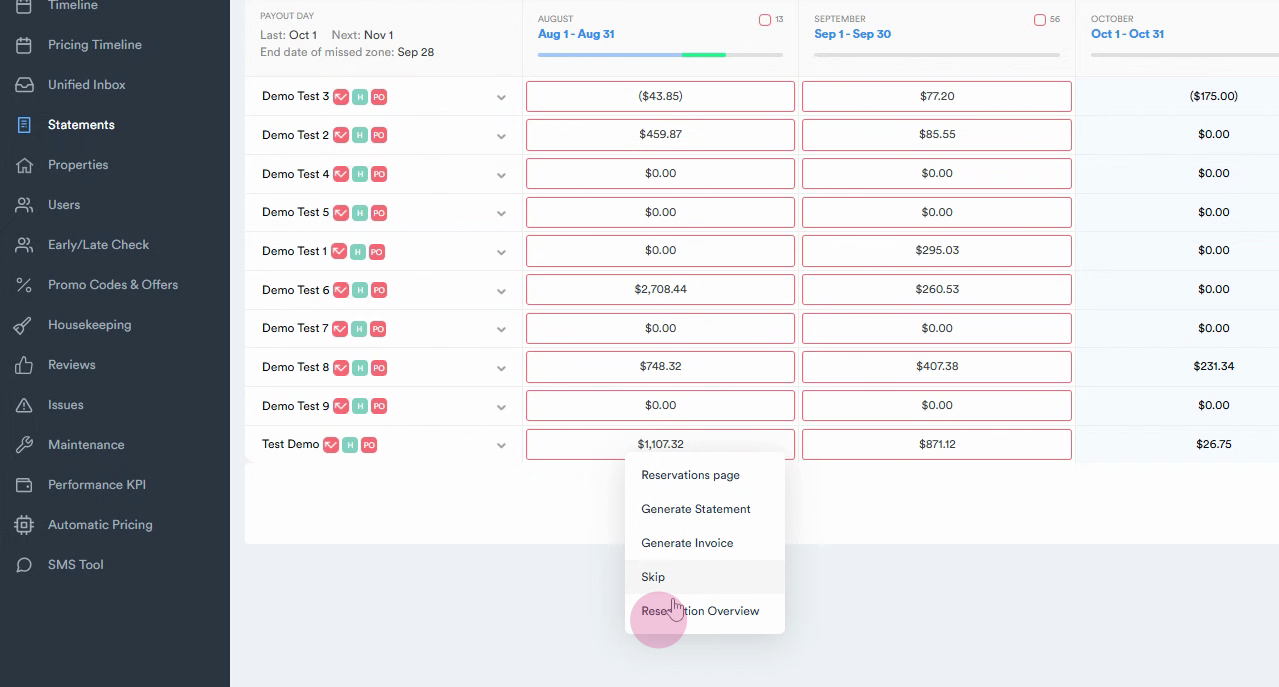
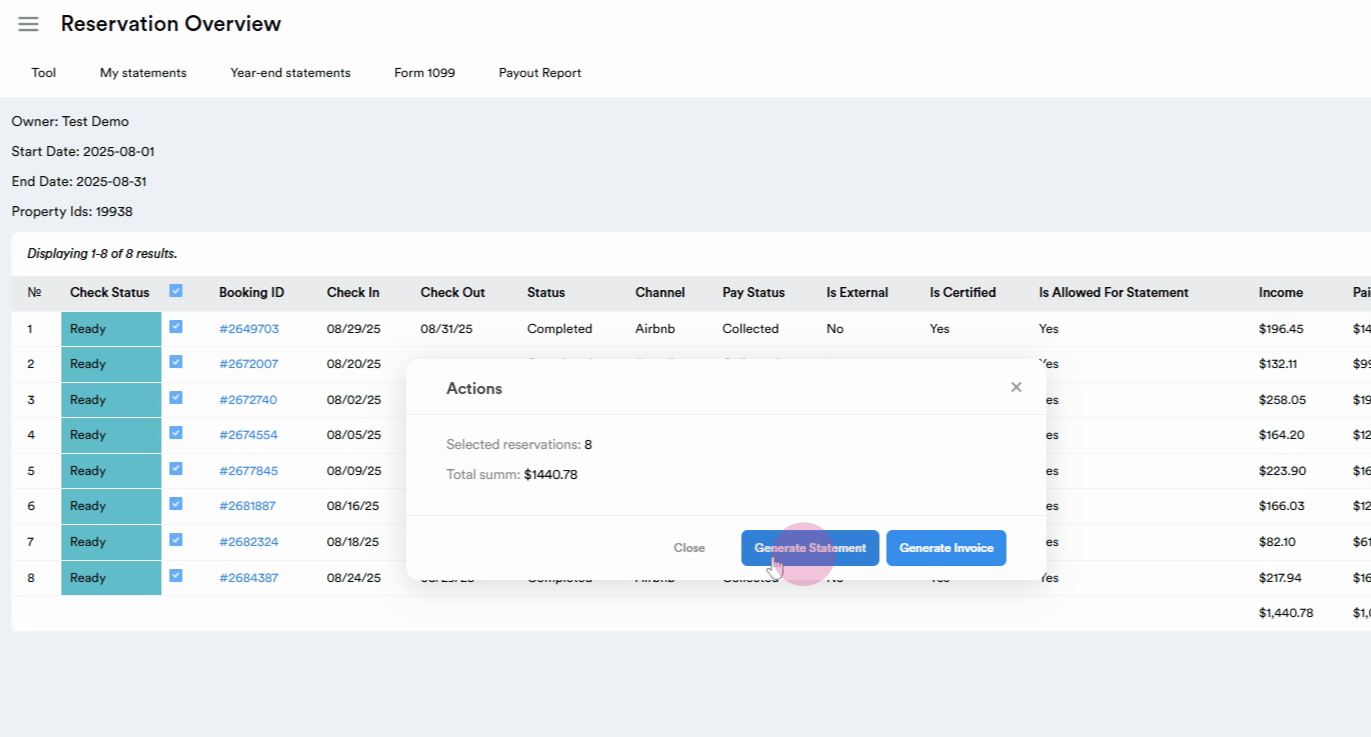
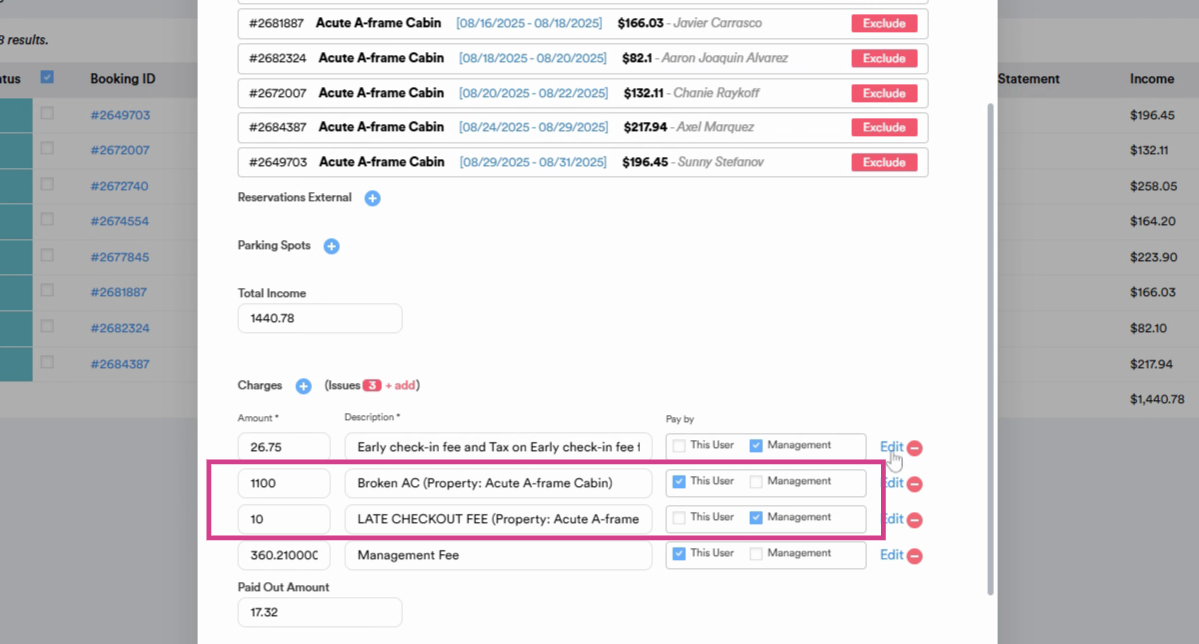
Step 6: On the "Reservation Overview" page, you can view all the reservations that are ready to be included in the statement. By marking the "Check Status" box , the system automatically selects all the reservations. Booking IDs are clickable if you need to check any reservation before generating a statement simply click on it. Next, click on generate statements once you've chosen all the reservations.
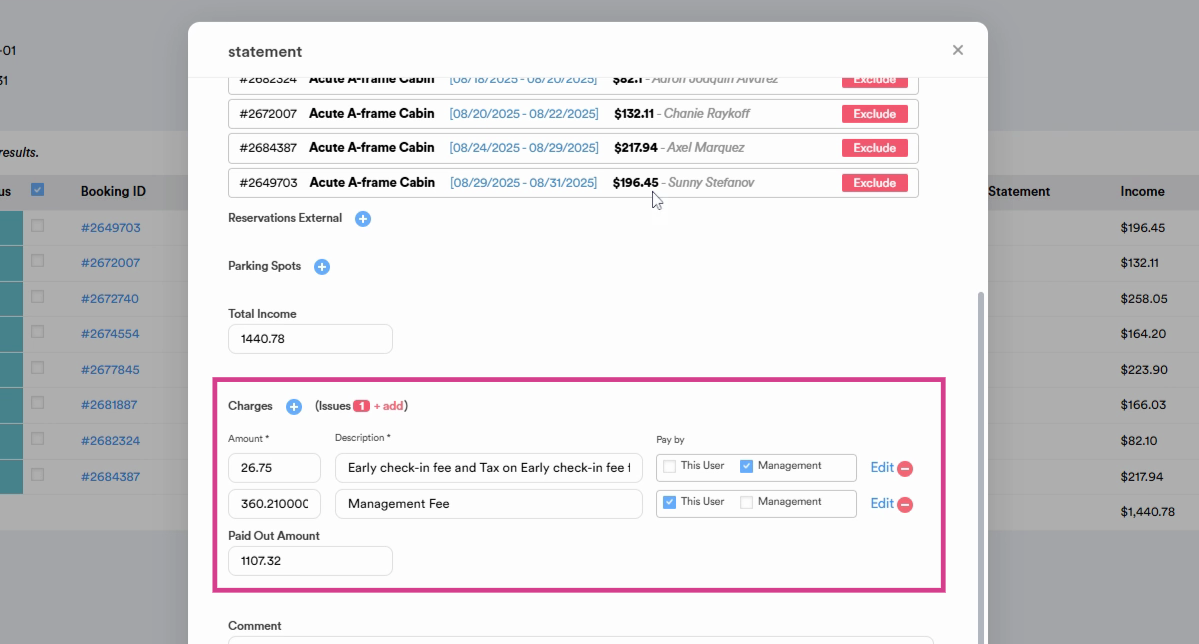
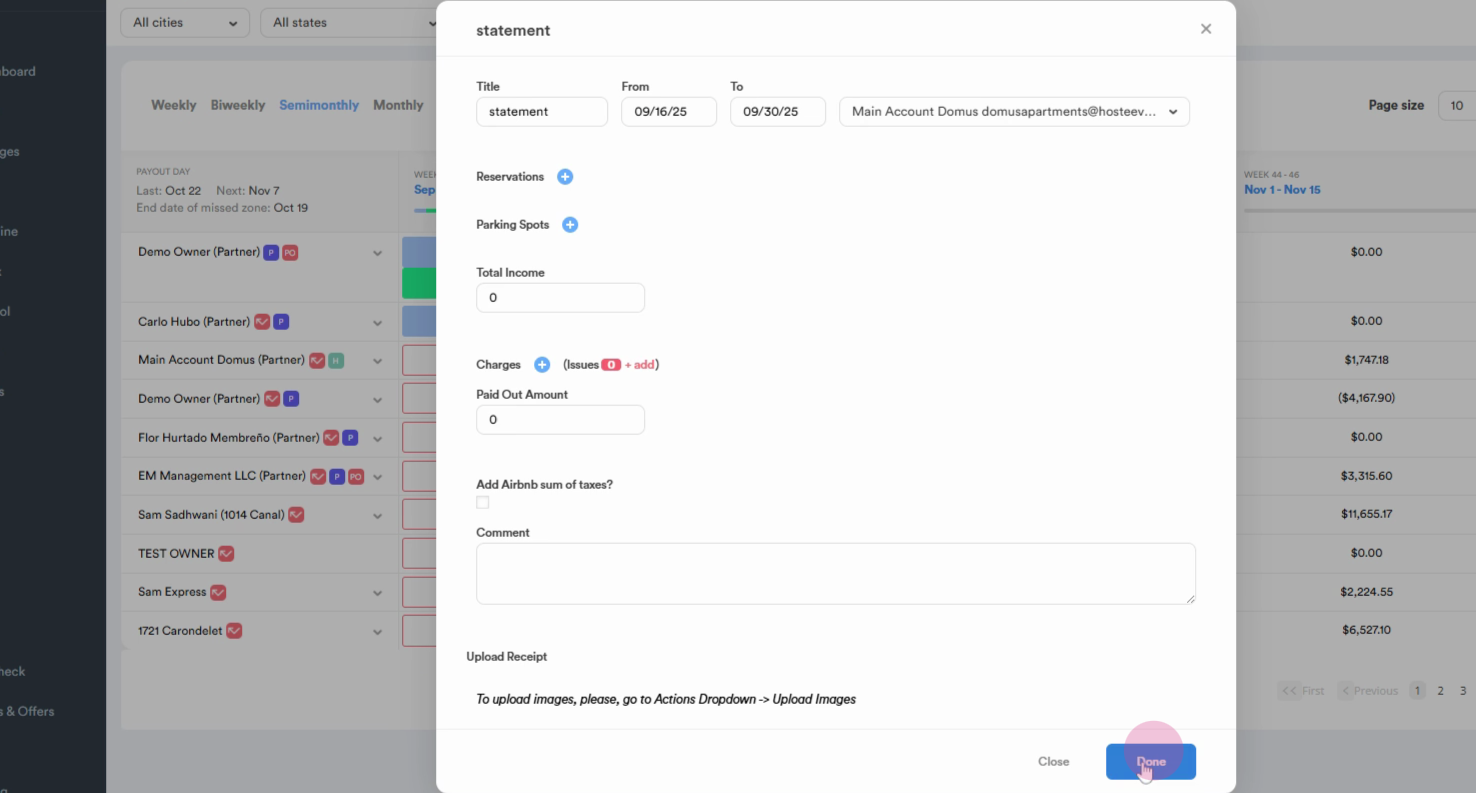
Step 7: This will show you all the reservations included in the statement, the time period, and the total income. Scrolling down, you'll find the expenses added to the statement, like early check-in fee and management fee. The management fee is automatically deducted from the income based on the initial set up . The "Paid By" option indicates who is responsible for each expense. "This User" stands for the owner.
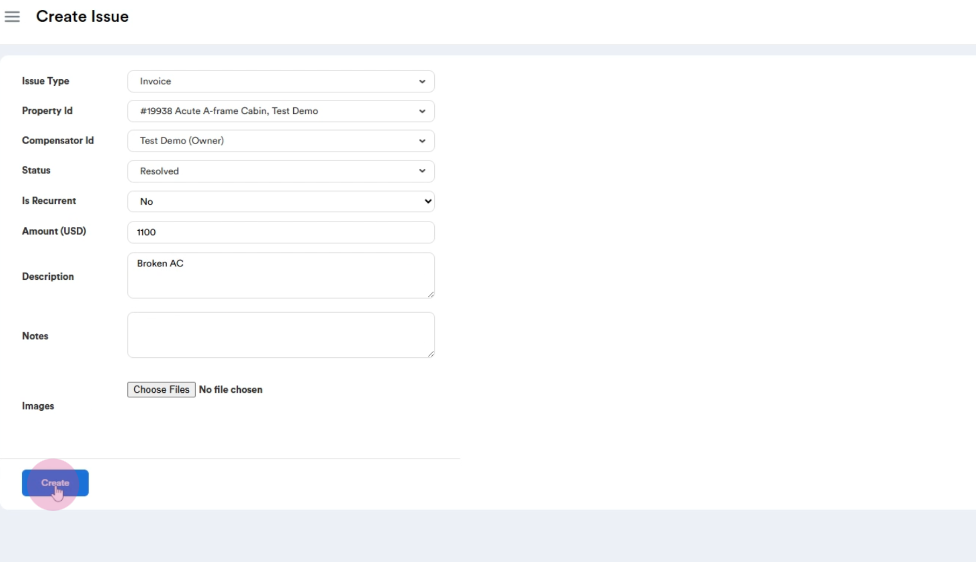
Step 8: In order to create an expense, navigate to the Issues tab. Then press the "Create" button.
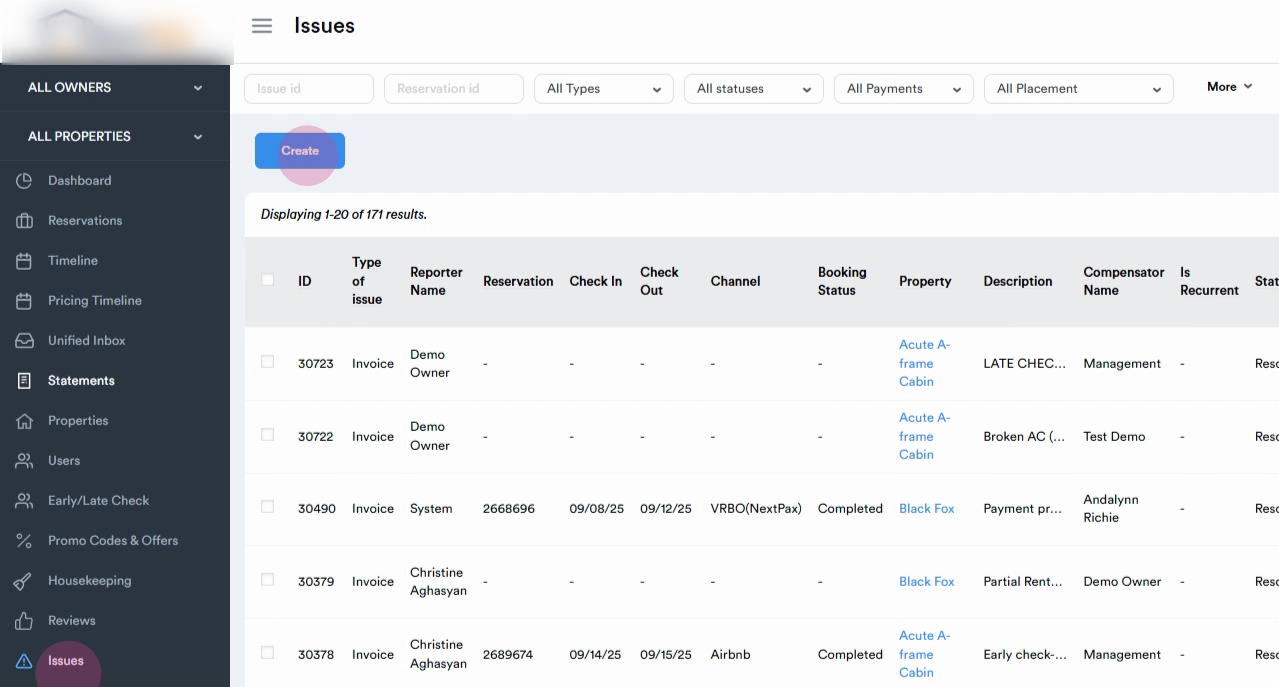
Step 9: Fill in all the required fields. The issue type is always "Invoice". Select the right "Property ID". The compensator ID can either be the owner or management. If we need to reimburse the owner, we select "Management" as the compensator, meaning that Management should pay compensation to the owner. If we want to do the opposite, we select "Owner". For now, let's select the owner as the compensator, implying that the owner should cover the expense. The status should be set to "Resolved". If you want to make this a recurrent expense, simply click on "Yes". If not, leave it as "No". Let's now input the amount, for example, 1100 $. After add a description of expense, let's say broken AC. Notes section is for internal use. To finalize the process, simply click the "Create" button.
Step 10: Navigate back to the "Statement" tab. Click on the outlined red box beside the owner's name. And select "Reservation Overview" from the dropdown.
Step 11: Modify the expense if needed by clicking on the "Edit" button.
Step 12: If we want to bill the expense partially, we can do so by clicking the edit button. Here, we can change the amount to $500 from the original $1,100. The payout changes to $670.32 accordingly. Click on "Done".

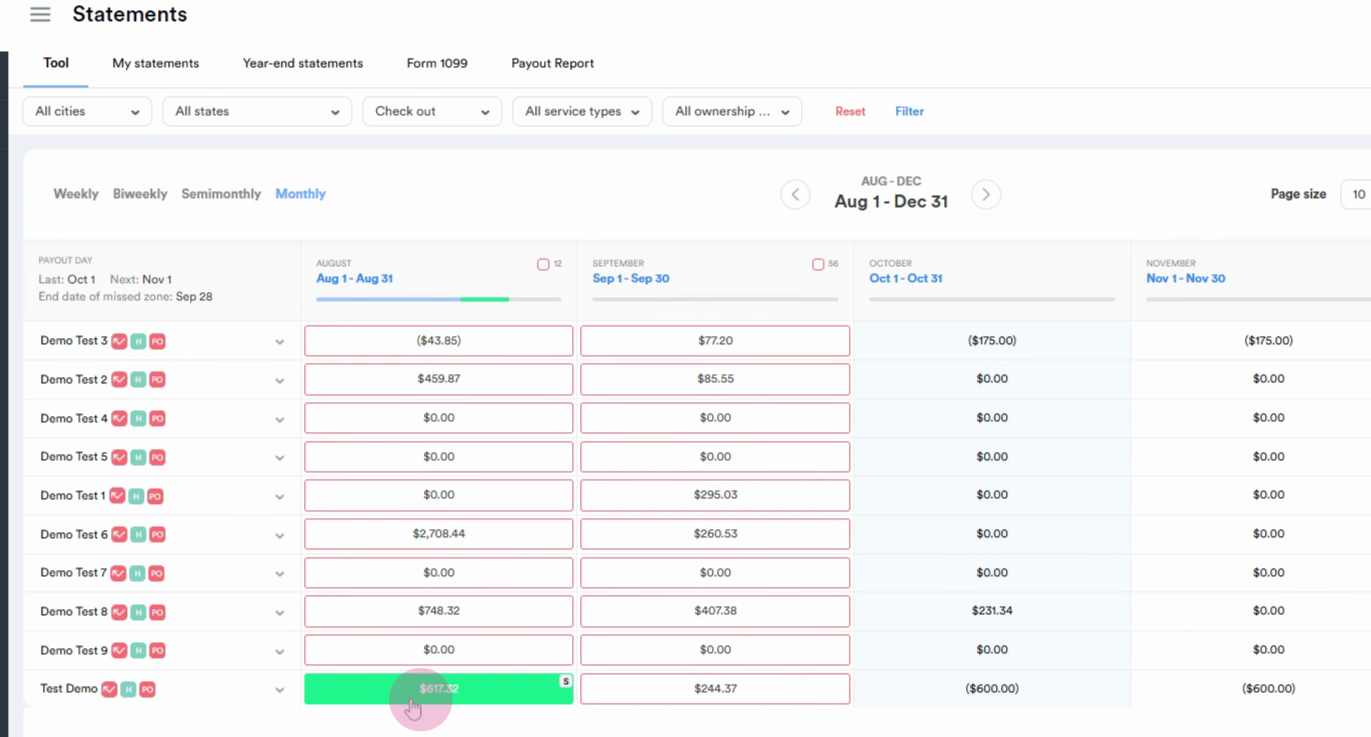
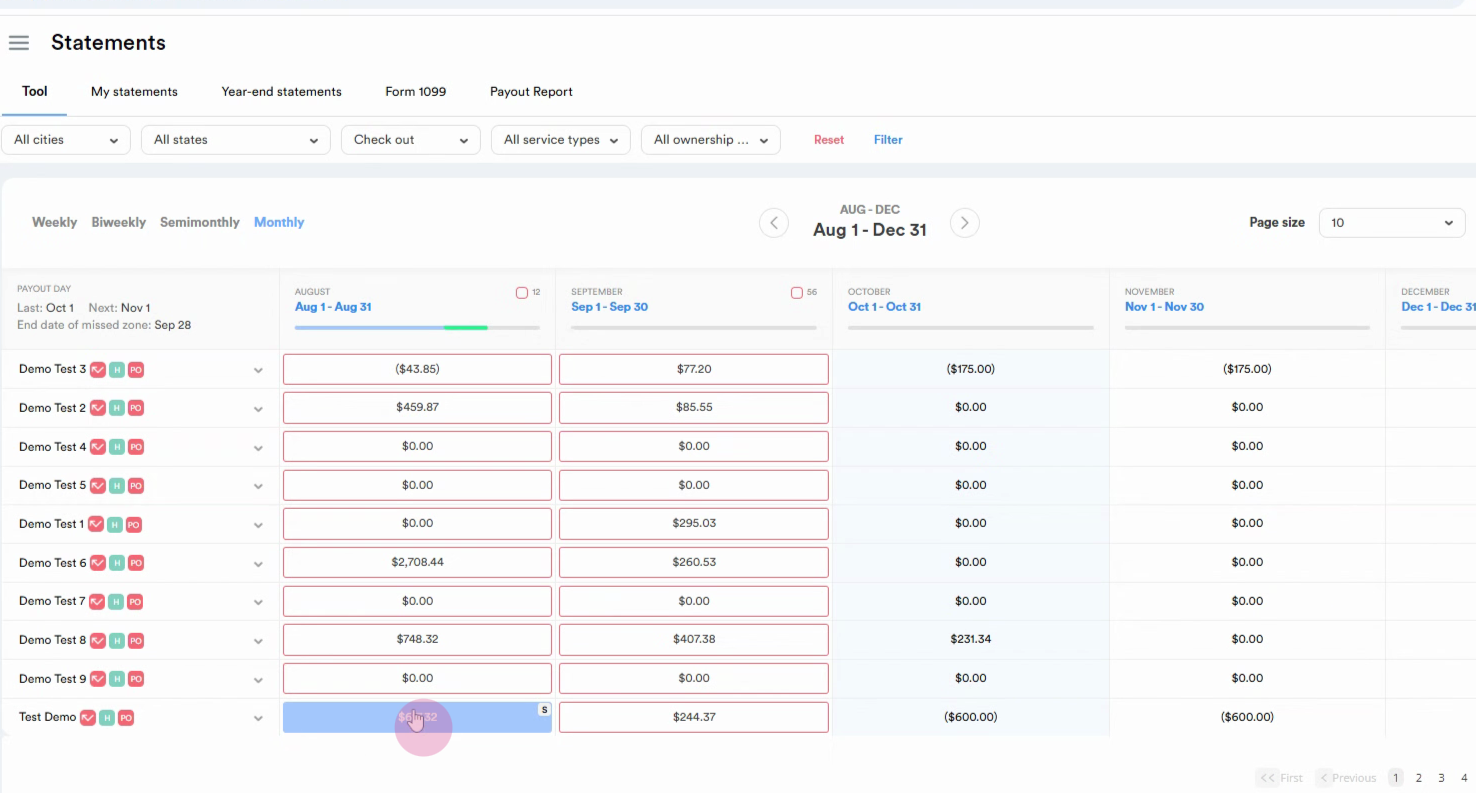
Step 13: The system will confirm that the statements have been generated, indicated by the color green.
Step 14: If you want to view the statement before publishing it, choose the 'View online' option from the dropdown.
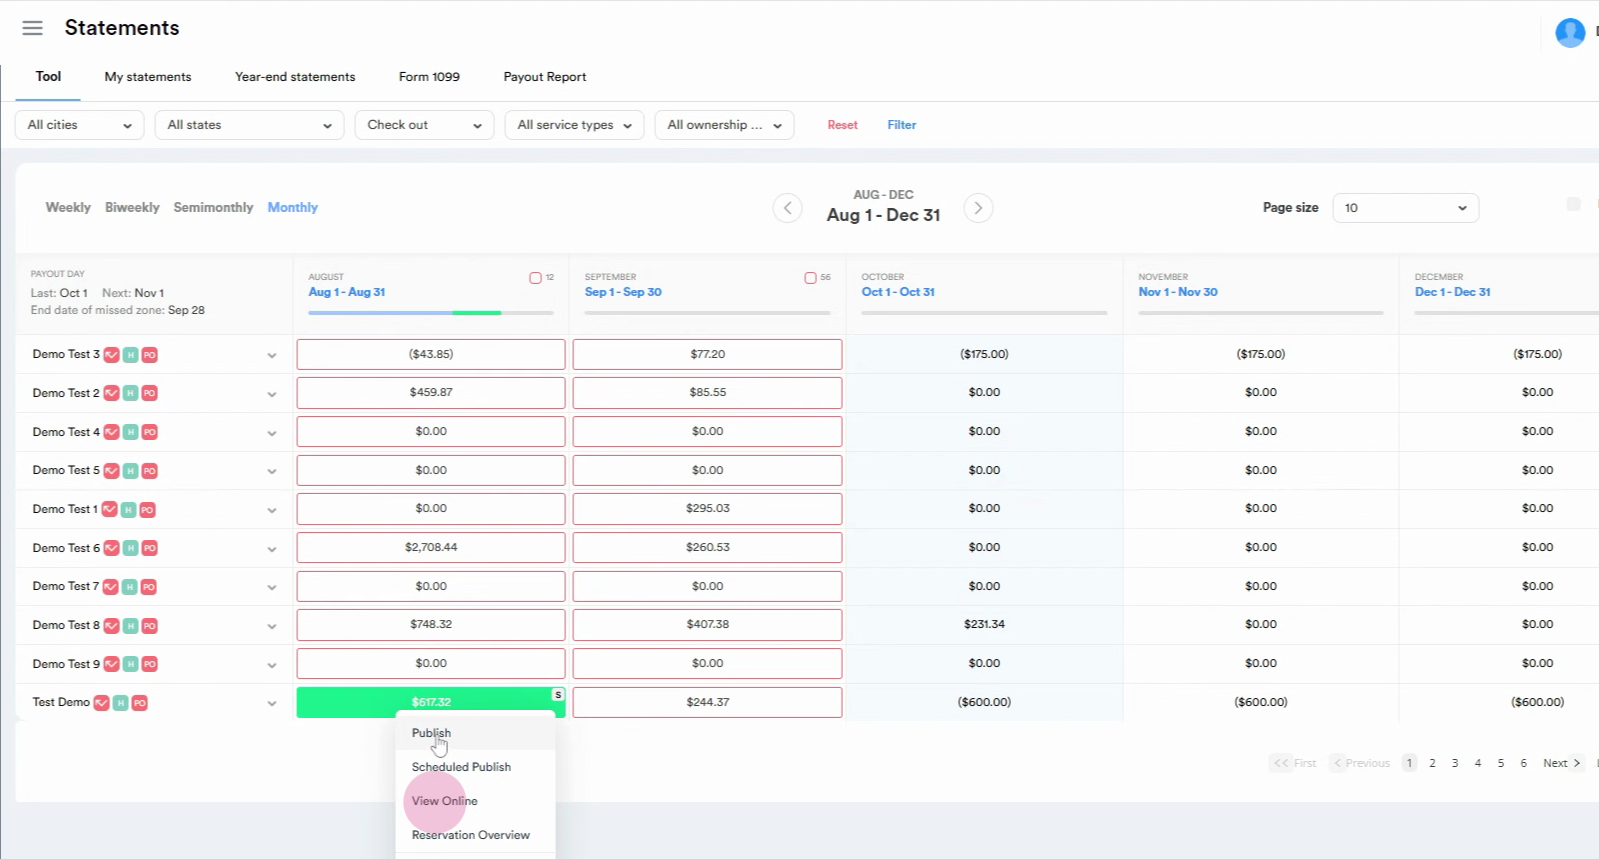
Step 15: After clicking 'Publish', the statement will turn light-blue, signaling that the owner can now view the statement on their end.
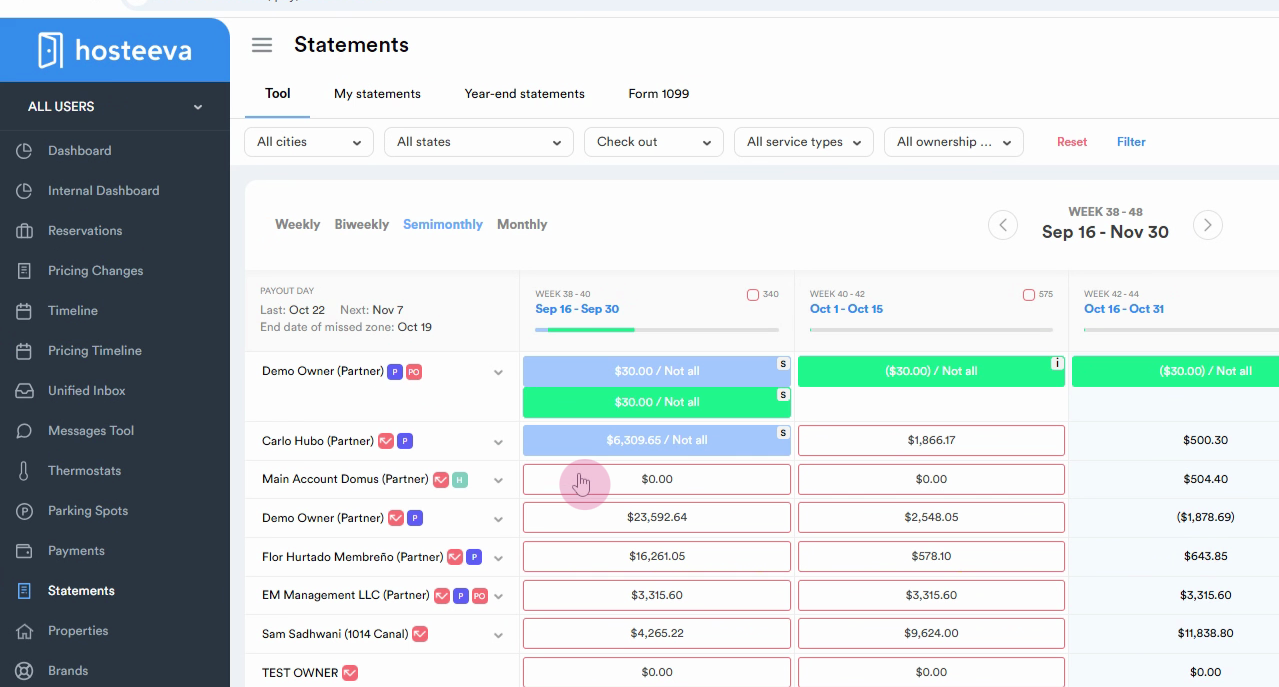
Step 16: Click on the box next to the owner's name.
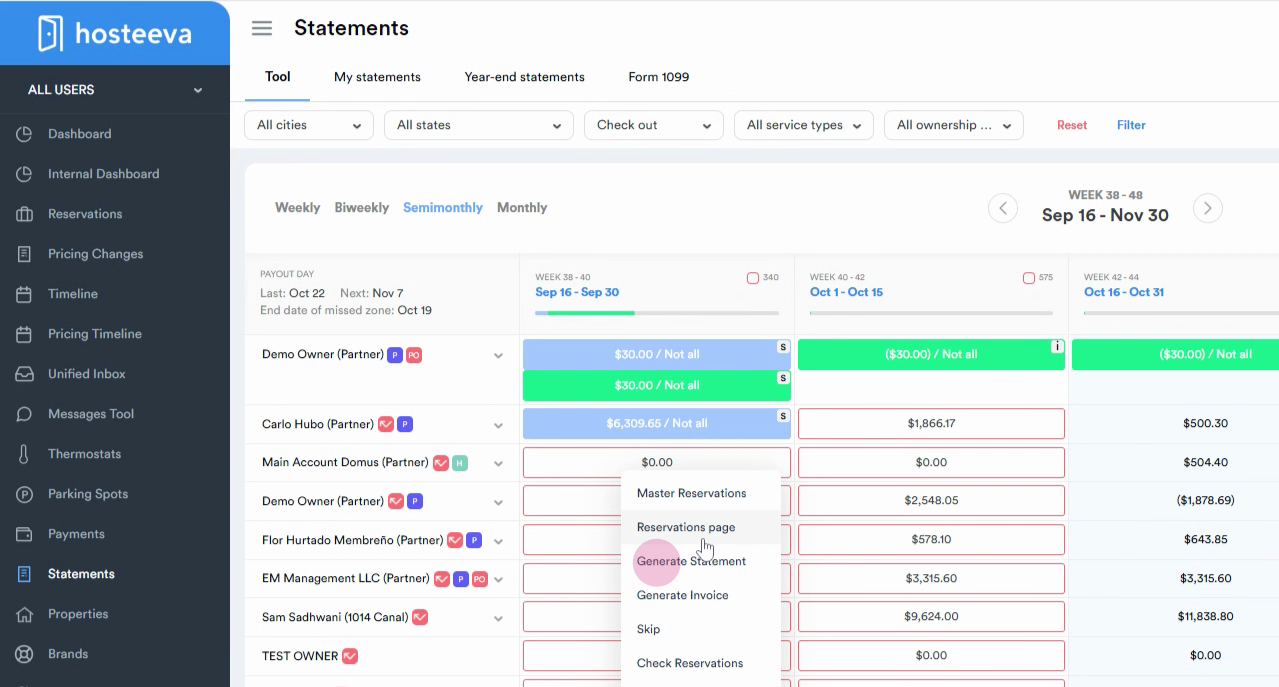
Step 17: A dropdown menu will appear. Select the "Generate statement" option.
Step 18: Confirm that the income is zero, which means the payout for this period should also be zero. Click on Done and wait for the system to generate the statement.
Step 19: Once the statement is generated, it will be indicated by a green color. Click on the statement again and from the drop-down menu, select Publish. This action will make the reservation visible to the owner.
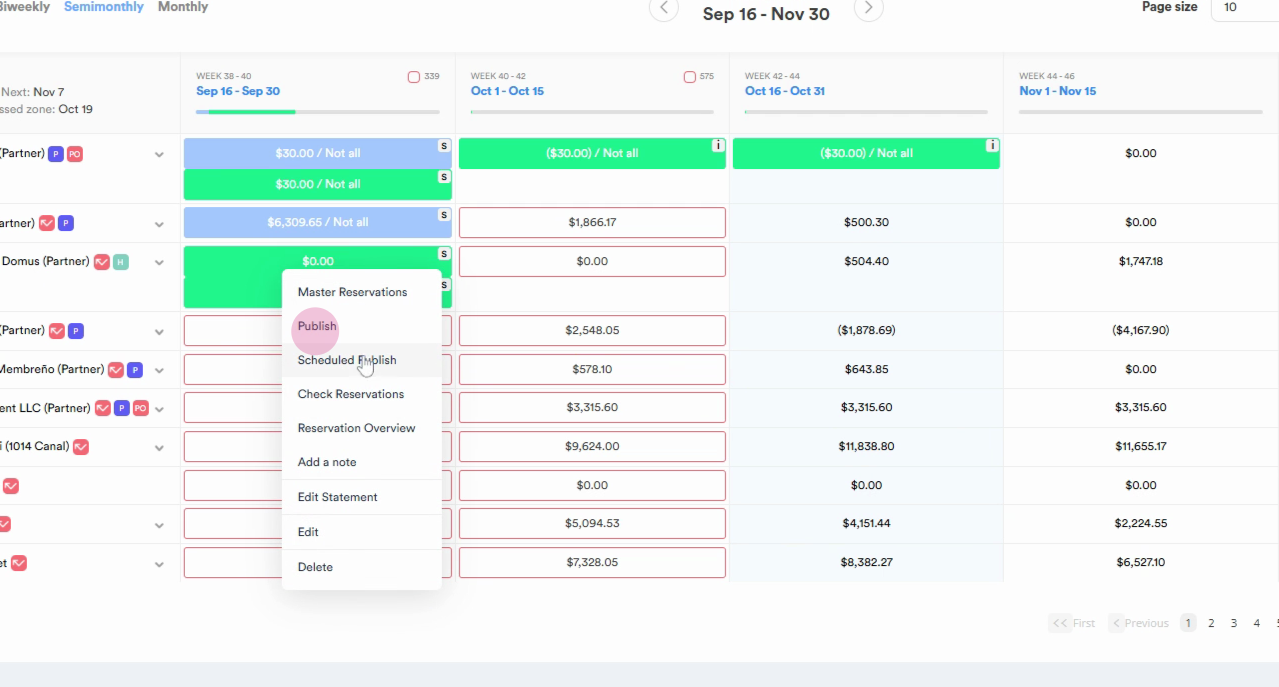
Step 20: Wait for the system to publish the statement. Once published, the statement will be indicated by a light blue color.
Thank you!