Dive into the process, requirements, and types of documents needed for guest ID verification.
Step 1: Understand that if the cardholder differs from the reservation holder, it's necessary to have the cardholder's documents as well.
Step 2: Know that the usual documents requested for ID verification are the guest's passport, ID, or driver's license.
Let's explore why ID verification is necessary.
Step 1: Realize that ID verification ensures the reservation holder and the guest are the same person. This is crucial for security purposes, especially in units without a front desk where the check-in process is fully automated.
Step 2: Understand that there's no one on-site to check guest documents and identity. Therefore, it's important to verify guest documents beforehand to ensure the guest is not underage and complies with company or owner requirements.
Step 3: Be aware that some hotels may not be comfortable accommodating guests who live nearby. For security reasons, it's necessary to check the guest's address and the distance between their residence and the hotel. Documents also help win disputes when guests dispute reservations and claim they didn't pay. Owners often request documents for property reservations where they need to collect payment directly from the guest. They may request to disable ID verification for websites where the website is responsible for collecting payment from the guest.
Let's look at what exactly is checked when reviewing guest documents.
Step 1: Check the document's expiration date and the guest's date of birth to ensure the guest is not underage.
Step 2: Verify that the name on the provided documents matches the reservation holder's name and that the cardholder and the reservation holder are the same person. It's also possible to request ID verification by asking for an ID scan or requesting payment after receiving the ID.
Now, let's learn how to verify the documents.
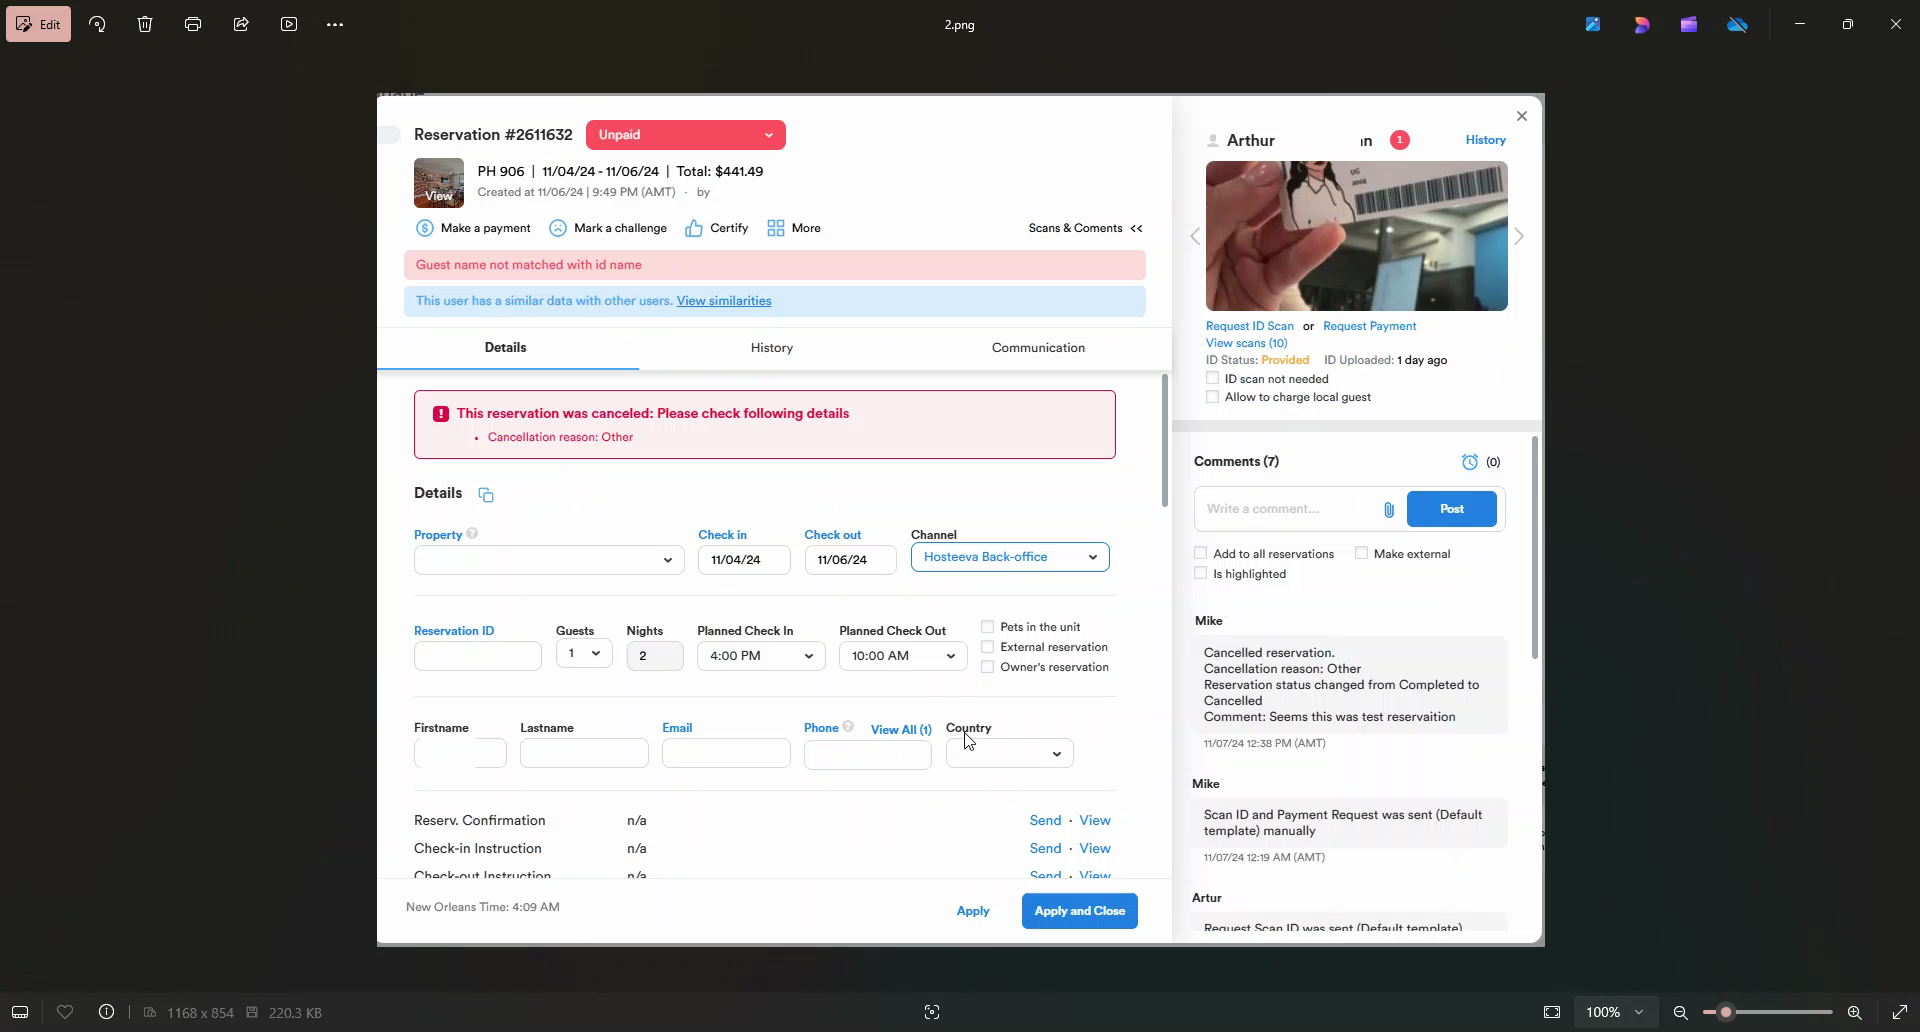
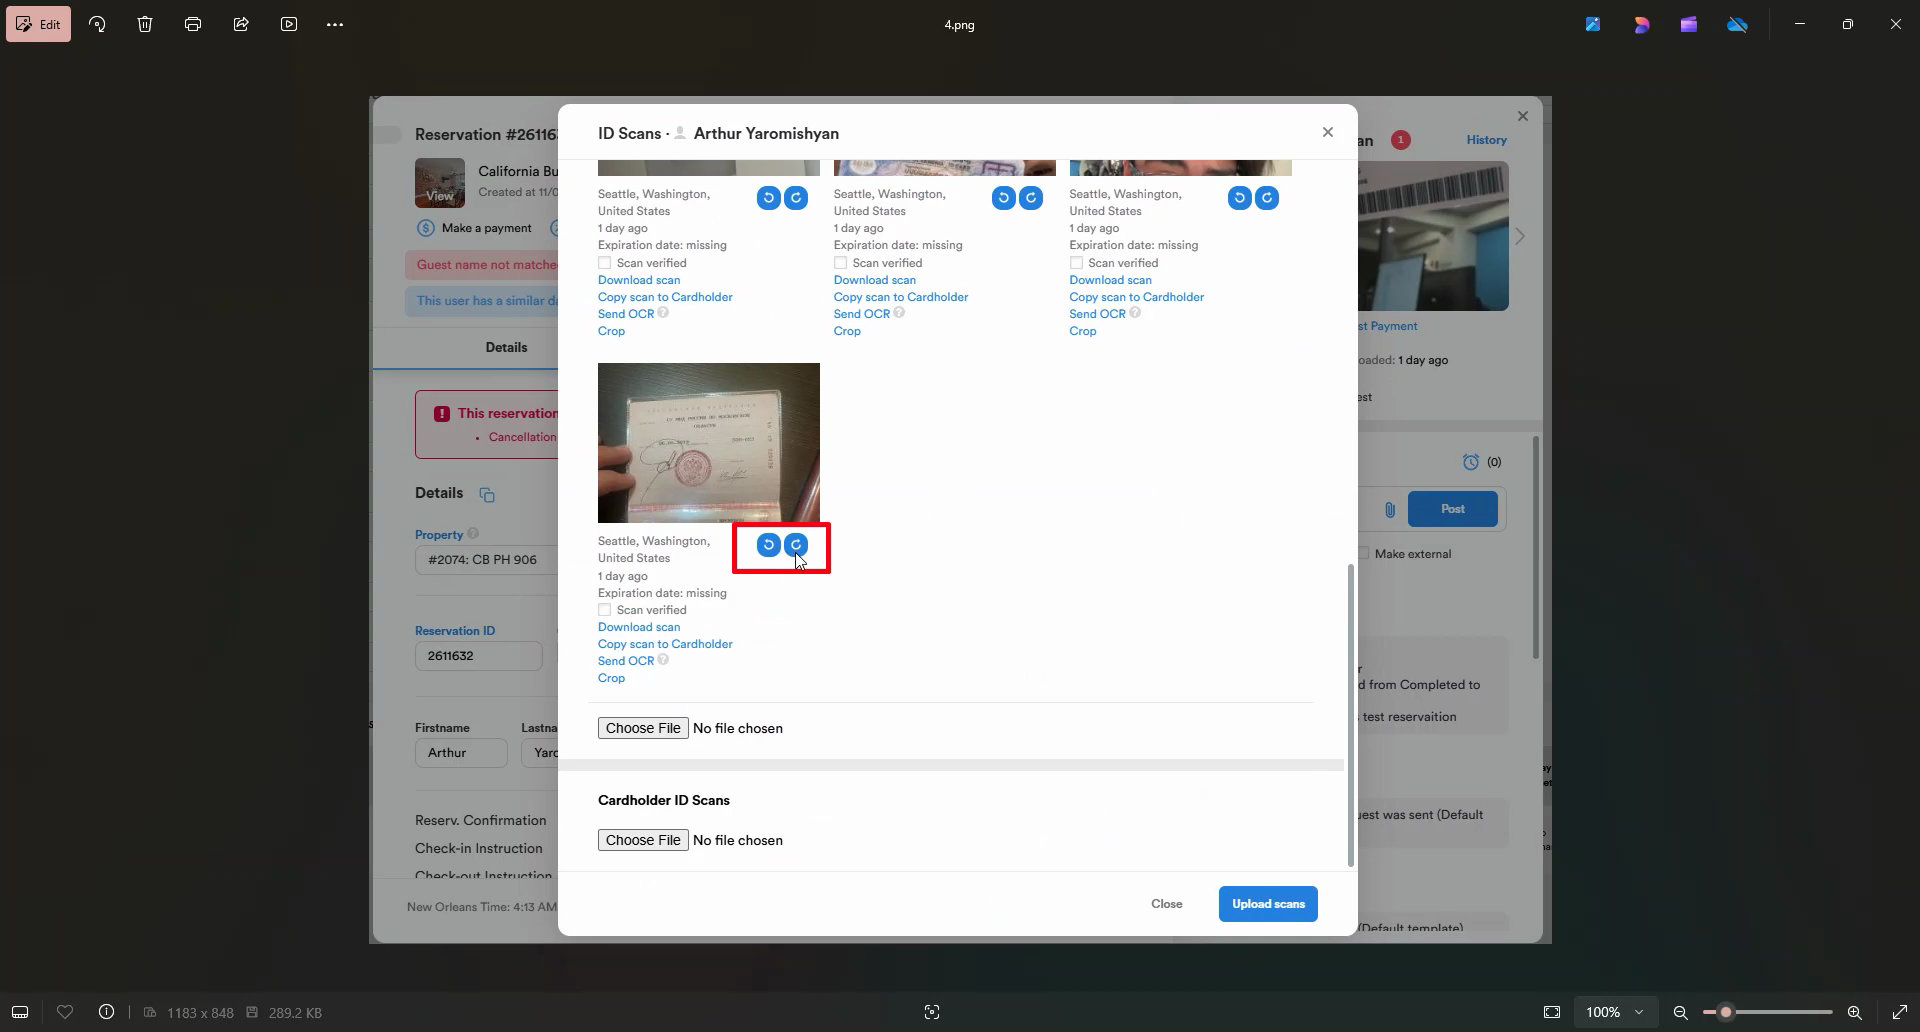
Step 1: Note that the ID status is provided. It could be partially provided, verified, not needed, or expired. Click on "view scans".

Step 2: Review one of the documents and click on "scan verified mark".
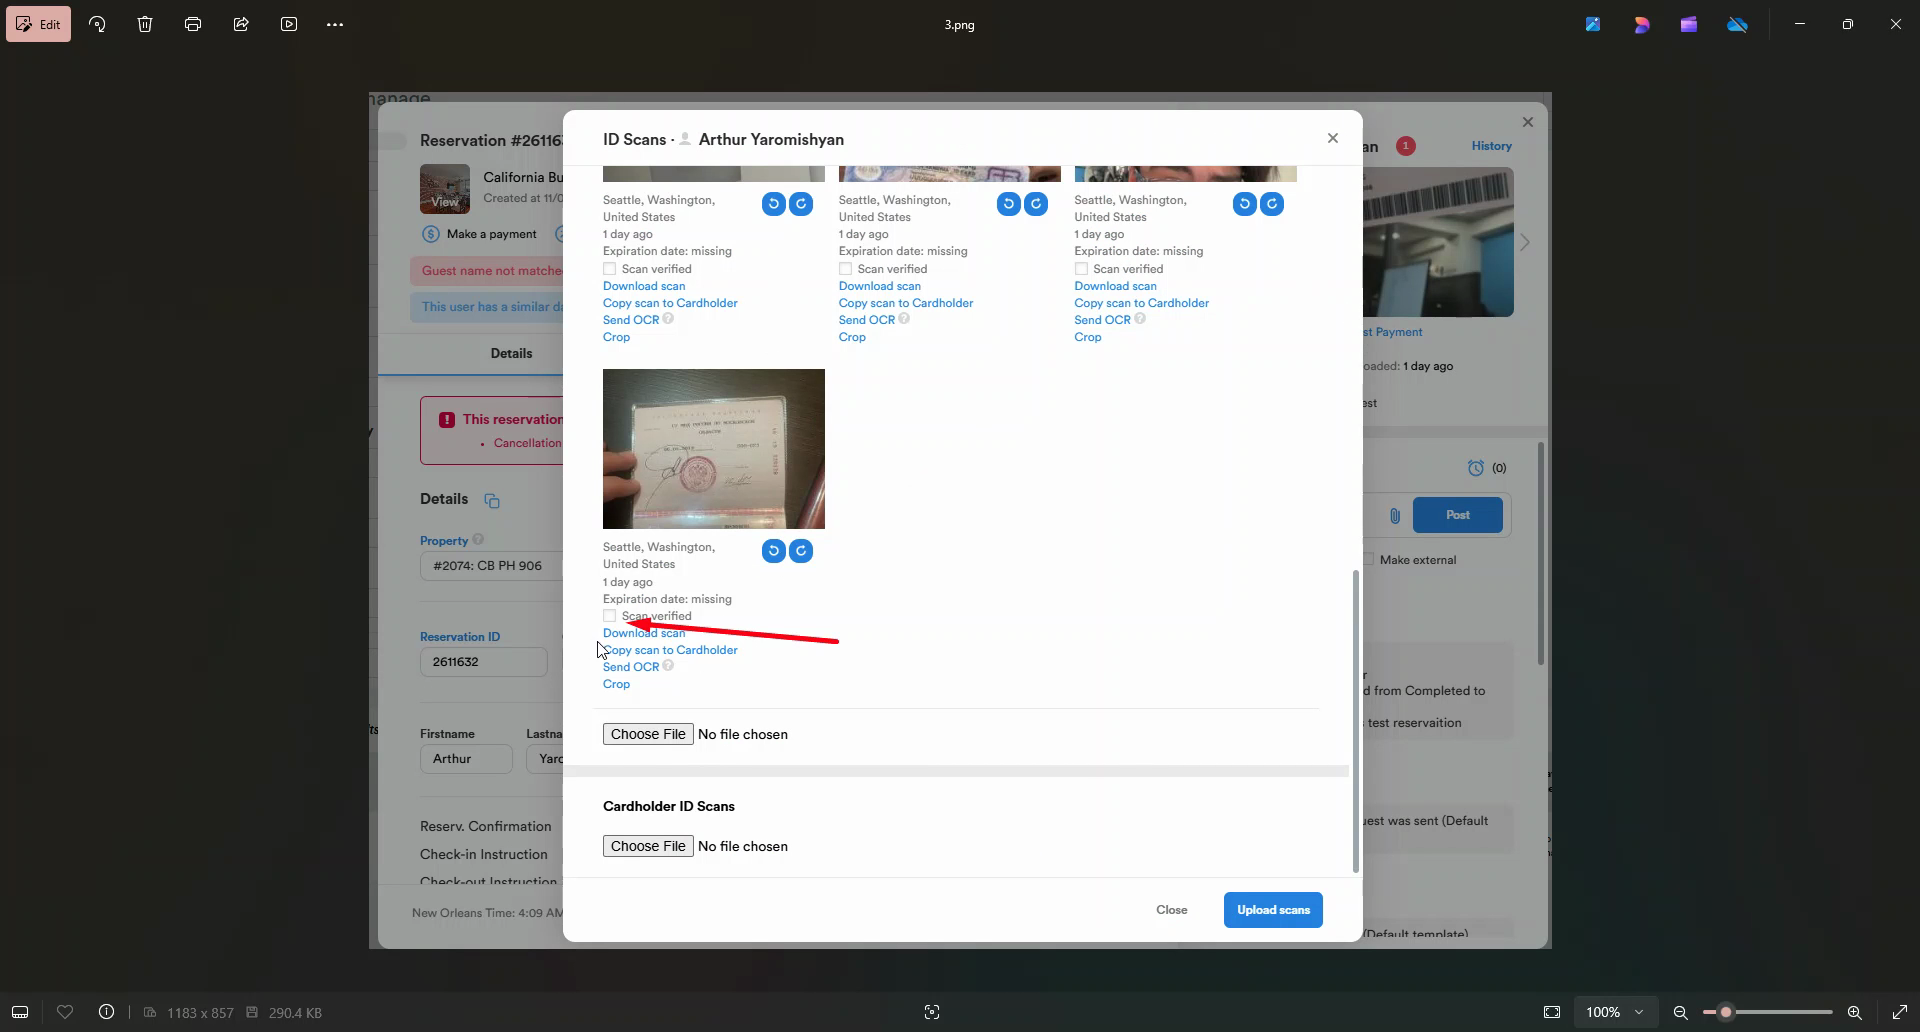
Step 3: After this, the ID verification status will be updated to "verified". Notice that the person who verified the documents and the time of verification are displayed. If the document needs to be rotated, use the rotation marks.
That concludes the tutorial on guest ID verification. Thank you for your attention.