In this article, you'll learn how to create Hosteeva vouchers and understand why they are provided to guests.
Step 1: Understand why we provide Hosteeva vouchers. These vouchers are typically issued in force majeure situations, such as emergencies, flight cancellations, natural disasters, or family emergencies. The vouchers are issued as a form of support and typically have a validity period ranging from 3 to 6 months. Prior to offering a voucher, we ensure to verify all relevant details with local management. In most cases, vouchers are provided for the same property within the same city, allowing customers to rebook their stay under similar conditions. Learn the three methods to create Hosteeva vouchers.
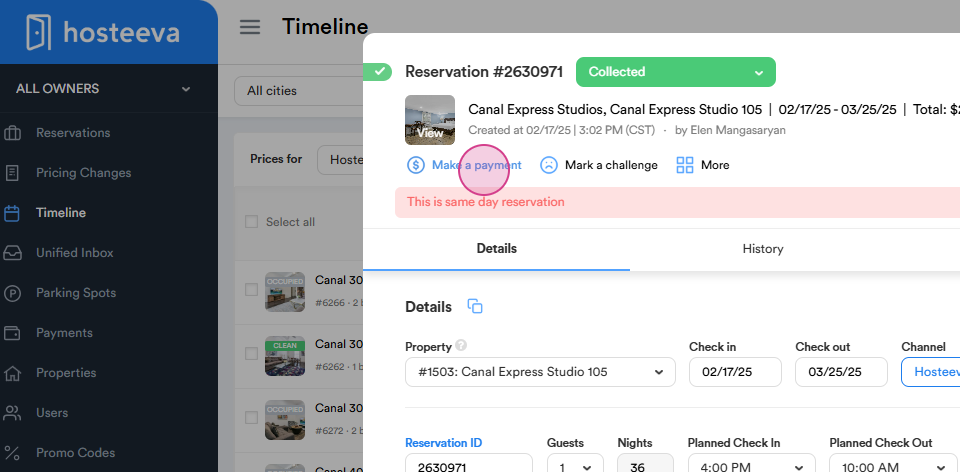
Step 2: Navigate to the Make a Payment option from the reservation dialog.
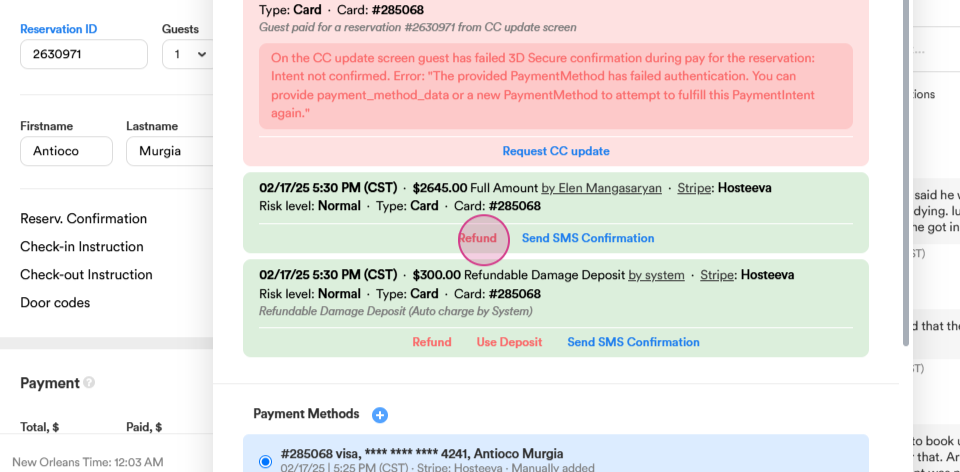
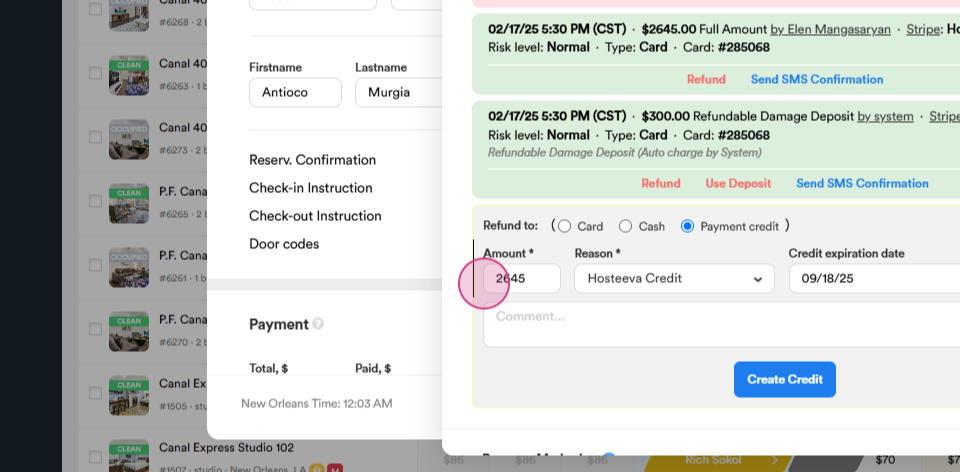
Select the Refund button from the payments of the guest. Notice three checkboxes: card, cash, and Payment Credit. Choose the Payment Credit option.
Enter the amount for the voucher. The reason is always Hosteeva credit. Set the expiration date. Leave a comment indicating who requested the creation of this Hosteeva voucher. Then, create the credit.
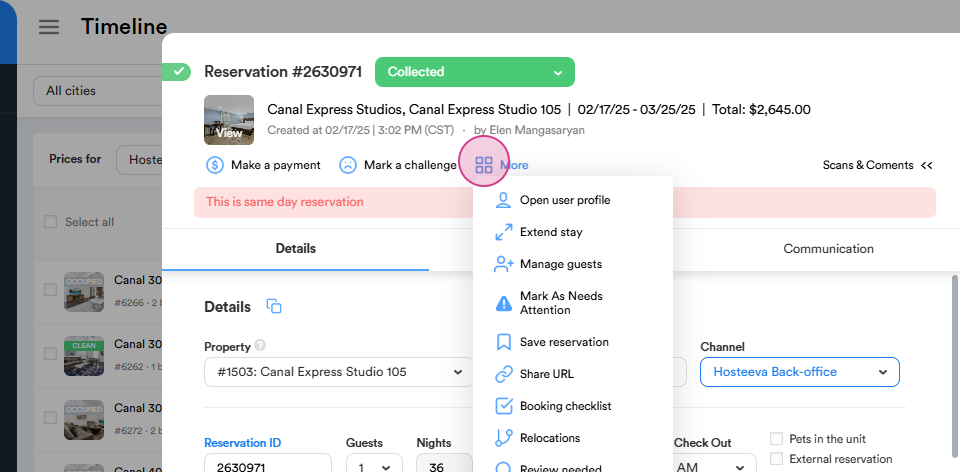
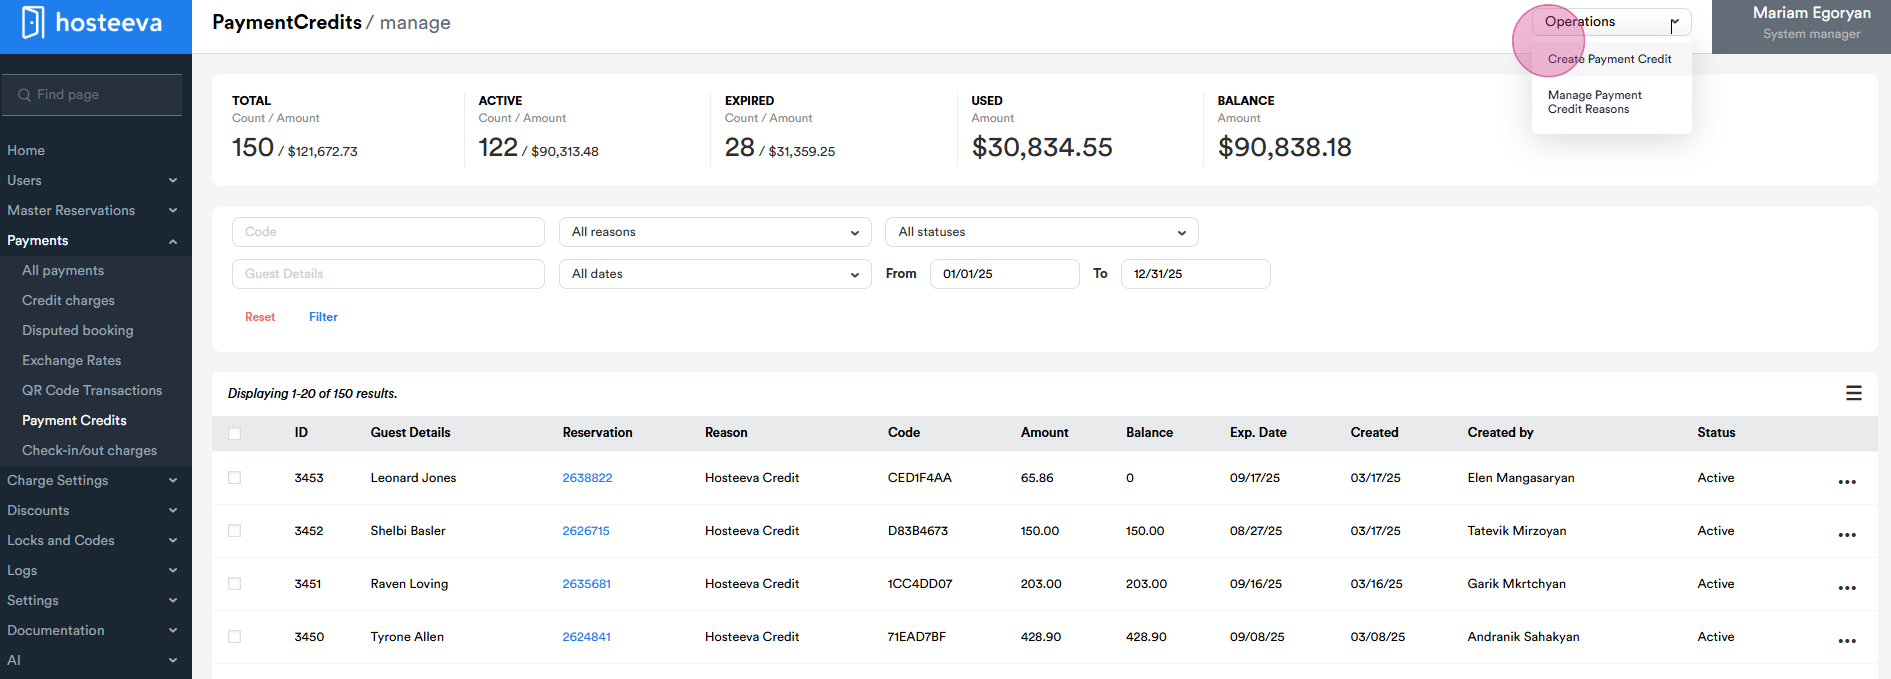
Step 3: Click on the More button. Select Create Payment Credit.
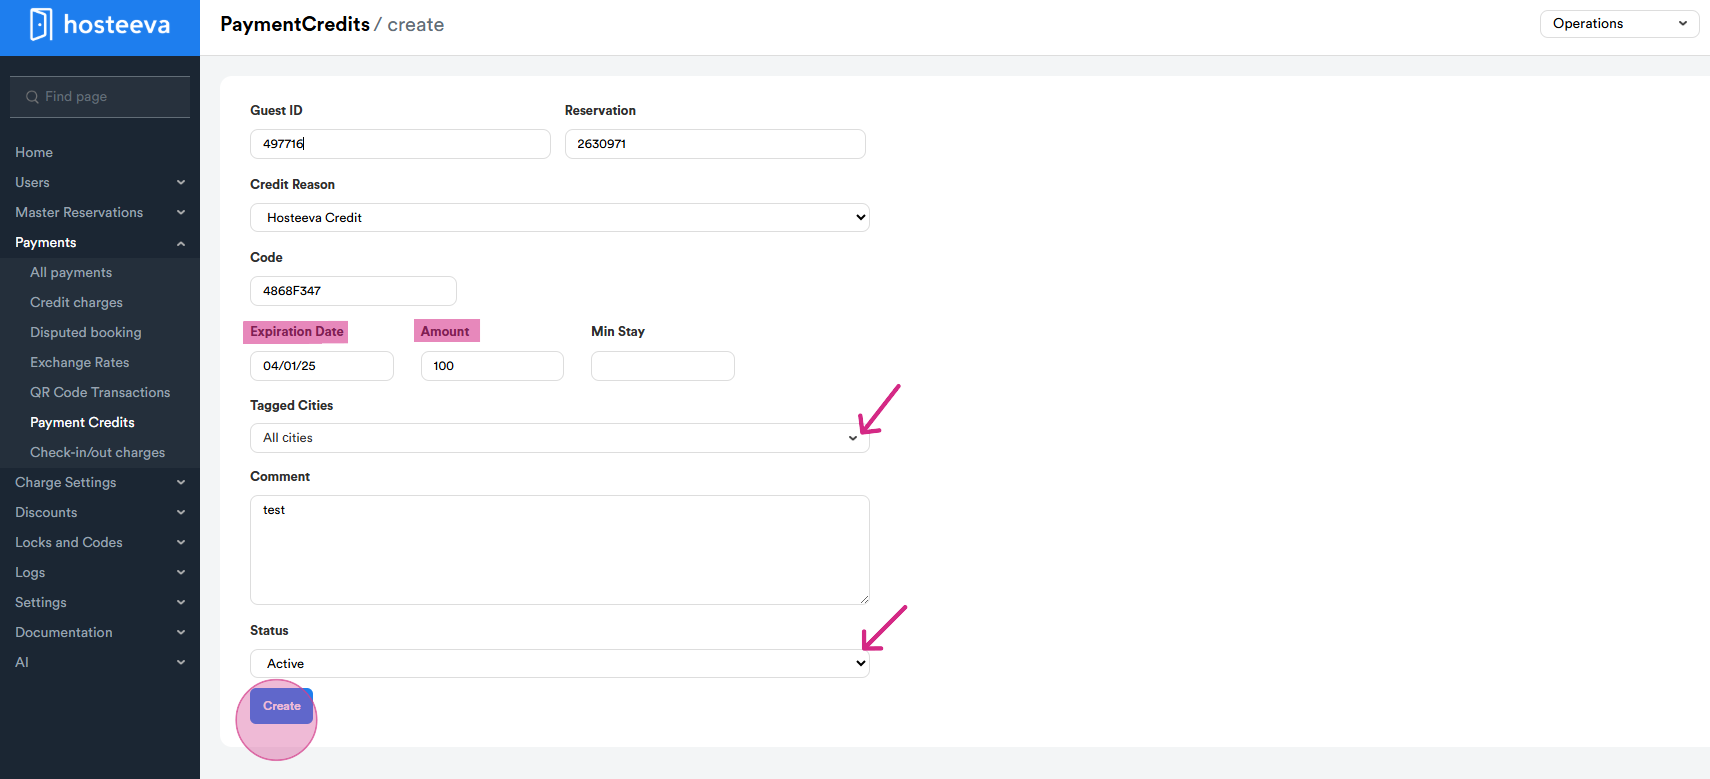
This will direct you to another page where you can explore the detailed process of how payment credits are created, including the steps involved. Set the expiration date and the amount. Choose the city. Usually, we give the voucher to the same property to avoid confusions. Leave a comment. Choose the status (Active, Expired, Disabled) and click Create.
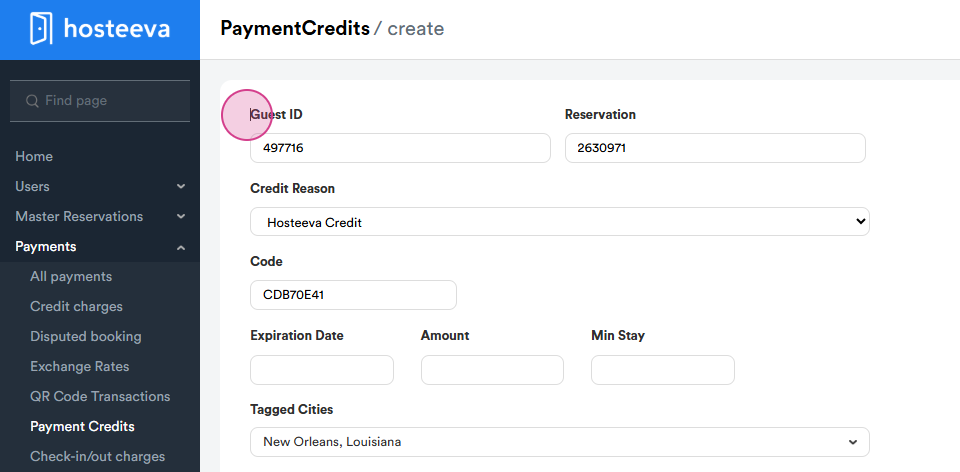
Step 4: Navigate to the admin portal and select Payments. Go to Payment Credits. And from Operations section choose Create payment credits.
Manually input the following details: Guest ID, Reservation ID, Expiration Date, Amount, and City. Additionally, include a comment specifying the individual or department requesting the creation of the voucher. Once all fields are filled in, proceed to generate the voucher.
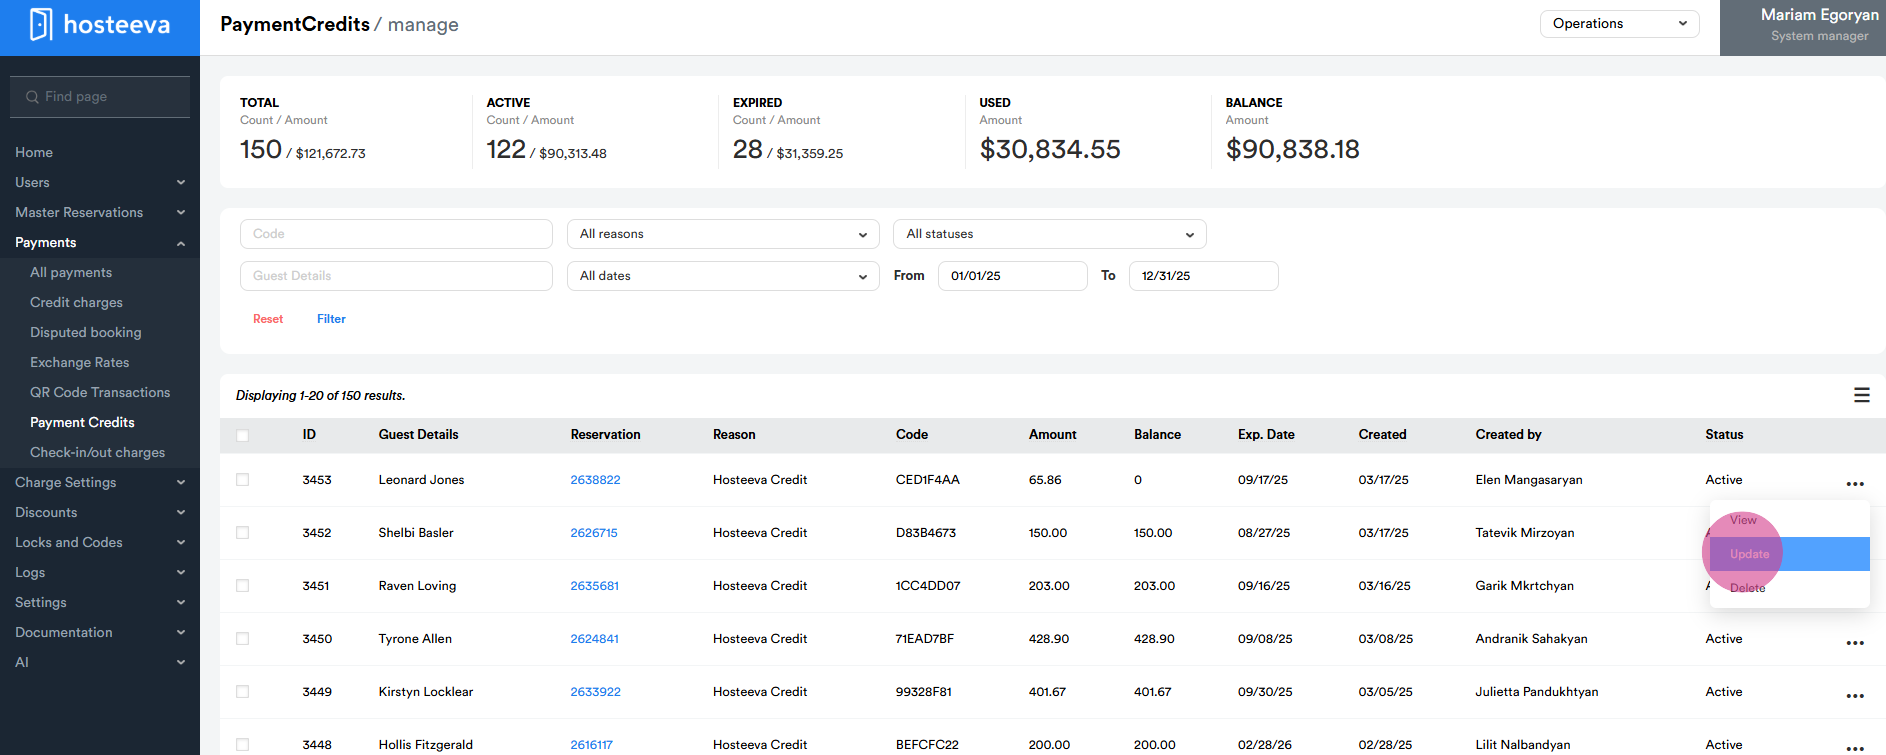
Step 5: Use the search bar to find a specific Hosteeva voucher. You can also see all the credits here. View the guest details, reservation id, amount of an existing voucher, balance, expiration date, and who created it.
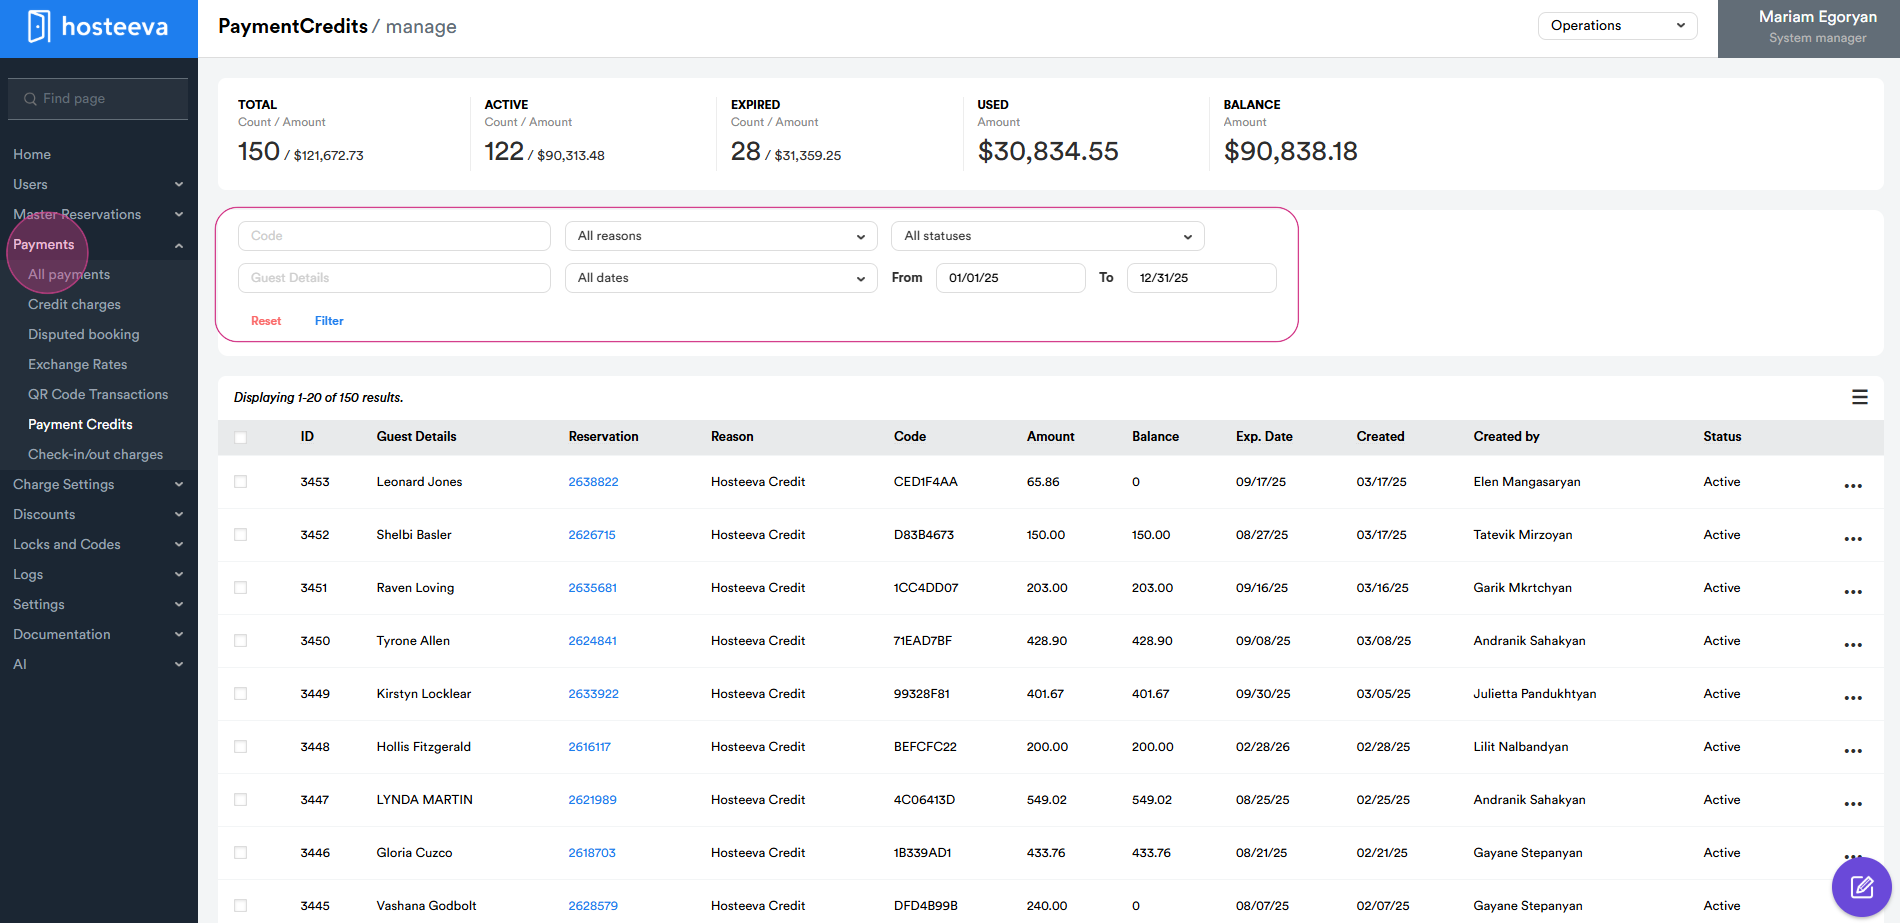
Step 6: Click on the three dots to update a voucher.
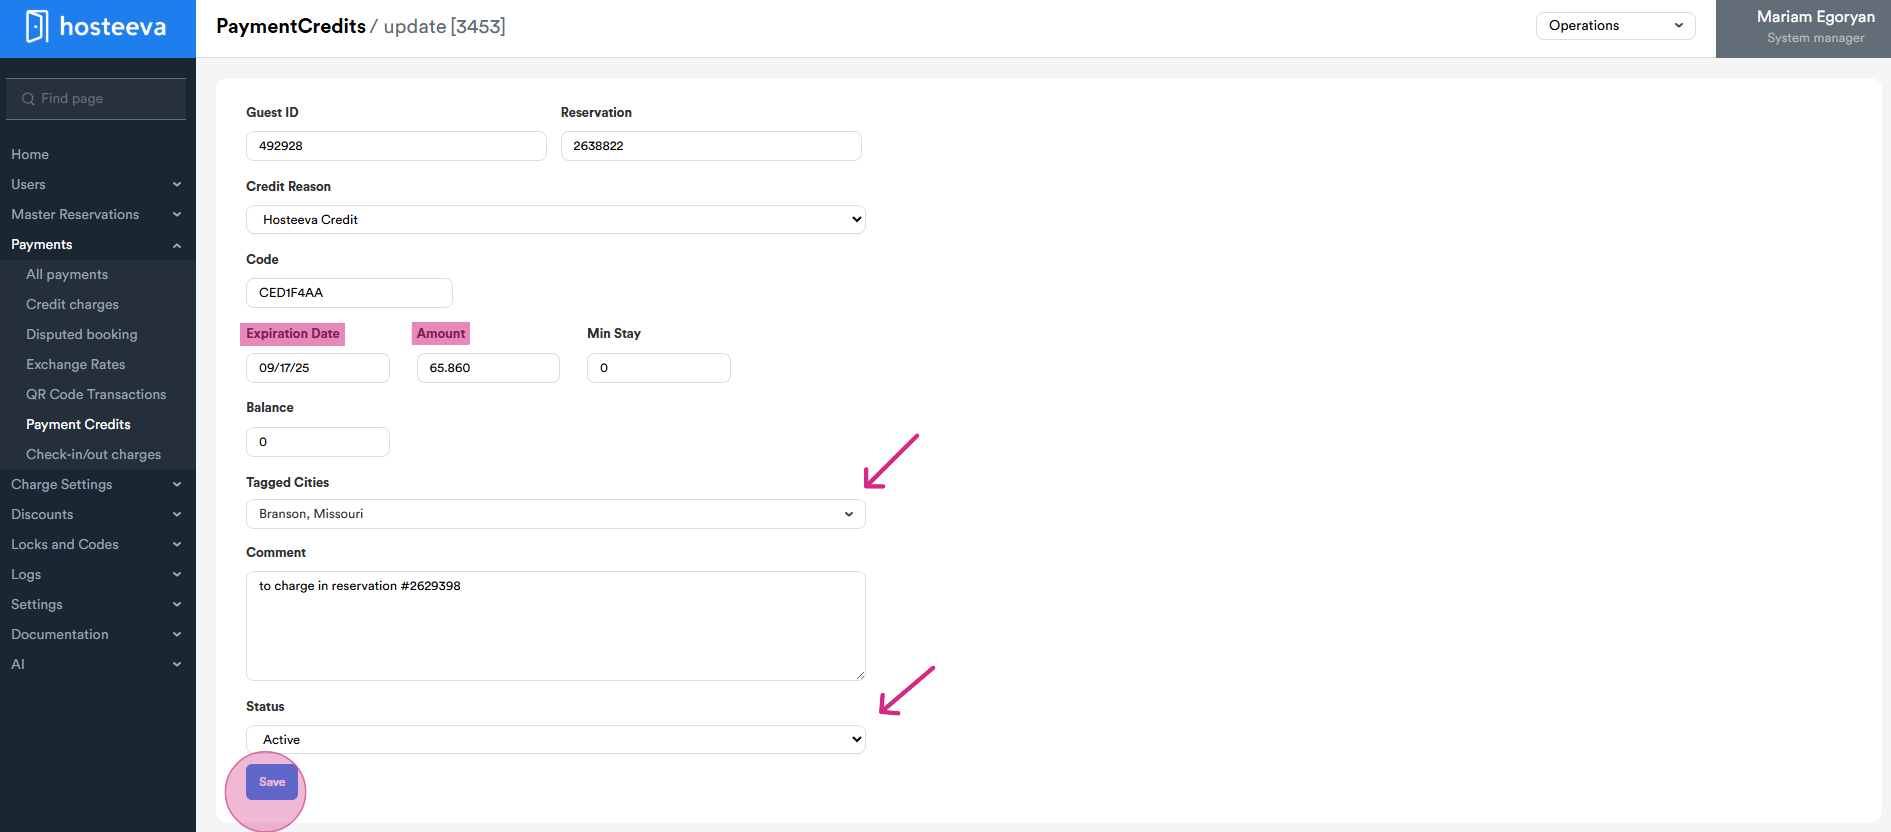
Step 7: You can update all information regarding the voucher. If you need to disable or make it expired, simply update expiration dates.
Thank you for your attention.