Customizing Your Report View
To tailor the information displayed in your report, the Hosteeva Dashboard allows you to add, remove, or rearrange the columns according to your needs.
How to Customize Columns:
-
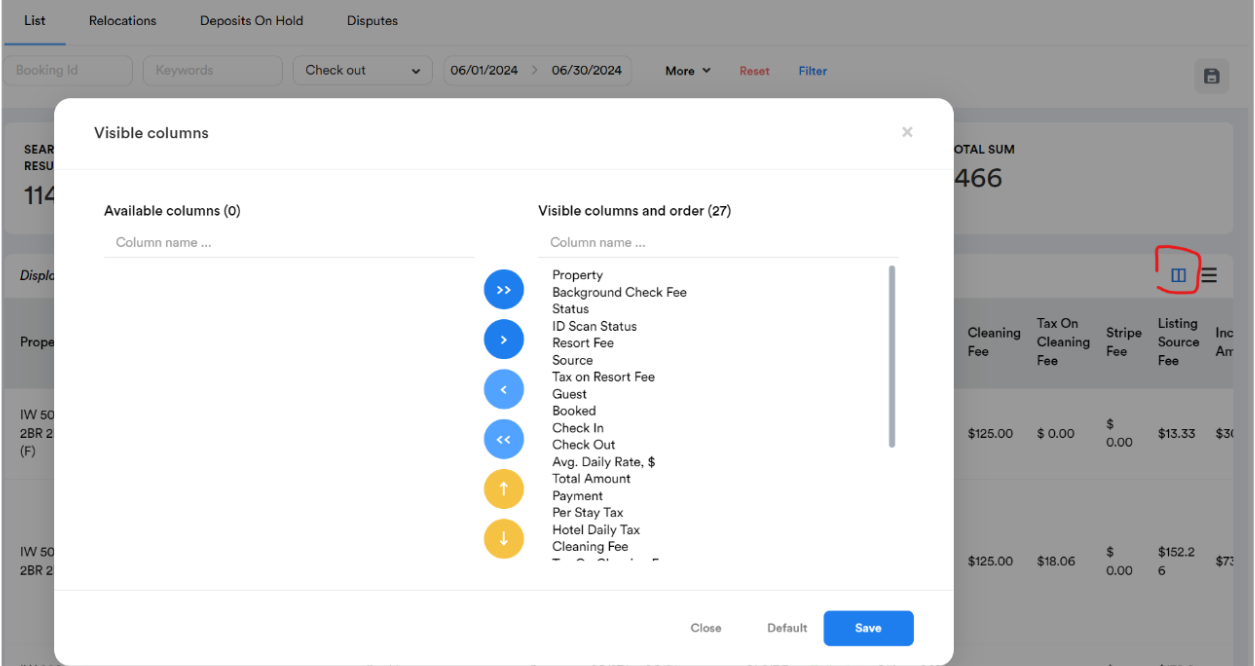
Click the Window Icon: On the right side of the report, you’ll see a small window icon (highlighted in the screenshot). Clicking this icon opens the "Visible Columns" men
-
Add/Remove Columns: In the "Visible Columns" menu, you’ll see a list of all available columns. You can move columns from the available list to the visible list to add them to your report or move them out to remove them.
-
Rearrange Columns: You can also rearrange the order of the columns by clicking yellow up/down arrows.
-
Save Your Settings: Once you have customized the columns to your preference, click the "Save" button to apply the changes. The report will then refresh with your new column settings.
This feature gives you the flexibility to view only the data that is relevant to your current analysis, making the dashboard more personalized and efficient for your property management tasks.
Customizing Your Report with Filters
To fine-tune the data displayed in your report, Hosteeva offers a powerful filtering option via the “More” dropdown menu.
How to Filter Your Report:
-
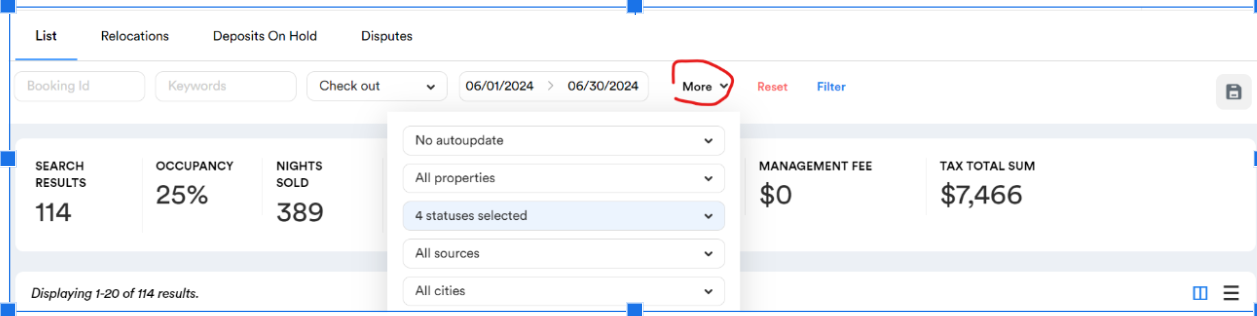
Click the "More" Dropdown: Located next to the date range selector, the "More" dropdown allows you to access additional filter options.
-
Select Your Filters: You can filter the report by various criteria such as property, status, source, city, and many more. This helps you focus on the most relevant data for your analysis.
-
Apply Your Filters: After making your selections, always click the blue “Filter” button to apply the filters to your report. This ensures that only the data matching your criteria is displayed.
Using these filters allows you to streamline your report, making it easier to analyze specific aspects of your property performance without being overwhelmed by unnecessary information. This feature is especially useful when managing multiple properties or dealing with large amounts of data.
Saving Your Filtered Report Future Use
To streamline your workflow and save time when running the same report multiple times, the Hosteeva software allows you to save your customized report filters.
How to Save Your Filters:
-
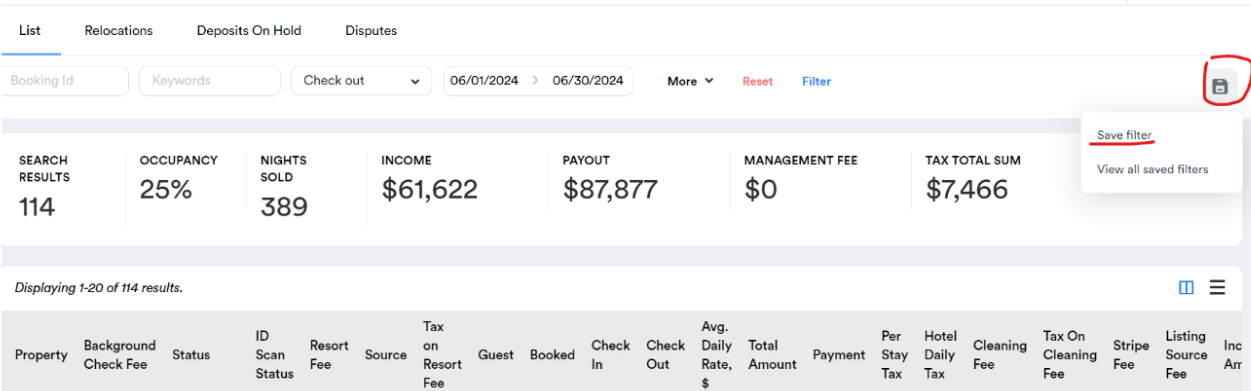
Click the Floppy Disc Icon: Located at the top right of the dashboard, this icon lets you save your current filter settings.
-
Save Your Filters: After clicking the icon, choose the "Save Filter" option from the menu. This will save all the filter selections you’ve made, so you don’t have to reconfigure them the next time you run the report.
-
View Saved Filters: You can access your saved filters anytime by selecting "View all saved filters" from the same menu. This makes it easy to switch between different saved reports quickly.
This feature is particularly useful if you frequently analyze data using the same parameters. By saving your filters, you ensure consistency in your reports and reduce the time spent setting up each report.