This article will guide you through the process of creating a Rate Plan on Booking.com and apply it for longer stays.
Rate plans are primarily used to apply monthly discounts, especially when discounts for stays longer than seven days are required.
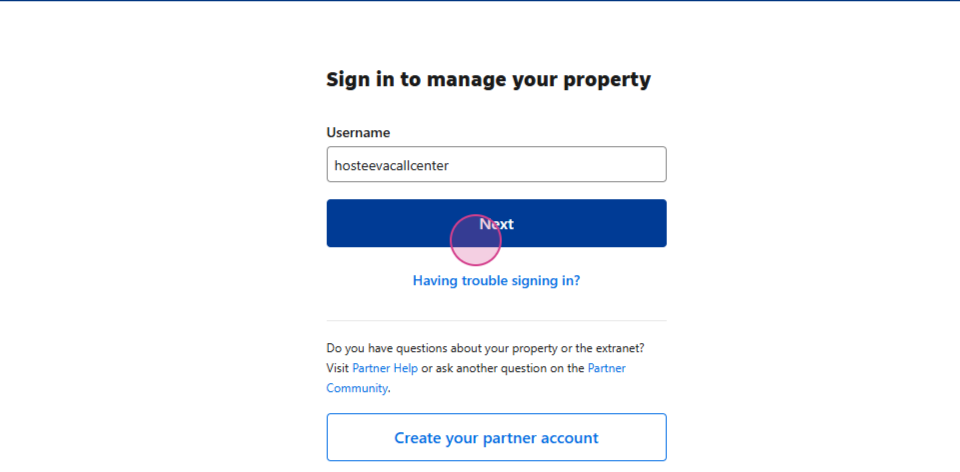
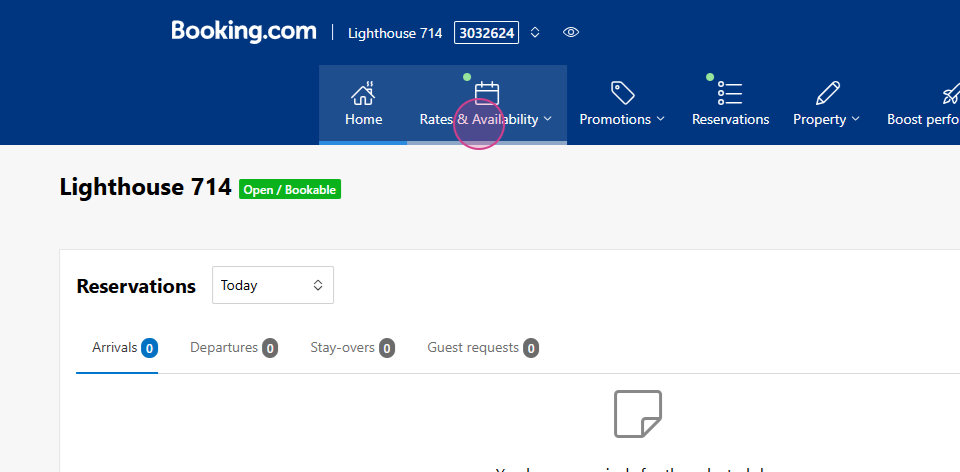
Step 1: Start by logging into Booking.com.
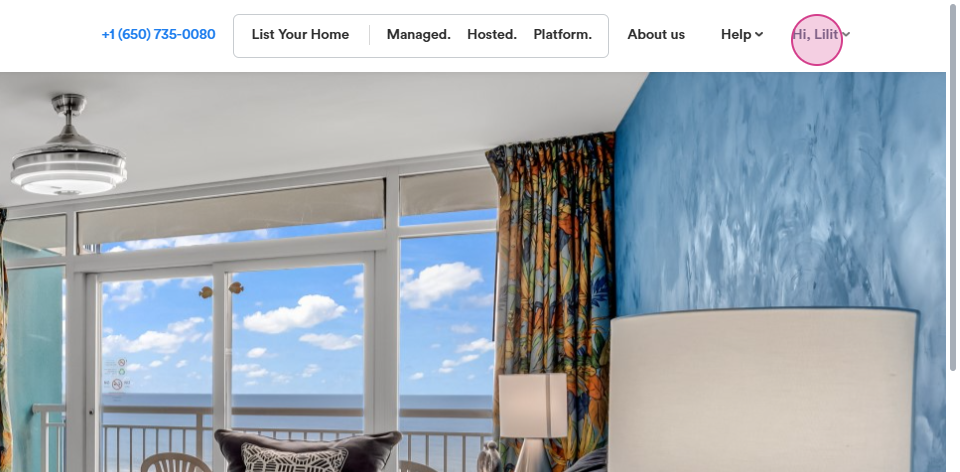
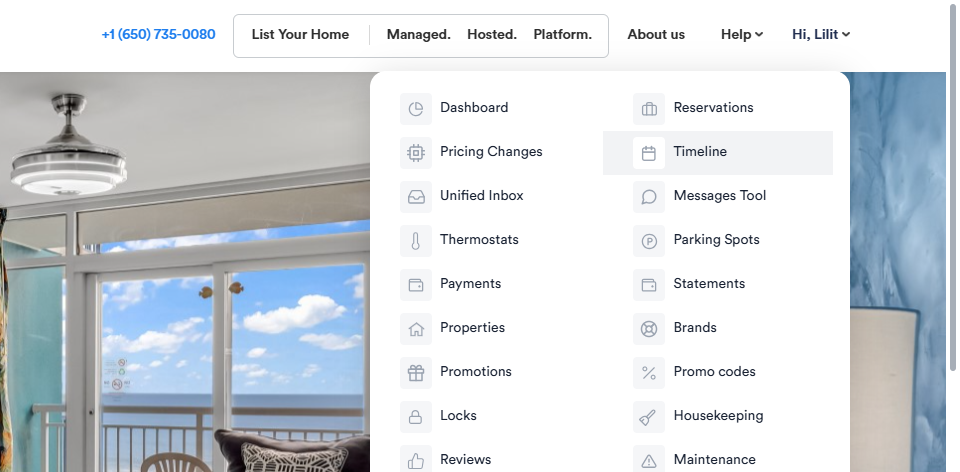
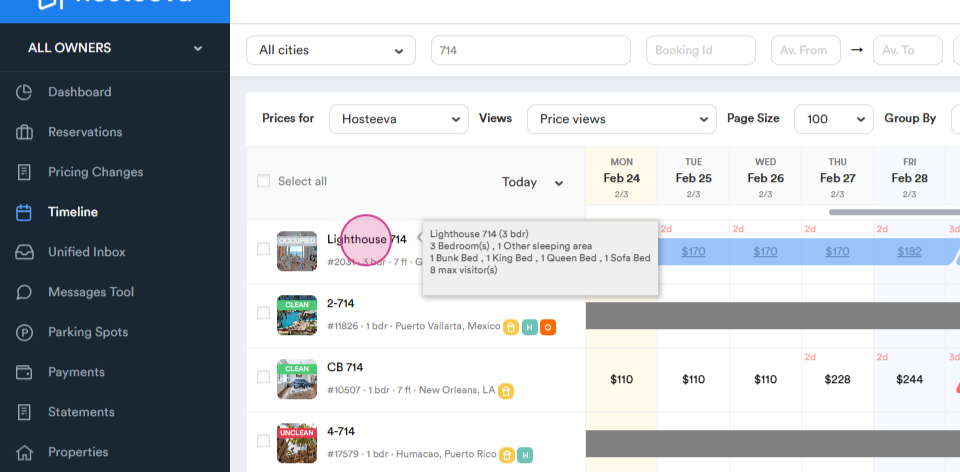
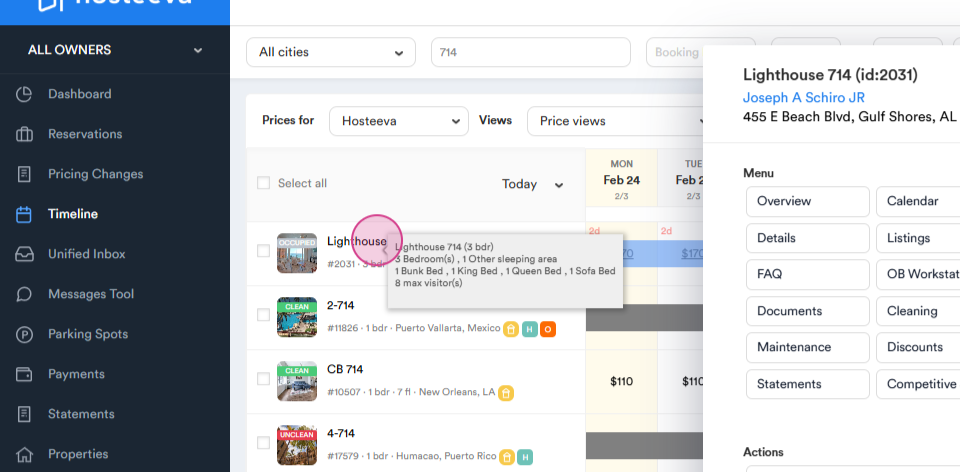
Step 2: Navigate to Hosteeva.com and go to the Timeline.
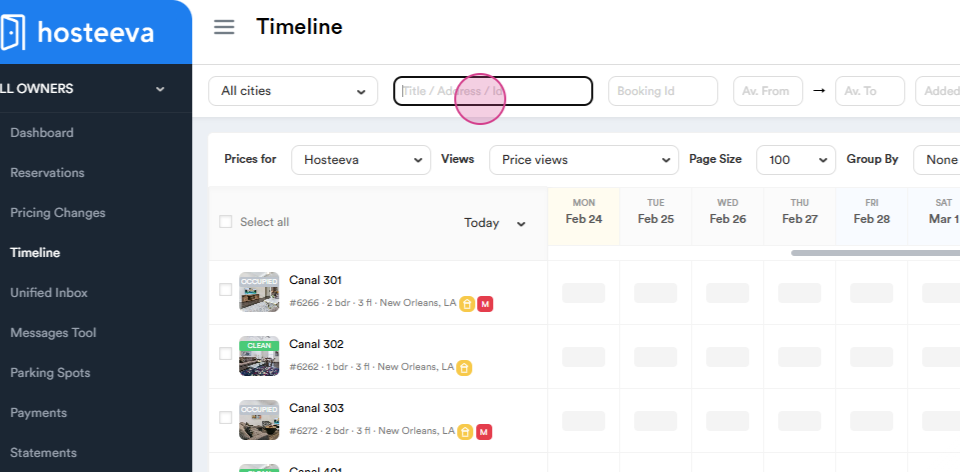
Step 3: Enter the required Unit Name or ID.
Step 4: Left-click on the unit.
Step 5: Click on Update and scroll down to the channel's mapping section.

Copy the Hotel ID from Booking.com.

Step 6: Search for the group homepage.

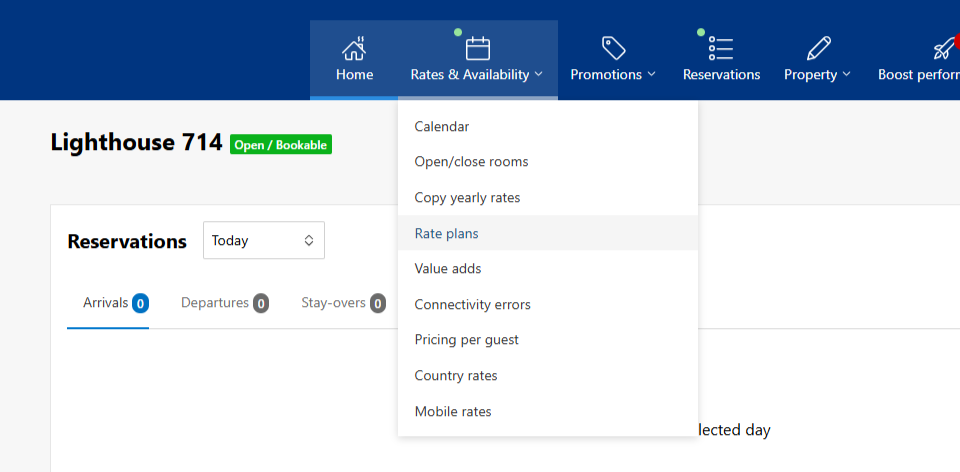
Step 7: Navigate to Rates and Availability.
Click on Rate Plans.
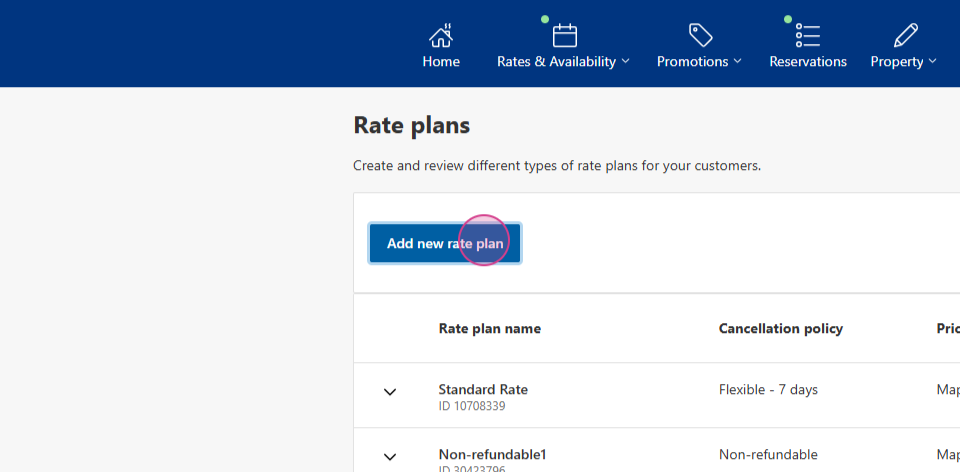
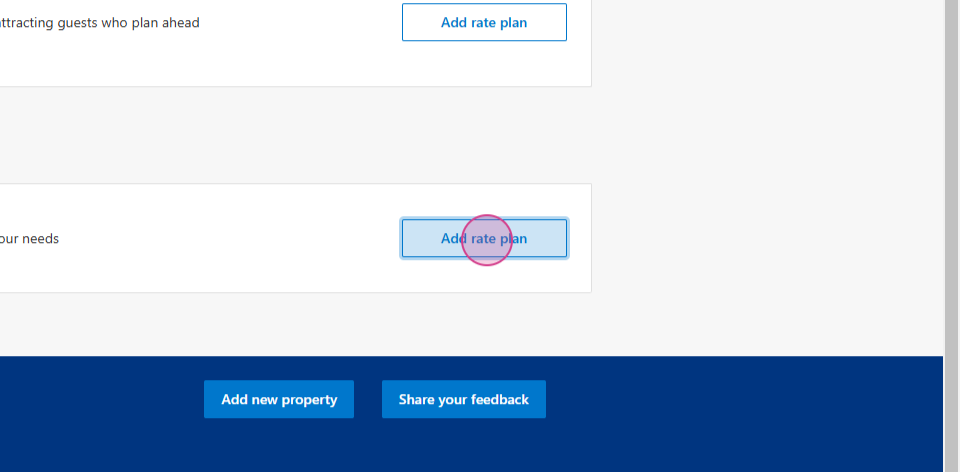
Step 8: Click to Add a new rate plan.
Scroll down to the custom plan and click on Add rate plan.
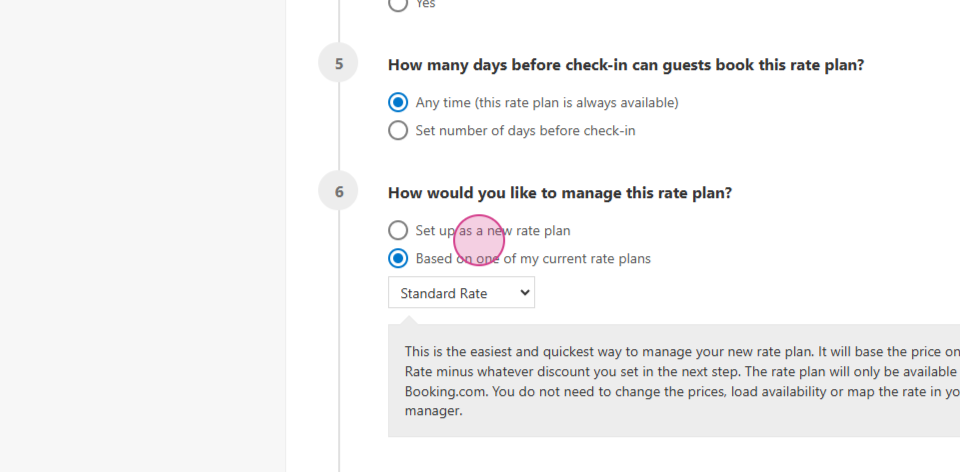
Step 9: Modify the sixth step by selecting Set as a new rate plan.
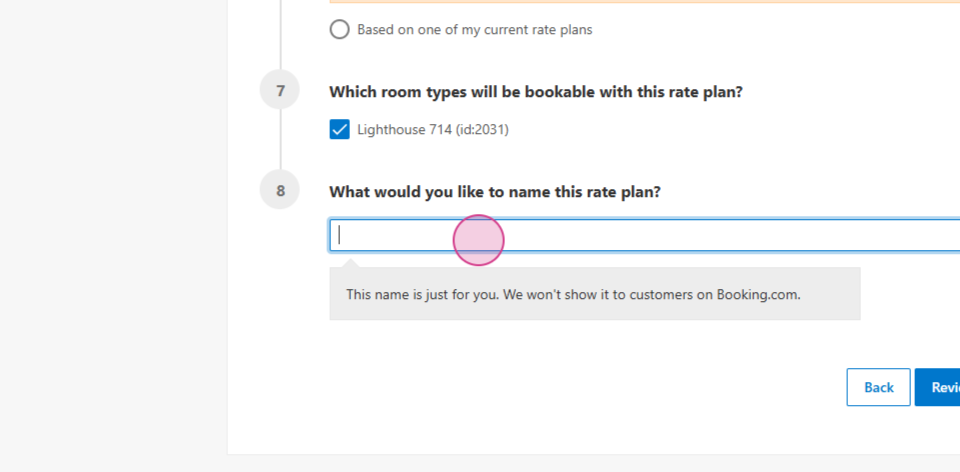
In the eighth step, enter the Rate plan name.
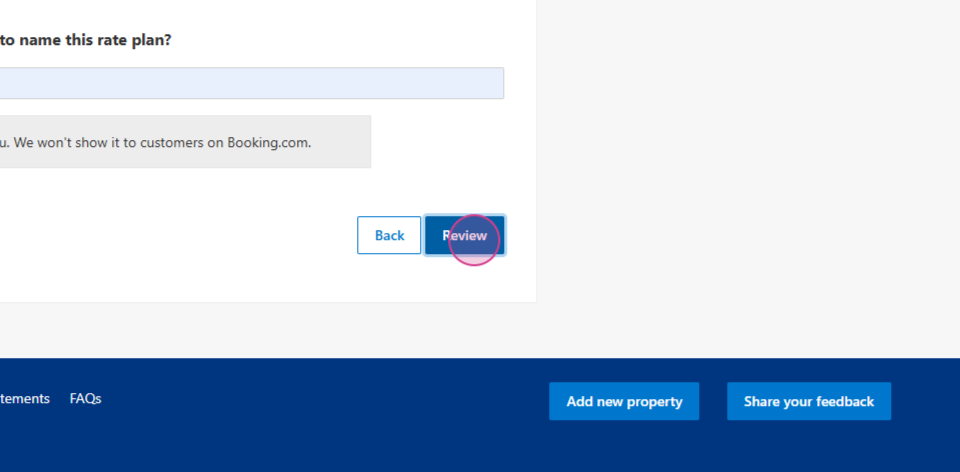
Step 10: Click to Review, then activate the rate plan.
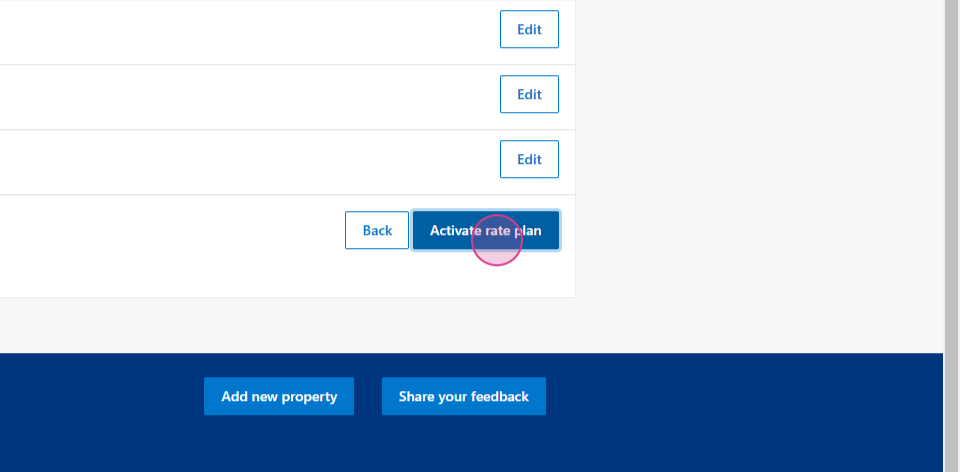
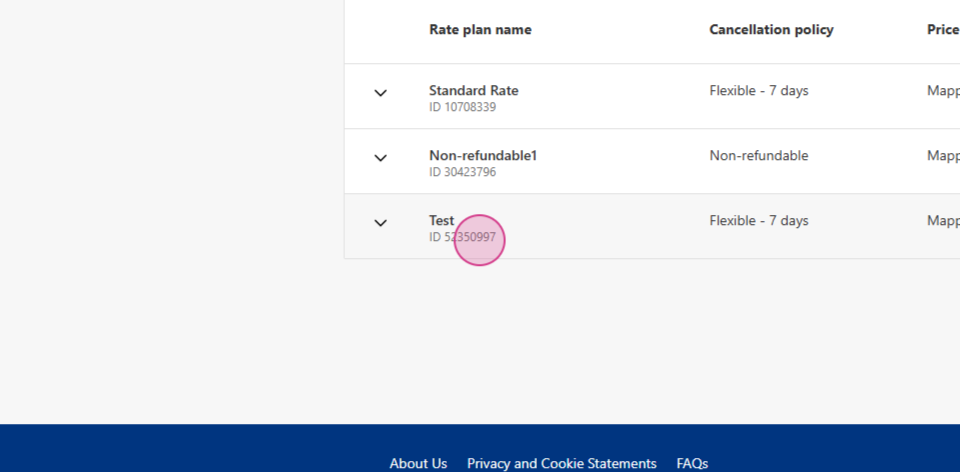
Copy the Rate Plan ID.
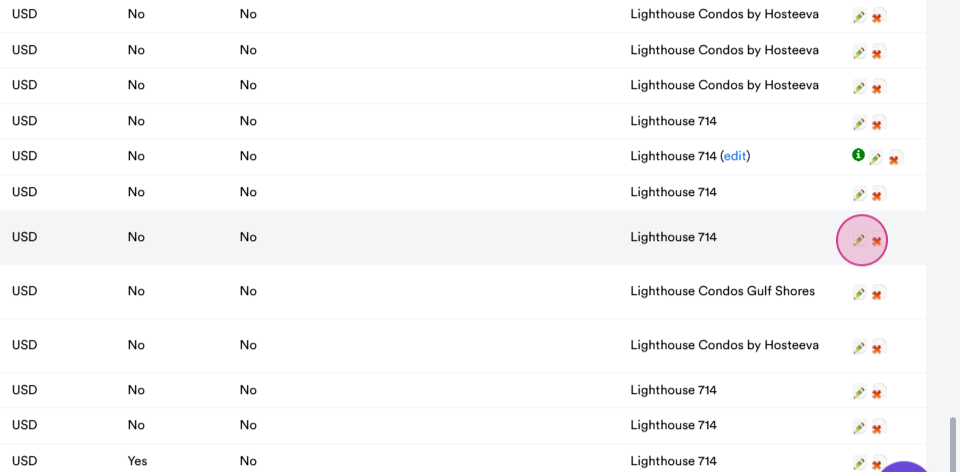
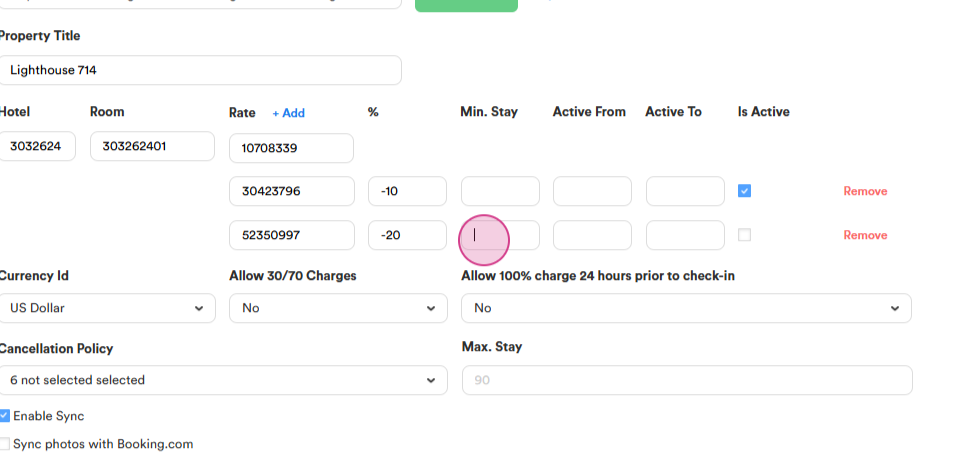
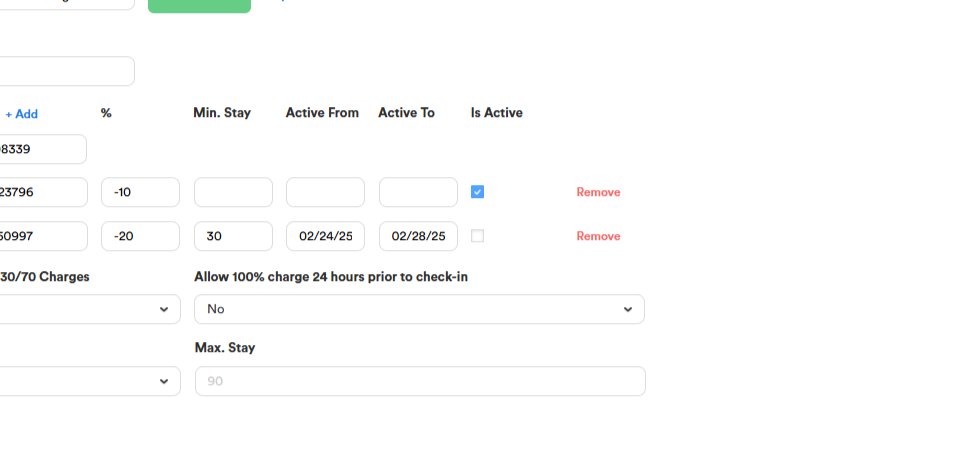
Step 11: Return to Hosteeva.com to continue the setup. In the channel mapping section, click on the Pencil icon.
Step 12: Click on the Add button next to rate.
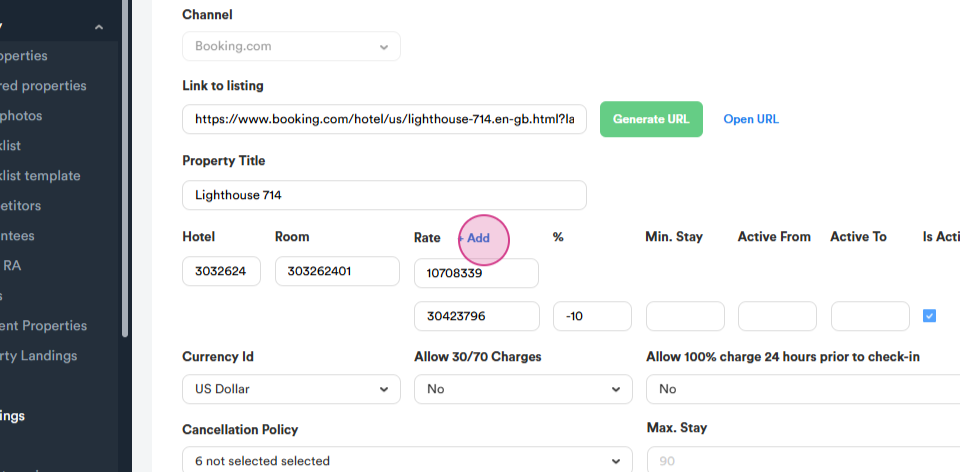
Step 13: Paste the copied Rate Plan ID.
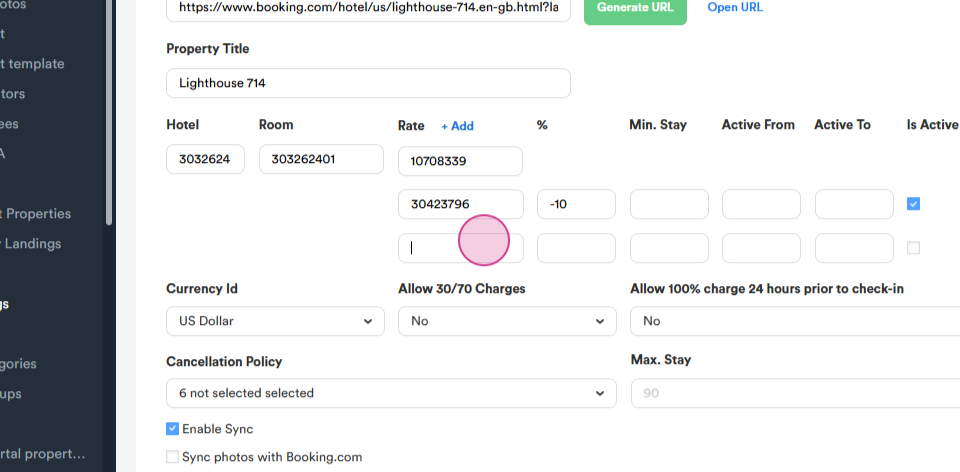
Step 14: Specify the percentage discount by adding a Minus before the number.
In the minimum stay field, enter the required number of nights, the days I have set are just an example, but if we need to apply a monthly discount, we usually set it for 28 days.
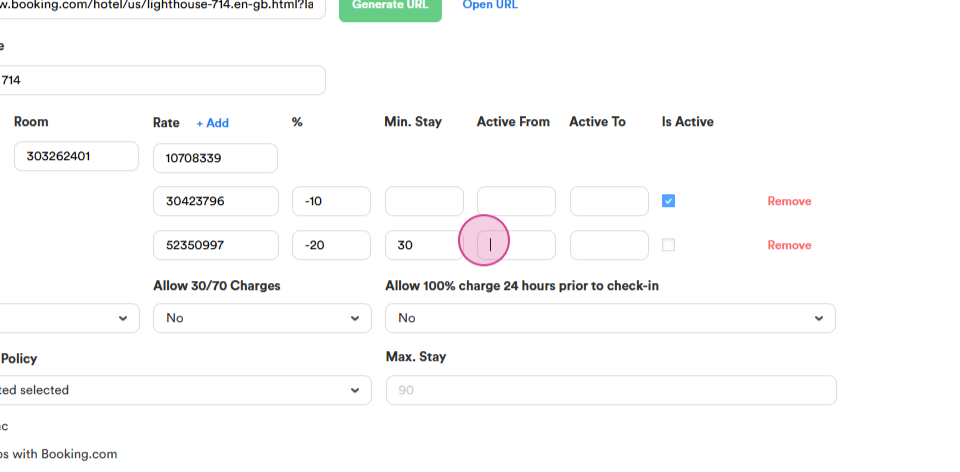
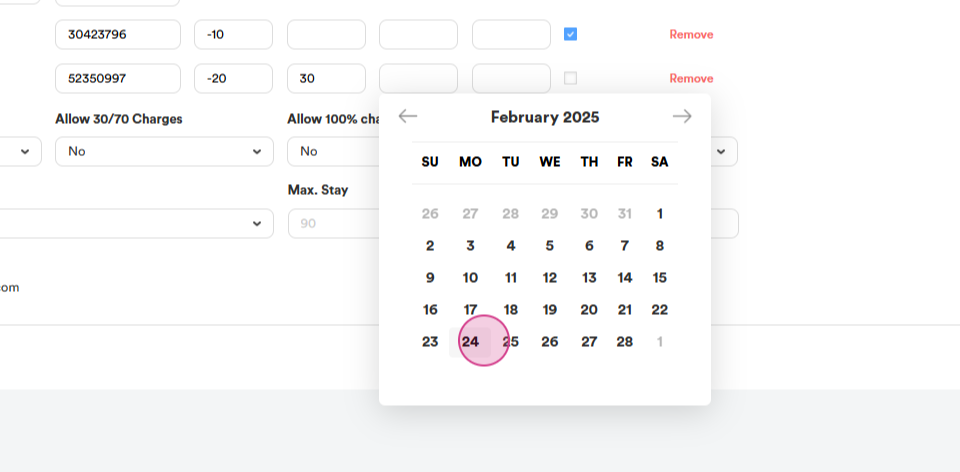
If the discount is for Specific days only, select them.
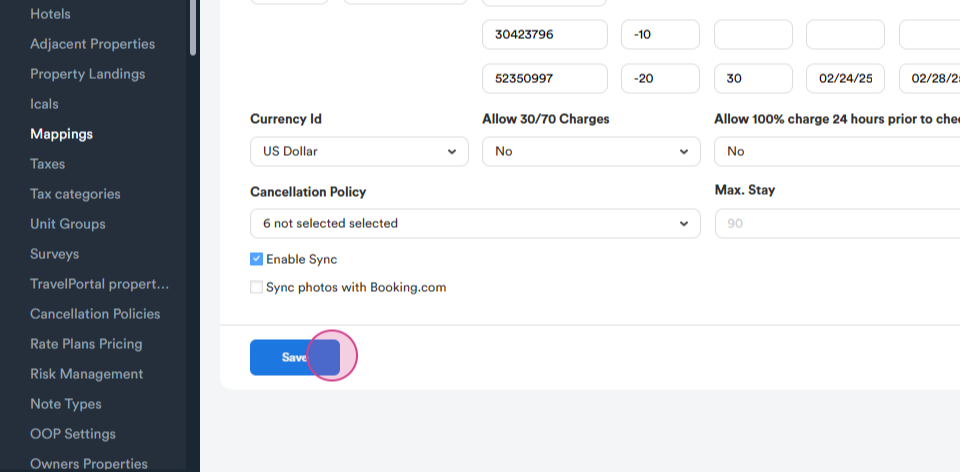
Step 15: Click the Checkmark and save your changes.
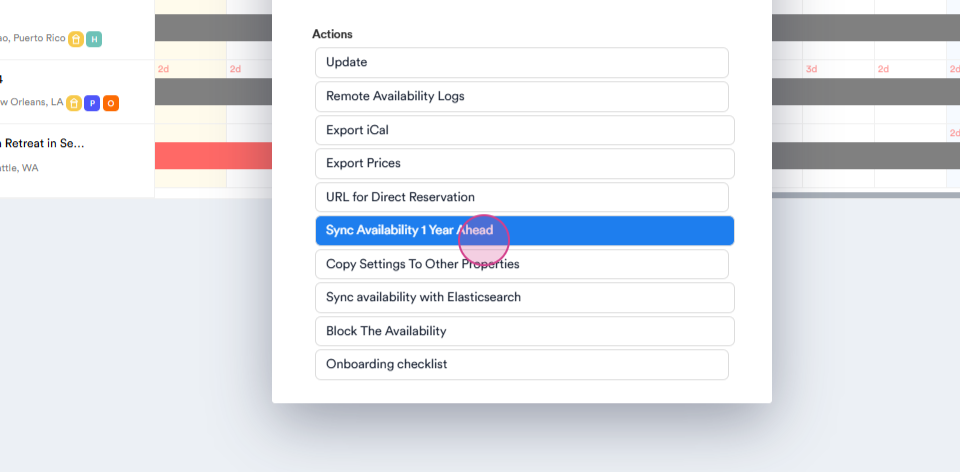
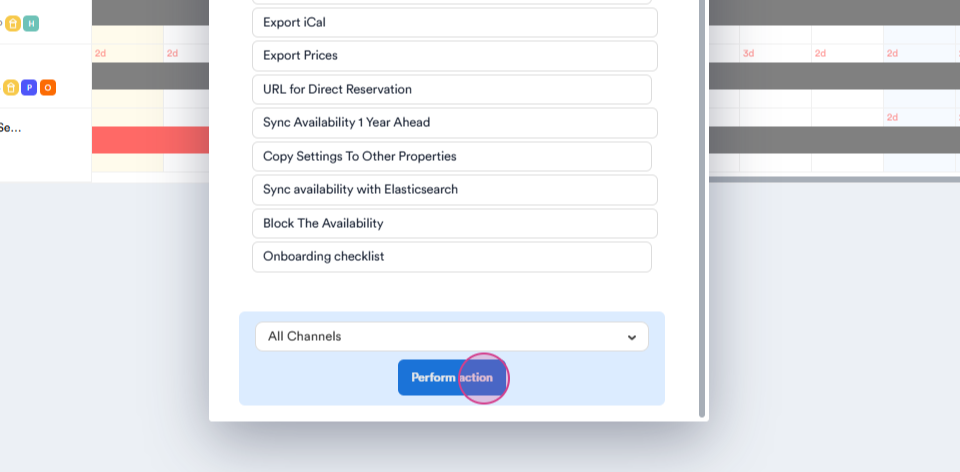
Step 16: To ensure everything is working correctly, return to the Timeline. Left-click again and click on Sync Availability 1 Year Ahead, then Perform action.
By following these steps, you'll successfully set up and activate a Rate Plan on Booking.com.